hanabluebird
-
Posts
41 -
Joined
-
Last visited
Content Type
Profiles
Forums
Events
Reborn Development Blog
Rejuvenation Development Blog
Desolation Dev Blog
Everything posted by hanabluebird
-
Praise The Sun... and Moon - Pokemon Sun and Pokemon Moon
hanabluebird replied to Godot's topic in Pokémon Fan Club
I'm a confused with the entire lack of 6.5 gen, but perhaps it will be released in a few short months, and Sun and Moon end of the year, who knows. All that I am certain of is that I want to finally get a ghost type eeveelution. I'm going to keep the rest of my hopes about everything else of this new game low just in case, including my hope for trainer customization, but I will dream for the ghost type eevee. -
Praise The Sun... and Moon - Pokemon Sun and Pokemon Moon
hanabluebird replied to Godot's topic in Pokémon Fan Club
Personally, I think that would make them overpowered as they would have very limited weaknesses, even with weaker stats they would have a big advantage. What I myself want is a water/fire/grass ghost type, fairy type, and dragon type. -
Praise The Sun... and Moon - Pokemon Sun and Pokemon Moon
hanabluebird replied to Godot's topic in Pokémon Fan Club
I remember reading that the developers for Pokemon were going back to the simple pokemon designs for any new pokemon, designs such as Gengar. But what I want and dream of for any new gen is the choice to be good or evil, be dictator and rule as king/queen. I doubt that will ever happen outside of fangames, but I can still dream. -
Undertale Players, Solve this Dispute!
hanabluebird replied to Despair Syndrome's topic in Gaming General
Cinnamon and crosswords here. As much as I love butterscotch, cinnamon takes a lead, I've named a pokemon that even. -
Pokemon Location Guide (Rejuvenation) [V11 Updated]
hanabluebird replied to Jan's topic in Rejuvenation
My original laptop completely died so I had to restart Rejuvenation. Can you please PM me of Froakie as well if it's alright with you? I always pick between Froakie and Mudkip and if I can get Froakie, I don't have to miss out with Mudkip. -
Finally fully registered for my college classes this fall as a student!!
-
This is makes me so excited and happy to know that I can get married in my state or even the state I was born in finally! I've always DREAMED of having a big, pretty wedding but for a long time, was really forced to not hope for it by people I know and even the more messed up sides of my family(certain cousins and relatives wont be going to MY wedding for sure) that I won't ever do that unless I 'stop being gay' and marry a guy. But wow, this makes me happy and hell yes I'm going to watch more bridal shows and look at wedding dresses. Allllll the pretty weddinnggggg and all the happy couples that can marry their loved one and legally be recognized as such.
-
Why am I not asleep at 3 am again??
-
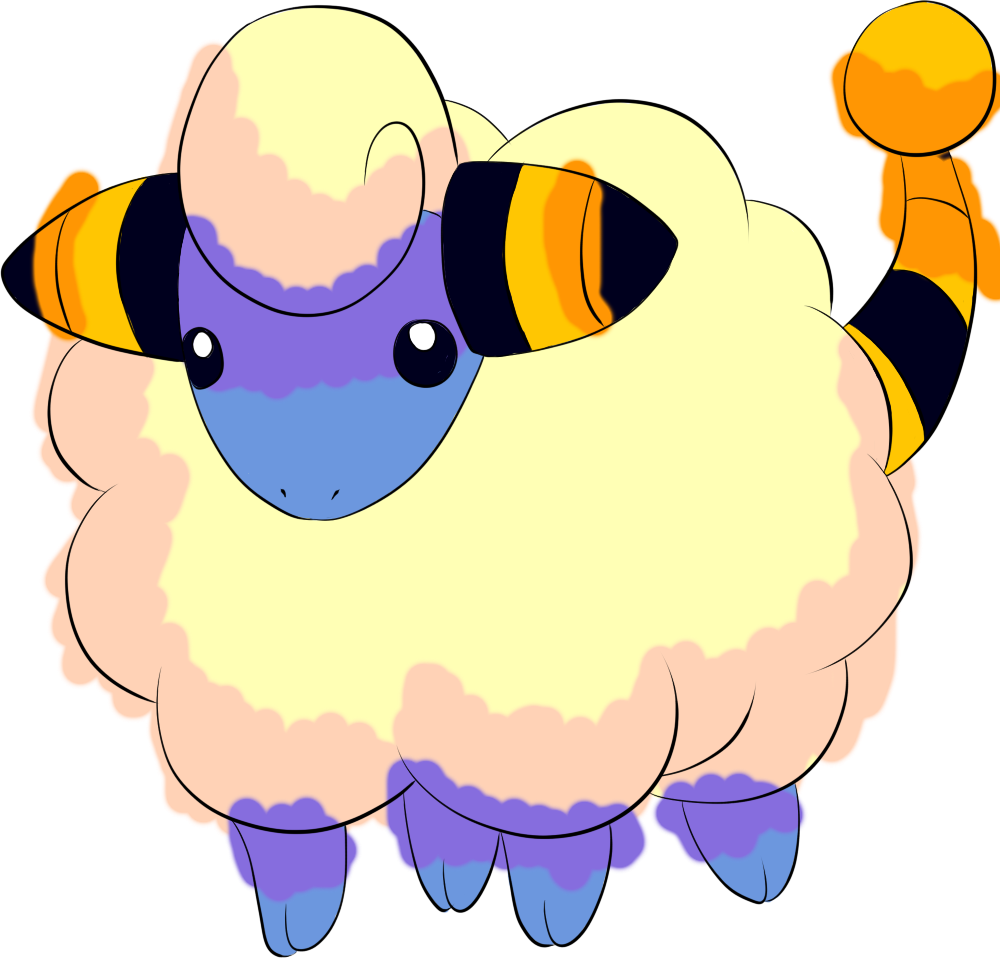
Step-By-Step Coloring&Painting of Mareep
hanabluebird replied to hanabluebird's topic in General Discussion
Okay so now for part two! Painting style minus some steps because I didn't want to make this a 30 step part, I'll make a video for the next pokemon I color to show this better and didn't want to also show repeating steps too many times. Step 1: Go on the lineart layer and change the line colors to a darker version of the shading like this. Step 2: Now on that same layer, start adding the same color of a dark shading where you want it darkest. Step 3: Blend those added spots(Yes, the lineartt layer) and blend the lines around everything so in this case the puffs, blend it nice as it'll add to making it look less quite so cartoony with lines to a more painted look. Step 4: Repeat for the skin section of the lineart. Step 5: Repeat. Step 6: Repeat for horns and tail(Honestly I only added these steps because I got in the habit for this saving a new png after parts so . .. yeah it wasn't needed to show it but wasn't gonna skip on this wasted time pfft) Step 7: Alright now MORE darker shading that will make it look even puffer and such. I used a pink gold for this and on multiply, under the layers of the light spray brush so it doesn't cover it up. Step 8: Blend in large circles to give a over all color and hue. Step 9: This one is a bit odder for the skin because I decided to TRY and make mareeps face look a bit like a sheep, make it have a hint of the nose shape and under under the eyes that makes sheep and goats look cute but also a bit weird. I just wanted to try, the lines for the snout are easy to skip, I put a version at the end of this without the nose and my regular shading for the face. Step 10: Blend it in, baby! Step 11: Those horns and tail have a nice shine so make sure to add it in! Step 12: Blend as usual. Step 13: So eyes were done, it would take another five steps to show it so I skipped ahead, added pink to the nose and started the ball on the tail! Step 14: Blend the colors on the ball, alter as needed until pleased. Step 15: DONE! There is pink to this background just because I was cleaning up the lights and some wild shading I had done. There was light added to the ball in two layer types, overlay and luminosity to make it bright and gleam. Some more light was added to the wool puffs as well. The shadows for the head and the tail were darkened and body shadow under the feet was added. Alternative Face: Tadaaaaa this is finished just different face as promised. -
Congratulations! Your Egg hatched into a new member!
hanabluebird replied to Nanami's-Egg's topic in Welcome Center
Welcome! It's always amazing meeting new members and people :'D I hope you enjoy it here! -
A shiny, new, slightly gimmicky, type of run.
hanabluebird replied to Marcello's topic in Team Showcase
It went from a cotton candy pink to a blue I could describe is blue raspberry candy color. It's still cute, but I'm super fond of the cotton candy pink Mareep and Ampharos more then blue for the three. I've noticed a lot more of the shinies have been getting recolorings more and more to really amazing and creative ones like Rapidash has a rainbow color now for the flames so I'm hopeful mareep and etc get something that amazing and cute! -
Step-By-Step Coloring&Painting of Mareep
hanabluebird replied to hanabluebird's topic in General Discussion
You are a wonderful person and wonderful friend, thank you so much. Now if I wasn't nearly done with Mareep, I'd record painting her but I'll just have to do a new pokemon for her(or if there are any reborn character linearts I can try that!) -
A shiny, new, slightly gimmicky, type of run.
hanabluebird replied to Marcello's topic in Team Showcase
Gotta say, I love that shiny for cute lil' Peach. insertdisappointmentmareepisntpinkanymorewhenshiny You're doing way amazing at this run! -
Step-By-Step Coloring&Painting of Mareep
hanabluebird replied to hanabluebird's topic in General Discussion
Thats actually a really good idea, though I don't know what program to use to record and stuff. But I like that idea! Yeah, it takes a few hours xD -
Started playing Reborn from Pokecommunity at Episode 7, joined Reborn site here at Episode 15
-
After fighting him and realizing that either way, he was going to most likely die, I noped out of there because i don't want him to die with me involved.
-
Perhaps it's set for future events where those pokemon will become event in a later version/update?
-
My hand is cramped from my tablet pen, send help and mareep
-
Step-By-Step Coloring&Painting of Mareep
hanabluebird replied to hanabluebird's topic in General Discussion
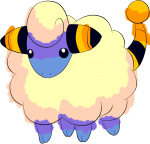
There is still quite a bit to do but this is a progress shot, got a lot of shading and lighting and some texture to do left and the eyes completely and gem but wool is almost done! -
Step-By-Step Coloring&Painting of Mareep
hanabluebird replied to hanabluebird's topic in General Discussion
Thank you so much! :3 I'll have the painting part done soon, hopefully tonight and can put it up as well. -
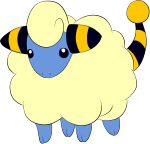
I decided that since I got lazy and didn't want to do a stream of this, I would make a thread of the step by step for how I color and paint since a few people said they would be interested in that. So I picked my favorite pokemon for this, Mareep! This first part is just the coloring as I did this part yesterday and it's 10 steps. Program used is PaintSai and my Huion tablet that will be replaced soon as it has no pen pressure so all this is without any pen pressure. Can't wait for my wacom to come in. My usual method is very random parts at a time but I wanted to make it more organized for this. Also, I started with attaching the files but well, there is a limit and I forgot about that so only the first two are attached files, the rest I uploaded to a side tumblr account and just added via URL image attach. But the image when finished will have a transparent background(Unless I change it who knows). And if this isn't in the correct subforum, please let me know! The lineart is by lilly-gerbil on Deviantart, click the link to see directly! Step 1: Base color added in and where I want it. The lineart is on mulitply on a layer above. Step 2: Second tone for the base coloring in a new layer on normal same as the base, though messy, I do clean up later. Step 3: First bit of blending! Step 4: Now here is the first bit of shading, another layer on multiply. For the shading, I picked where I wanted the light source which I picked the upper right of the image for it to come in from so the shading would be on the lower and left part of wool puffs and under the hair poof. Step 5: More blending, shaping the wool puffs more with it. Step 6: That wool looks a little flat and needs some light on patches. With the spray brush, used pink, it's on a new layer as well, right now on normal to show where I put it. Step 7: Layer changed to overlay, no blending. Step 8: Oops, forgot to put the head shadow along with the tail, time to add that in. New layer, multiply. I seriously use a lot of layers. Step 9: Blend the edges and where I want it lighter and more spread out, added some more at the head shadow, and lowered the opacity to 42%. Step 10: Clean up! Some small bits are still messy and small patches look odd, but that's okay as this is just the coloring, the painting will take care of that and fix it up. Thats that for the main coloring, now the hard and time consuming part of making this even better and more like a painting style!
-
My personal favorite is Froakie! But if I could, I'd scream Mareep.
-
Pokemon Apotheosis Discussion, Ideas, You name it!
hanabluebird replied to Guzam's topic in Resources and Tutorials
Ohhhhh, I really like the sound of this! I know some basic design if you would like a banner or something, I can help with that! I'm curious as to the characters appearances, blonde for the male and black hair for the girl(I shall always dream and wait for a pokemon game with a ginger haired girl like me pfft) it is to kinda flip the main two protags of Reborn with black for male and blonde for the female? -
Birthday girl today!
-
Welcome to my introduction! Names Chippy!
hanabluebird replied to hanabluebird's topic in Welcome Center
Trust me, I'm a night owl person so I'm up at all hours of the night. One of my closest friends is in China and we talk most of the time he is awake.