Leaderboard

Popular Content
Showing content with the highest reputation since 09/01/26 in all areas
-
This will probably be the last site news post I make. ... Scary, isn't it?! But don't worry, I'm just being dramatic. The statement is true because probably, at some future point, I'm going to retire this news section. The posts are infrequent, game announcements are better served elsewhere, urgent things have better notification systems... This is a vestige. Time to let this go. But the forums? The site? Nah, they not goin' anywhere. Information is hard to come by right now. Platforms are enshittifying left and right. Search Engines are worse because the internet is worse, genAI is inflating everything like a circus balloon, and there are one million ads on every site. Hell, even we've had ads! And you know what, I'm sick of it. The income has been helpful-- even necessary. But by jove, at least one site on this godforsaken internet will be ad-free. I've just yeeted them from the site. Fuck 'em! I think a lot of people are tired of the current state of the internet. And I can't help most of that, but I can help here. Forums are a bit antiquated-- all the cool kids use Discord, right? Discord is great, but not eternal, and many exchanges there stay there and in our memories only. So that's my goal for the site now: Longevity of information and community. Maybe it's a bit lofty, but at least we can have one tiny island of peace amidst all the tumult of the modern internet. But it would be nice if it would load faster, wouldn't it? Believe me, I've been trying. I'll keep trying. I'm pretty sure it's better now?? Not perfect, or even always good... But at least better. It'll be work in progress. Other changes: Shuffled some forums around. New banner. Trying a post widget on the side. Whatever, you can see for yourselves. Actually, this was going to be a more major forum upgrade, but there was some bullshit, so that's not happening. Frankly, I have a lot to say about some of the stuff behind this extended maintenance. I've compiled a lot of stray thoughts into a free post on my patreon, A Postmortem of the Modern Internet. If you want to read in depth, you can there. It's half an essay. But if you, heartful reader, feel so inclined to help us keep this place afloat, it would be most certainly welcome, and helpful. The patreon above directly supports both my development and the (rising, grumble grumble) server/hosting costs. I've been running this forum for twenty years and I intend to run it for twenty more. Let's see what we can do to make it feel like home.8 points
-
Great to see that this Forum will stay; I personally prefer Forums to Discord, because here, Information can be gathered and immortalized for any, who will search the internet for solutions in the future2 points
-
It’s summer time and you know what that calls for? A well deserved holiday… I’m british, I’m not calling it a vacation. In today’s development blog we’ll be highlighting updates to Redcliff and Keneph Resort, a project that I was initially working on before I took on the mantle. Let’s get into it shall we? Redcliff Makeover With all development cycles for games like Desolation, updates to older parts of the game will happen, and Redcliff was one that needed a bit of a makeover. TL;DR Ruby was like “yeah I’m gonna update Redcliff” and I said “bet”. Redcliff being one of the first towns in the game, we wanted to spruce it up a bit, especially since this is where the research lab is located. It’s a town located in the midst of cliffs… given its name, and right by Keneph Jungle, so we wanted to give off a woodland-esque vibe with a sense of tranquillity, here’s how Redcliff will be looking in EP7! The starter room just got a little fancier Once Ruby is set on updating something, there’s no changing her mind, she’s already been doing some makeovers for other areas which you would have seen across previous development blogs, nothing is safe from her pen. --------------------------------------------------------------------------------------------------------------------------- Outside of Redcliff, we have been working on several new areas of the game, such as Keneph Resort! For this next section, I’ll be passing over to twoslashes to talk through his thought process for tackling the map design for the area. Take a break at the Resort Greetings, Deso fans! I’m twoslashes, I joined the Deso team back in February as a spriter and mapper. My main project for the past few months has been the mapping of Keneph Resort, which I recently finished. Further on I'll be talking about my mapping process - how I go from nothing to a full map with a custom tileset, but first, let’s start with some screenshots! Yeah, I definitely went a bit overboard with some of these. Overall, I’m happy with how they turned out though! I’m especially glad to be done with all the indoor maps, I was really struggling to come up with more indoor layouts by the end. Anyway, for those of you that are interested, I’ll describe my mapping process. I’ll mostly be using the antique shop (Keneph Antiques) as an example, but most of what I have to share is applicable to any kind of map, even outdoor ones. Firstly - the design. I was provided with a lot of design details for the various areas of the resort, so the general idea was already there and I just had to fill in the gaps. For the most part, the details were not rigid, so I could change them if I didn’t like them or couldn’t make them work, but I stuck to them for the most part. In the case of Keneph Antiques, there wasn’t anything unexpected for an antique shop - wood floor, display cabinets, shelves, a counter for paying. Notably though, it was supposed to have “unique treasures”, and given the nature of the shop, it made sense for them to relate to the history of Ayrith. Those paintings on the walls may or may not be references to historical areas within the game. Generally, I wanted to give it a bright and approachable atmosphere, packed with stuff to buy. Despite being a new building, I wanted it to have a bit of wear so it could stand out a bit from the other resort buildings. From my observations, I find that antique shops in real life tend to be cluttered, but organized for the most part. Keneph Antiques, however, is a complete disaster when it comes to organization. This is due to sprite size limitations. I found it challenging to display both of these qualities, so I focused more on the clutter since that is more unique to antique shops. Regardless of whether the tiles are custom-made or not, a map should take into account both level design and visuals. These two aspects aren’t completely independent from each other - you can have a nice looking layout, just as you can use visuals to guide a player around the map, but I think that level design is more foundational. Granted, level design is not as relevant in a small indoor map like this, but it’s still good to do the layout first at least, even when spriting tiles from scratch. It’s quick to do, and is a much greater step towards understanding how the final map will feel than, say, spriting a nice floor tile. My first drafts usually look something like this: Not an actual progress screenshot of Keneph Antiques, but it probably looked something like this at one point. Extremely simple, as you can see. It only takes about 20 minutes of experimenting, and it gives a good idea of how the map will feel to run around in even without any proper tiles. Next I’ll add some mostly undetailed blocks for some of the larger items in the map, and determine the general color scheme: Compared to the final version, the colors are less polished, and obviously it’s lacking in detail, but it’s very recognizable at this stage. Now, all that’s left is adding all the additional assets and details, which is by far the most time-consuming part of the process. I’m not going to give a full guide on how I made all of the details, but I can give some insight into my workflow and some general advice. One workflow trick I use frequently is to screenshot the map from RMXP and open it up in my pixel art editor (I use Aseprite for anything tileset-related, but this should work with most programs). The screenshot will likely be at a higher resolution, so I scale it down such that the pixel sizes line up properly. Then you can create the asset directly on top of the map, which immediately gives you full context as to how it’ll look in game without having to add it to the tileset. If you do the layout first, then you can do this for all your assets, which will save a lot of time throughout the process. I almost always start with the silhouette when making assets. I can take a blob and throw it on top of the map and get a pretty good idea of how it’ll look when it’s actually detailed, which I find more difficult to do with an outline. I also prefer to work in grayscale and color the asset as one of the final steps, mostly because I find the process more straightforward when I can focus solely on one thing at a time. Colors can be swapped cleanly and easily in pixel art, so I don’t find any downside to this workflow. Anyway, the silhouette shouldn’t take long. It just needs to vaguely resemble the object’s shape. For large objects with more organic shapes (e.g. the Milotic statue in the reception, as well as the leaves around it), adjusting single pixels trying to make it look perfect is taking it too far for this stage, because it’s likely that further adjustments will be needed once more detail is present. Next, I’ll add shading and highlights, still in grayscale. With indoor maps, the light typically comes from straight above, but sometimes I like to put shadows on the side to show the form of the object better (ideally on the side closer to the wall, but for objects used repeatedly it doesn’t matter too much). With small objects, I don’t bother with any cast shadows, since they interfere too much with the form. For larger objects, I start pretty rough, then I refine the shape of the silhouette and the shadows at the same time. Some antique shop assets, still in grayscale Finally, it’s time to add color. Working in grayscale encourages having appropriate value contrast between the local color and the shadow color, so I try to keep the contrast consistent between the gray and colored versions. Keeping the grayscale version on the side to reference while adding color to a separate copy can help avoid reducing or overdoing the contrast. Colors are relative - the same color can look different based on context, so I also recommend placing your object on a screenshot of your map when adding color if you haven’t already, mostly to make sure it doesn’t look out of place. That said, I don’t stress too much about having perfect colors yet because they’re easily fixable later on. Now, that’s where my process ends when it comes to individual assets. However, once I have all assets made (or sometimes a bit earlier if I get bored), I’ll do a phase of color adjustment on the map as a whole. The easiest way I’ve found of doing this is to take a screenshot of the map, edit the screenshot to make it look better, then apply the same edits to the tileset. Lastly, I manually adjust any individual colors that look out of place. Well there you go, a summary of my entire mapping process. I apologize for not having many examples for the details part, unfortunately I didn’t take many process screenshots while in the middle of making assets. Despite that, hopefully some of you find this helpful, and I hope you’re looking forward to experiencing the resort in-game! --------------------------------------------------------------------------------------------------------------------------- A massive shoutout to twoslashes for all the work he’s put into what was essentially my baby when we started EP7 development. For those unaware, while Caz was meant to be working on main story, this was going to be my focus on the Episode as it was my idea to build something to bring new life to Amaria as we continue our journey across Ayrith and have an area for players utilise in their playthroughs, from move tutors to the new Fight Club. With Caz’ departure and myself taking over the project, I reviewed the scoop of what we need and decided to delegate this to other members of the team. Seeing how it has now come to life truly brings me so much joy, and I really can’t wait for you all to experience it for yourselves. In other news before I close out this blog, last month our friends over on the Rejuvenation team have finally dropped their V14 update not too long ago, I would imagine a lot of you might have already played or are in the midst of playing. If you haven’t yet then I highly recommend you checking it out! Jan and his team have put so much effort into it, truly pushing the limits of what was known for Fangames and has honestly given me a lot more inspiration for Deso. So go play this, it’s your homework. :) https://rejuvenationgame.com/download That’s all for now folks, til next time! Posty2 points
-
Hey guys! Thanks for supporting my mods Due to limited forums upload size limit i am forced to downsized and make it a modpack. For anyone or new wondering what are the mods include to my mod pack there is a txt file of all the mods in the zip file inside the patch folder. These also include(not mentioned on txt file) Silvally Crest mod(updated) Bag crest mod(updated) patch.zip For an active support for the mod/Things you want to talk about it, Please visit the discord server threads in rejuvenation section, mods of rebornrevo server with the same name as this forum name.1 point
-
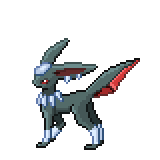
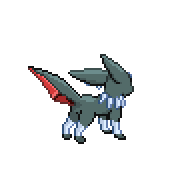
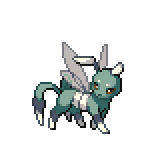
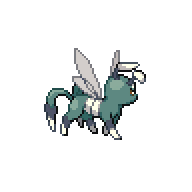
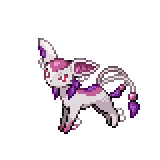
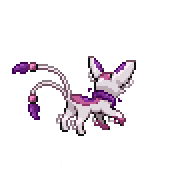
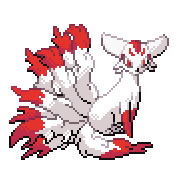
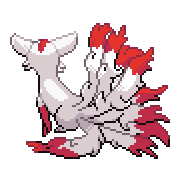
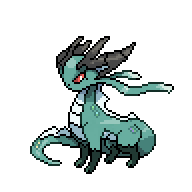
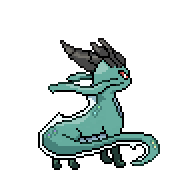
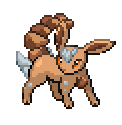
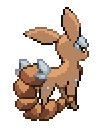
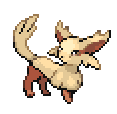
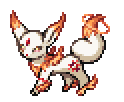
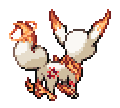
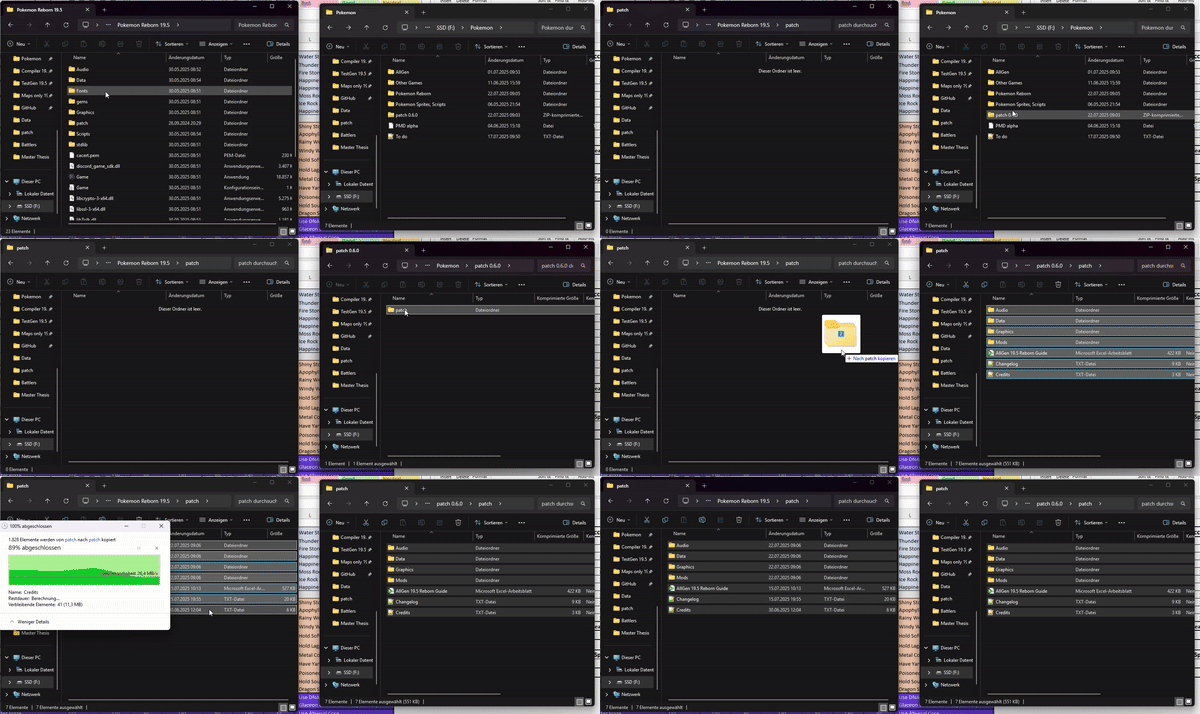
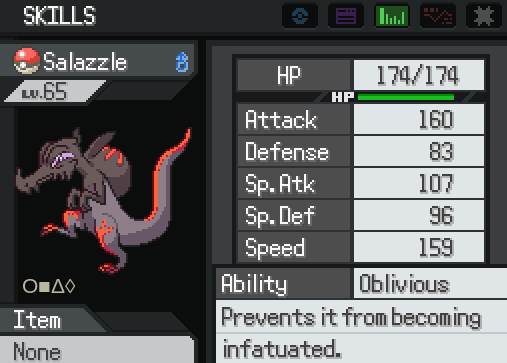
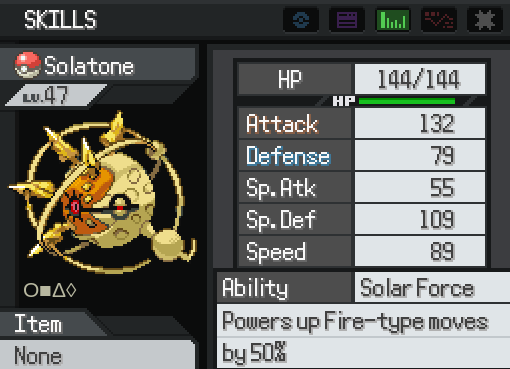
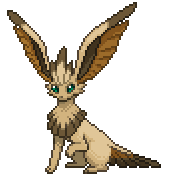
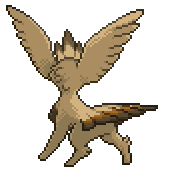
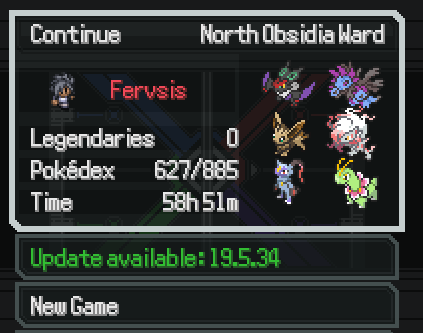
Pokémon AllGen Reborn! (19.5 ready) Hi Everyone!~ This is the Forum Thread from the previously named "Eeveelution mod"! This is a mod that implements (almost) all the Gen 8 / 9 / Hisui content, as well as a lot of optional custom features! The story is almost entirely unaltered, so you get the usual Reborn experience story-wise with the opportunity to encounter new Pokemon. Note for Self-Modders: Modding a mod became a bit more complex with 19.5. If anyone wants to mod the mod, ideally contact me (or our mod community in general) via Discord! If the demand is high, I might decide to make a short guide on this page later. Features: All Pokémon up to Generation 9 (including Hisui and Z-A Megas) Gigantamax forms introduced as Mega forms G-Max moves for their respective Gigantamax Pokémon A separate save folder to easier distinguish between your saves New Abilitiy distributions to suitable Pokemon from older Generations Custom Pokemon and Forms! Special Feature: Sunkern Switches! - Replaced by a toggle option in the menu! You will find Sunkern sitting around certain place all across Reborn City! - You can talk to a Sunkern and choose the mode you want to play with: You can now toggle the difficulty in the ingame options: Reborn: You will experience the typical Reborn experience without any changes to Trainers, events, etc. AllGen: Battles against Trainers are updated to include Gen 8 / 9 content. AnyGo: A different approach of "Casual Difficulty": Trainer teams will include Custom content, Legendaries, and Gym Leaders are not restricted to only one type! Also difficulty is ramped up a tad bit. Additionally, you cannot overlay field effects with Surge Abilities when a field already existed (e.g. on julia's gym battle grassy surge wouldn't work) Optional Custom features: Custom Megas: Currently over 70 new Custom Megas are added (ever-increasing) Custom Mega Stones are added which can be accessed in "Marble Maniacs" in Calcenon City after beating Adrienn. It's the house left to the Poké Center. Many of them also get signature Abilities (can be checked with the Guide) 2. Ability Changes: A handful of Abilities got buffed or changed, mainly he ones that are heavily underused/underperforming Changes can be activated by talking to an NPC in Grand Hall OR in Agate Circus (Green-clothed NPC) A book is added for all recorded changes (also in the docs) 3. Eeveelutions: Eevee has now custom Eeveelutions for all types (see at the end of this post) They are not considered necessary for Pokedex completion or similar achievements You may encounter these when evolving eevee under very specific circumstances (evolution methods are listed below and in the docs 4. Custom Forms: Several Custom forms have been added Custom Fusions have been added These may be encountered independent of the game mode chosen, they are completely optional though (except for AnyGo mode) All custom forms are documented in the Guide that comes withinh the patch folder download Some examples: Special Notes: Terastalization will not be added - mainly due to balancing issues The Protean change (that it only activates once per battle) is not included Movesets may still be missing some move compatibilities (reports are welcome!) Check out the Important Notes below for a specific issue NOT compatible with these mods: Pokemon Nightmare Mod Pokemon Memeborn Reborn Sandbox mode Pokemon Reborn Yang / Reatomized / other full-overhaul mods Other mods that change ingame scripts Randomizer is out for testing! (Version 0.9.7) Compatible mods (ONLY IF they are updated to 19.5): Aironfaar's Mod Box SWM Modular Modpack Pyrolusitium's UI Overhaul Ash-Greninja Mod -> This mod has been incorporated and fused with the Battle Bond Password! Pristine Accuracy mod Battle Music Pack -> This mod as been integrated as well (see a bit below) Important Note: Save file location For anyone wondering why the game cannot find you save file, AllGen uses its own save file directory! The New directory is usually in savedgames/AllGen Reborn, just copy contents of the original directory over there! Side Note: People from earlier versions than 0.8.0 need to transfer their save files from the previous /savedgames/Pokemon AllGen to the new savedgames/AllGen Reborn directory! The renaming happened due to conflicts between legacy AllGen version causing corruptions and errors. (The new name is also just better) How to Download / Installation Even though 19.5 AllGen is technically in a beta, it is already more stable than the legacy version! This still means, if any inconsistencies were found, please do report it here or on our Reborn Discord! In contrast to the legacy version, 19.5 mods only work via patches. Download a clean 19.5 Reborn game, OR download the specific Joiplay version for your Phone Update the main game vie the ingame updater (on the save file choosing screen) Download the patch.zip from the Link below Unzip the folder For Joiplay - empty the game's patch folder before adding the mod drop the whole folder into the main directory of your 19.5 Reborn game If you update between patches, remove the previous folder and put the new one in the folder! Profit Do NOT apply the patches' content to the folder, you do not overwrite any files. If you get asked to overwrite any, you did something wrong! Here is a small Gif for demonstration: AllGen Reborn patch 0.9.7 (Last updated 30/08/26) https://mega.nz/file/v8ZC2BpY#GNSQodCCWcoqb7eNPnW9gwfQcbyZr97O7ajkEO7jI_k Google spreadsheet https://docs.google.com/spreadsheets/d/1JFgeB3OJEadA2E0nC4t0ISUQeNYmRIpq/edit?usp=sharing&ouid=117014621059890777493&rtpof=true&sd=true Battle Music Pack Compatibility patch The compatiblity patch has been removed due to the integration of a custom music pack! Thanks to all contributors, especially @Ashzure, @Karvanha and @Dreamy for their inspiration and parts of their Music Packs! https://mega.nz/file/zw4jBDrJ#y-oCW1ISSsMxJ1mKfpWg1fGsHHJY15abeeCMqoRU-a4 You can toggle the Music Pack ingame in the options menu. Note: The AllGen Reborn 19.5 Guide (Excel) comes directly with the patch download as well! Changelog: Bug Report: Please report all bugs you can find related to abilities, incompatibilities, crashes etc. in the comment section or by contacting me in the Reborn Discord in the #Reborn-Mods or #Pokemon AllGen Reborn Channel For the Eeveelutions: Sneak peeks for the eeveelutions! More details can be found in the docs! Eeveon - Normal Type Credits to Starwolff Braveon- Fighting Type Credits to Starwolff Nimbeon - Flying Type Credits to Starwolff Hawkeon - Alternative Flying Type Credits to Eleanor Brick (Design), Me and Baraayas (Sprite and polish, Discord) Dusteon - Ground Type Credits to Starwolff Basaleon - Rock Type Credits to Starwolff Titaneon - Steel Type There were no names associated with this design, if anyone may know from where please tell me! Front Sprite Credit goes to Badman#6291 form our Reborn Community (Back by me) Ephemeon - Bug Type Also no associated name for credit, however I found it here Toxeon - Poison Type Credits: Dazed Flame Sprite Credits go to The archived Eeveelution Thread Kitsuneon - Ghost Type Awesome Design Credited to OnyxBlock Sprite Credits: Kriyanceldt Drekeon - Dragon Type Design by Mykel Ryan (Sprites by me) 2 NEW additions to the Eeveelution Family! Eevee Deities~ Published under the Creative Commons Attribution-ShareAlike 3.0 License https://creativecommons.org/licenses/by-sa/3.0/ Found on Deviant Art Abysseon - Underworld Deity Sprite: Dracoyan Artwork: Eysselia Concept: Eysselia Divineon - Heavenly Deity Sprite: Dracoyan Artwork: Eysselia Concept: Eysselia Credits go to their respective creators/artists/designers. Legacy Version (19.0.16) and Doublebattle mod With the advancement of 19.5 AllGen, I took down the legacy version. If anyone still needs/wants a link for it you can contact me. Credits (contact me for missing names, they are all appreciated):
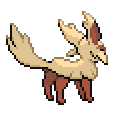

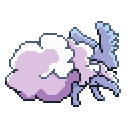
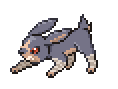
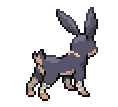
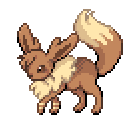
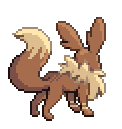
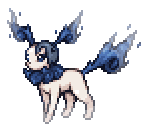
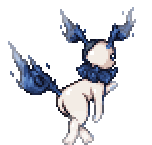
 1 point
 -
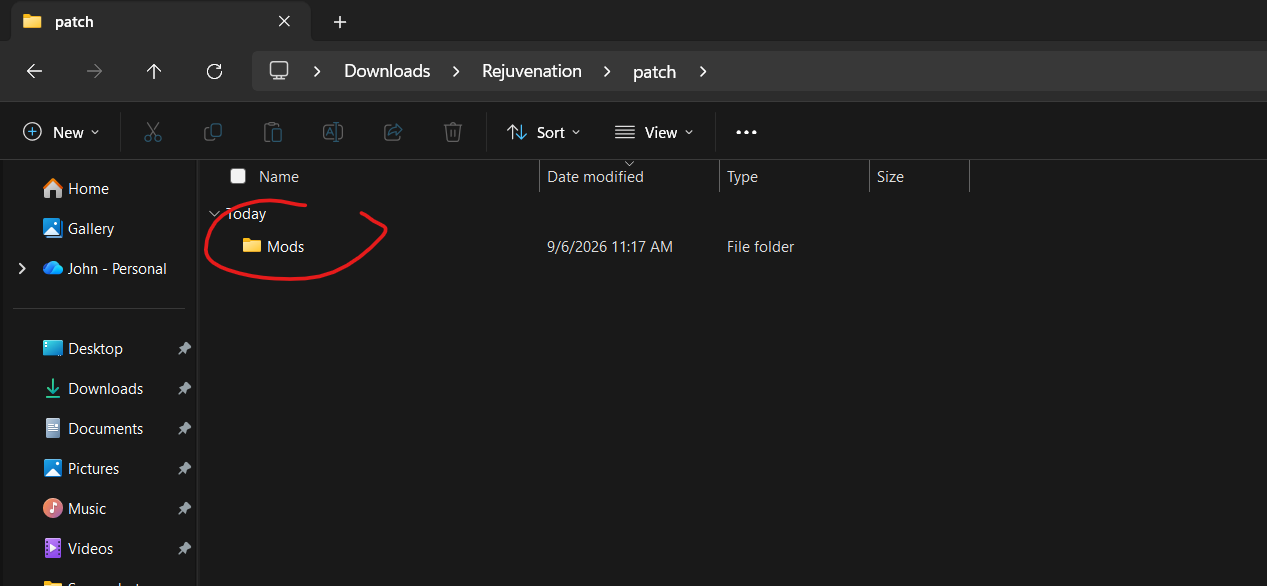
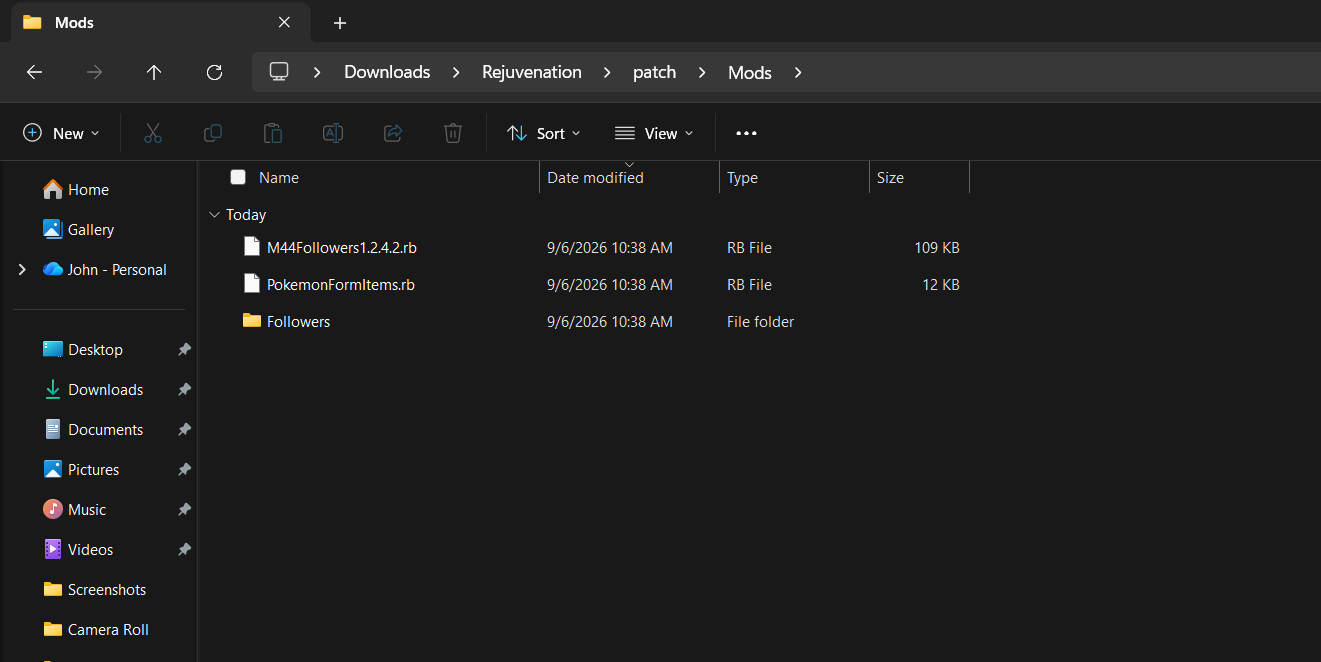
PROPER GUIDE FOR INSTALLATION AS OF V14 9/6/26: I am new to modding and had no idea how to properly install this mod. The instructions were incredibly vague, but I managed to figure it out. Here are proper instructions: 1. Download the Mod zip file from this page. Make sure you get the newest version! Scroll down in the comments to find the mod creator posting the newer versions as time goes on. 2. Extract the zip file once you've downloaded it. 3. Open the extracted zip file. 4. Open the "Rejuvenation" folder. Have this folder and the extracted mod zip file open side by side. 5. In the "Rejuvenation" folder, open the "Patch" folder. 6. In the "Patch" folder, create a new folder, and name it "Mods". 7. In this "Mods" folder you just created, DRAG AND DROP all three of the files that were in the extracted zip file for this mod you just downloaded! There should be only three: "MMFollowers(Numbers).rb", "PokemonFormItems.rb", and a "Follower" folder. ALL THREE must be dragged and dropped into the new "Mods" folder you just made. 8. Open the game, press control, and it works! I am on a windows laptop, so if this method does not work for you, it may be for that reason. Hopefully this helps! (Screenshots attached below to help!)
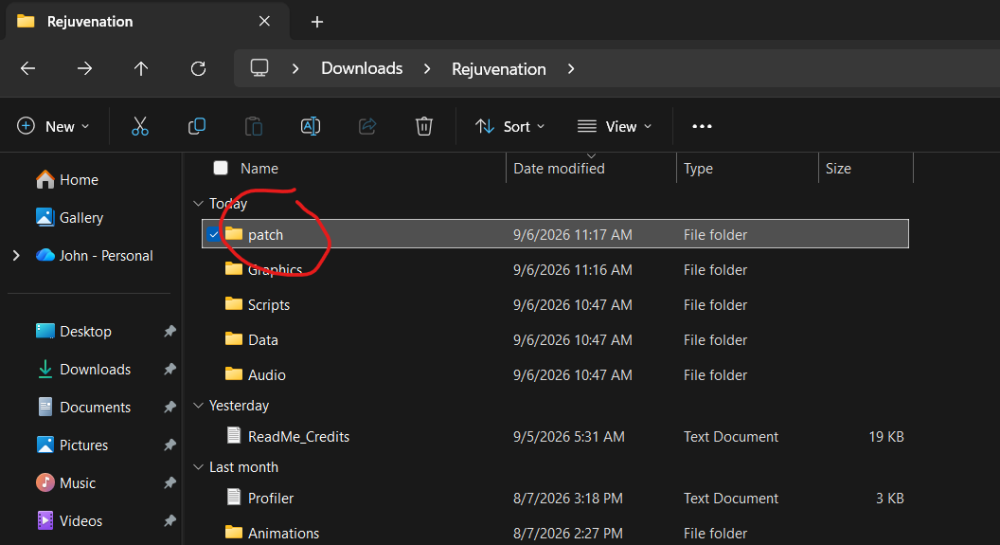
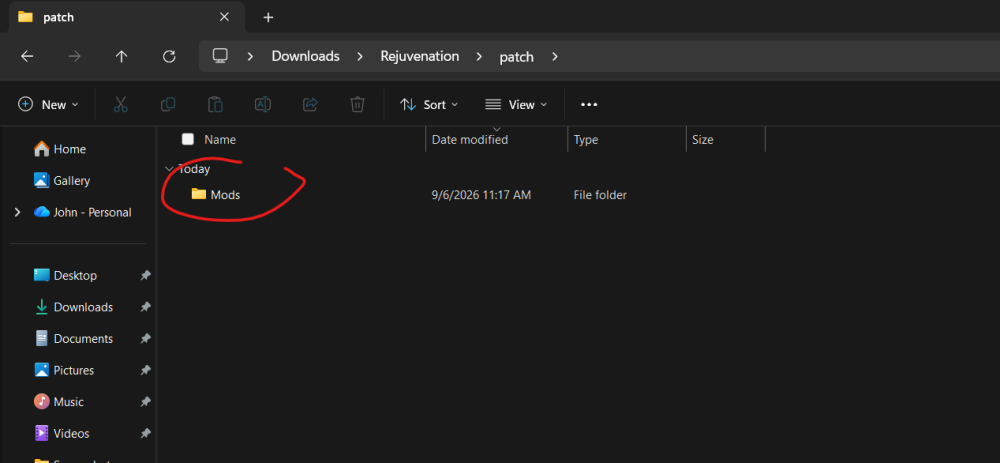
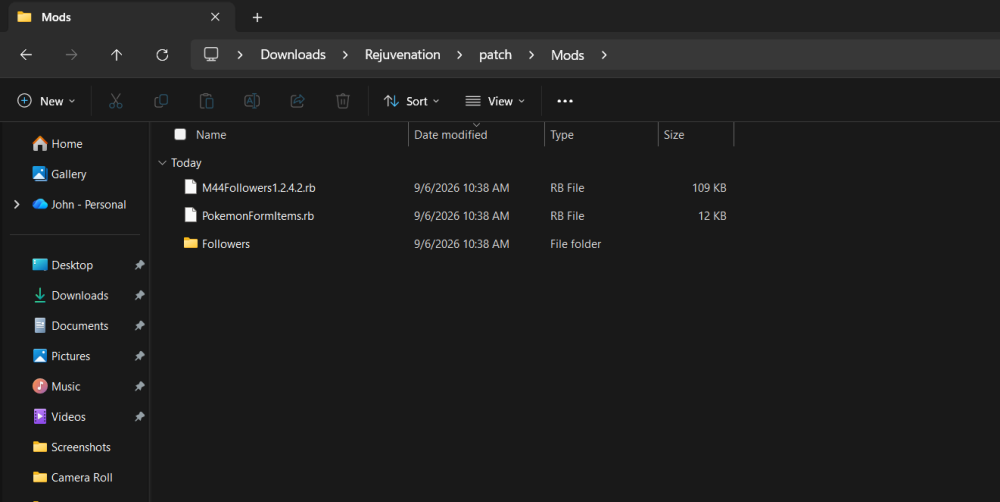 1 point
 -
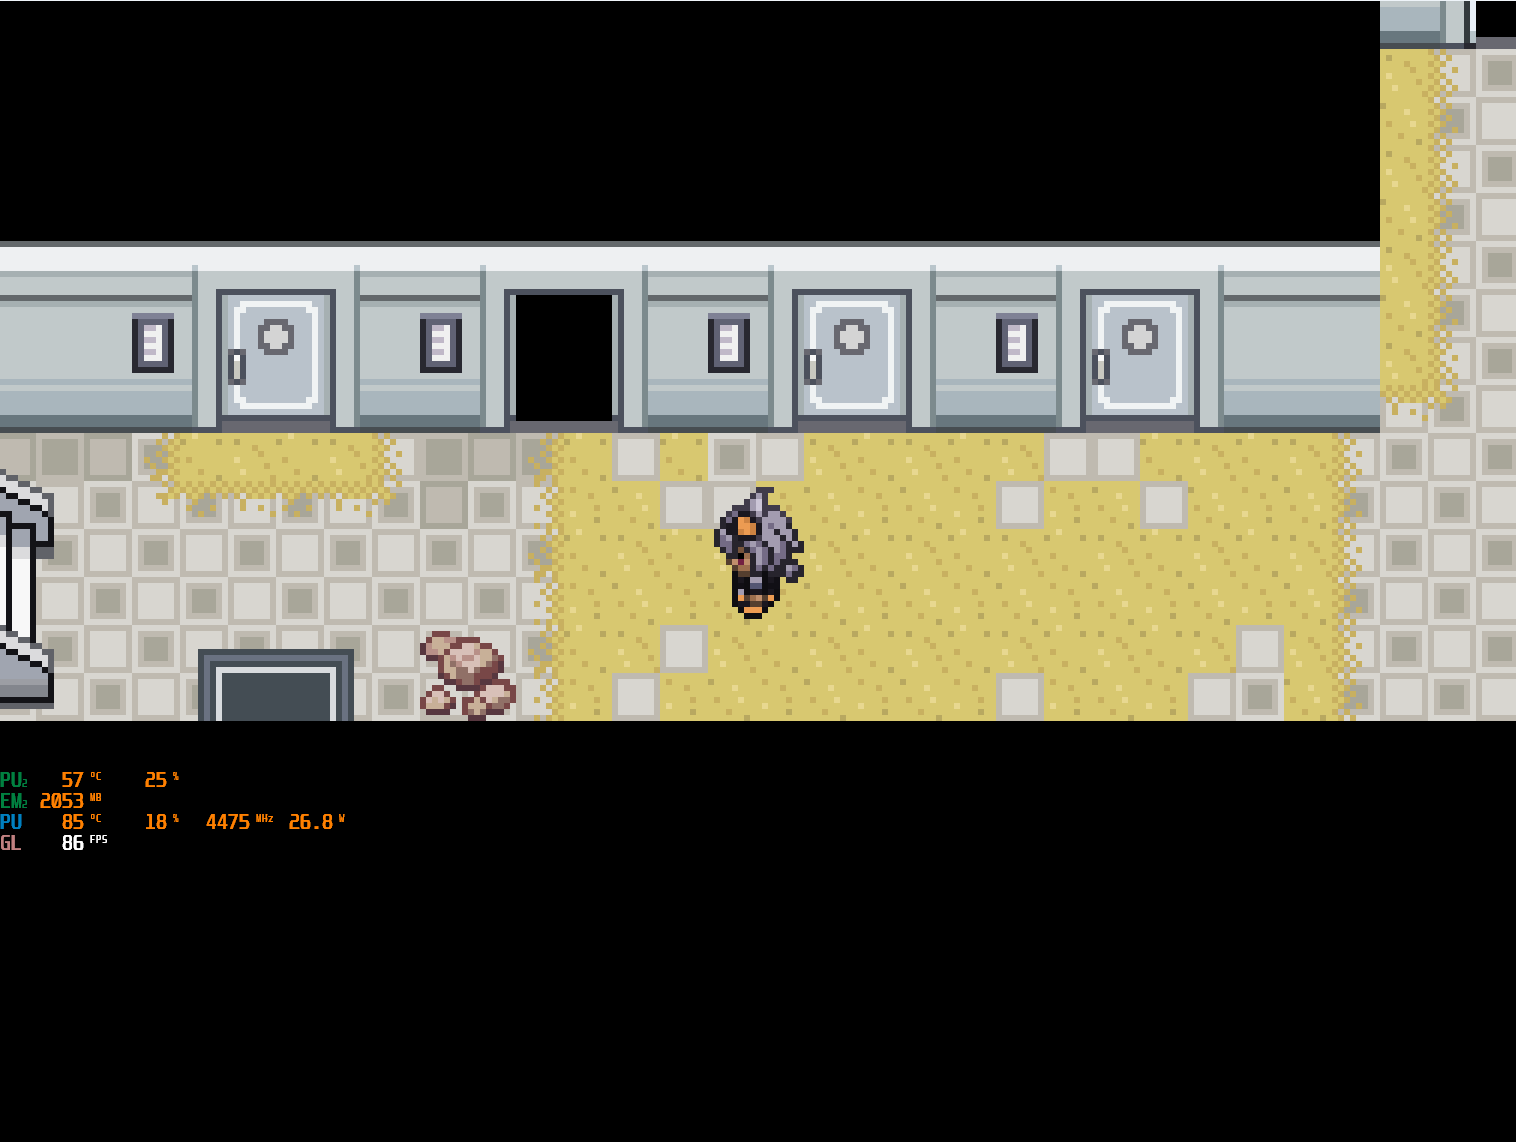
Was able to get in here from between the small bush and yellow tree to my right.
 1 point
 -
So a lot of the new things is on discord such as: Mega Pinsir and Heracross Mega Golurk Mega Electivire Mega Glalie. If you guys want to check those out please go to discord rejuv mods channel(thread) the forums has a limited size for upload and i may not be able to upload for quite some time here because of that but I would compressed it all soon into a modpack but for now the active side would be on discord I'll just be here for the bug fixes for the existing implementations.1 point
-
Fixed the bugs found by the community: Glalie bug is now fixed(download link on discord) thanks to @Constances Manetric bug fixed thanks @RandoTrainer/Zain(discord) Mega venasaur bug fixed thanks again @RandoTrainer Bag crest not working for luvdisc(fixed) reported by jigen(discord)1 point
-
After spending several days searching double battle mod, Enduring the pain of not playing Version 14 since the first day it was released. without success, I had to take matters into my own hands and do some research from : 2v2 Mod: Rejuvenation 13.5 port by mog [19.16][Mod] 2v2 / Double battles everywhere (trainers/wild encounters) By vilrose file script from v14. [E19] Oops, ALL Doubles! [Full Battle Conversion / Challenge Mod] by Mister_ecks cant use, it buggy, Install ------- Copy: patch/Mods/DoubleBattlesEverywhereV14.rb into the root of your Pokemon Rejuvenation V14 installation. What it changes --------------- 1. Trainer battles are forced into double-battle mode. 2. Normal random encounters generate one wild Pokemon. 3. Existing scripted pbWildBattle(...) calls are NOT changed, which reduces the chance of breaking story/boss encounters. 4. It does not replace Rejuvenation's entire Scripts folder. Important --------- Back up your game folder/save before installing any script mod. Double_Battles_Everywhere_Rejuvenation_V14.rar1 point
-
Well, it seems like one of the recent updates changed the position of the door. I did not expect Oceana Pier Gate to change so much in V14. I will update the mod, hopefully, this weekend...1 point
-
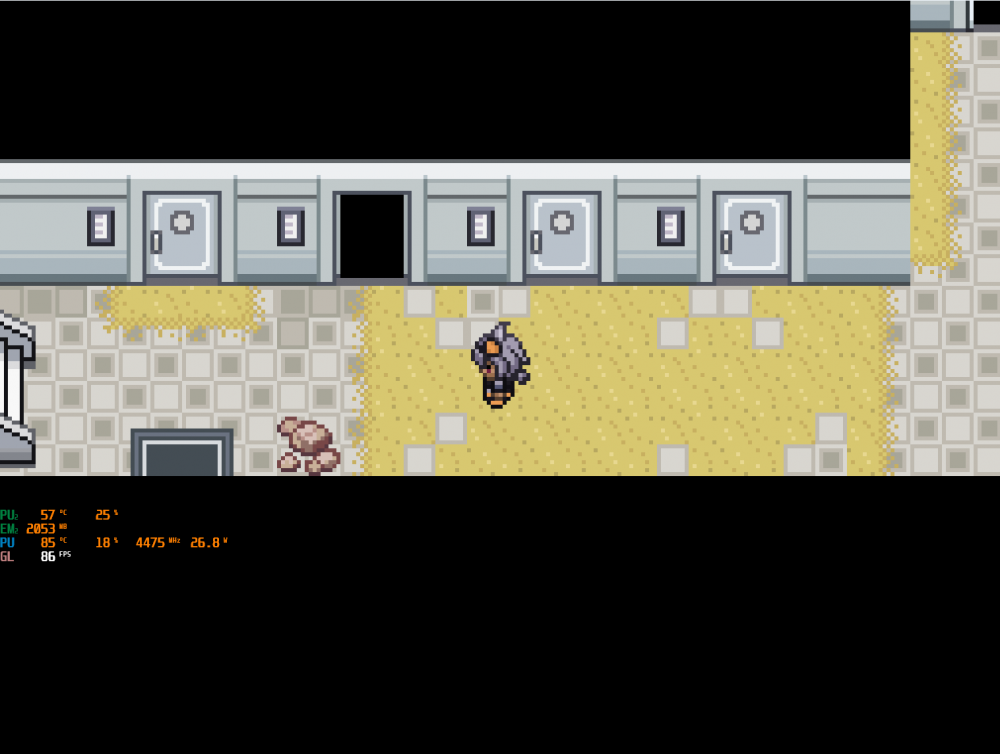
Today I discovered that the game is capped at 40 FPS, and I wanted to see if I could increase the frame rate. After checking the game scripts, I found that higher frame rates are indeed supported. With this script, you can adjust the parameter to 60, 90, or even 180. For mobile devices, setting it to 60 FPS is recommended due to hardware limitations. Rejuvenation FPS Unlock Mod.zip
 1 point
 -
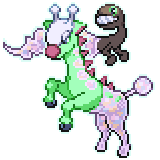
Fictitious Forms Mod 1.0 This mod contains a few new forms to add to your Pokemon gaming experience. This mod is a continuation of the Mega Girafarig mod, but I wanted to start a new thread as I want the focus of the mod to be on forms in general, not specifically Girafarig. I may add new forms in the future, at which point I will update this thread instead. Fictitious Forms is currently designed only for Pokemon Rejuvenation, but you can copy the script lines for the below forms to adapt these forms to Reborn and Desolation. I plan on adapting these forms to those games in the future, at which point I'll update the files to include scripts for them both as well. New Forms: Aevium Dewgong Aevium Furret Mega Girafarig If you have any feedback or suggestions for these forms, please discuss them below and tell me what you think. credits.txt Fictitious Forms Mod.zip
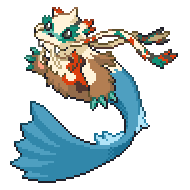
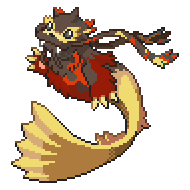
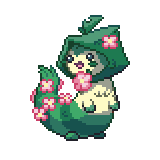
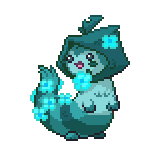

 1 point
 -
Can you update this for V14 of Rejuvenation? I really love your Furret version.1 point
-
Introducing Advanced Crests! This is my take on a modular format for adding custom crests to the game. For the modders out there, this should be fairly easy to adapt to further systems if desired. The download can be found here on my GitHub! I will not be re-explaining anything tech-y here. Feel free to submit PRs if something is Bad modders. New Crests! Partly for myself, and partly inspired by a friend running Where Love Lies, I've decided to make a bunch of crests based on it and whatever else we find interesting. At the moment I only have 4 fully planned out: Spidops Crest: Holder gains Fighting- and Dark-type STAB and resistances. Deals 30% bonus damage per Speed drop on the target, multiplicative. Scyther Crest: Holder's slicing moves are always critical hits. Donphan Crest: Holder deals 20% bonus damage and takes 12.5% reduced damage. Each time a move is used consecutively, apply these bonuses again, additive. Caps out at 300% bonus damage and 87.5% reduced damage. Snorlax Crest: Holder's Special Attack and Special Defense are swapped. Additionally, base Speed is equal to Snorlax's current percent HP, scaled from 30 to 160 (Base Speed -> Base Health). Xatu Crest: For each turn the holder is out, the holder gains a random Type's resistances, indicated by color. Additionally increases stats by 15% per Totem Height I may or may not remember to update this post, but the GitHub should stay up to date lol1 point
-
following for future updates and whrn work dies down for me to make my own stuff1 point
-
How you can dislike Golduck, it's a platypus!1 point
-
Most of the shinies in rejuv were submitted by the community, as like with reborn there was a community effort to make all the custom shinies for rejuvenation a few years ago. We usually try to update some lines over time if we notice that we ourselves don't like them much either, but a lot of this is subjective and in the end we can't really satisfy everyone in that regard, so sorry if not all of them are to your tastes ¯\_(ツ)_/¯1 point
-
interesting concept, I'm currently using Silvally rework idea, although it has 1 minor logical error occurring: When it switches form, it loses the 20% boost off the crest (more context on edit 2). can you test it on your end and confirm whether this is the case? Edit1: I did forget when I installed the mod, I see it got compatibility fixes, I'll try the new one and let you know Edit 2 (final for this post): I made a lengthier test, apparently it conflicts badly with the mod file: "nero_bagcrest": a) displays the wrong ability upon switch-in, although the intended ability is functional afterwards and also properly inspectable as a readable b) cooks the crest 20% atk buffs after a form is switched (at least on inspect, dunno how it affects it functionally) c) might also cook its stats in other ways, tho I haven't really went into depth on this one. Anyways, hope this helps with debugging0 points