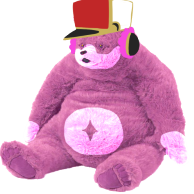
Pocky Posted December 1, 2015 Share Posted December 1, 2015 Hello friends! Are you wondering, "Jeez, I'd love a swanky new hat, but am too lazy to message Dan or any hatters! What should I do!" Well look no further! This is a tutorial on how to make your avatar as snazzy as mine, without the hassle! This dootorial will require:Paint.netAvatarHat! (Or multiple for hatstacking like a pro.)Step 1: Getting an avatar.This part should be relatively easy, just find your favorite avatar of anything, whether it's a leg, or your favorite pasta loving skeleton! For this tutorial, I will be using this image:lookathischubbycheeksd'awwwwwStep 2: Get a hat!It can be any hat, whether you'd like something cheesy like a literal cheese hat, or reindeer horns! Since we are in #HATTENING2015, I will be using a casual sans-ta hat. (heehe)Step 3: Open Paint.Net and TRANSPARENT THAT UP MOFO!Alright, if you do not have the program, go download it at getpaint.net . Paint.net is a free! Anyway, you want to use the magic wand tool that looks like this:And you want to change your tolerance level bar too so you don't end up slicing your avatar or hat in half! Here is what the tolerance bar looks like.So anyway, once you're done setting up that shiznits, you want to select the background of the hat so it becomes transparent when you cut it out! This is so you can put the hat on cleanly and so you don't cover your avatar's beautiful face. Just press Control + X when you are ready to crop the background out. Here's an example of it being cropped. Notice how it didn't select any of the hat at all! Wow! (Fortunately the hat I'm using already had a transparent background, so that saves me the trouble.)Step 4: Time to awesome-sauce put that hat on your avatar!My most favorist part! You want to use the Rectangle Select tool now that you are done making the transparent background of the hat.Copy it using the Control + C command after selecting. Now, onto the avatar. First make a new layer! This is important as pasting it on the background immediately will make the avatar face transparent too. Make sure the new layer is on top of the background layer.Also as you may have noticed, the square with the green cross is the one where you add a new layer.Anyway, OH NO! MY HAT IS TOO BIG! WHAT SHALL I DO?Well, you can either...Keep resizing and undoing the hat until it is petit enough for your avatar. The command for undo is Control + Z.Or you can keep resizing manually using the squares on the corners after pasting your image.Anyway, the final product once you're done with all that work is something like... THIS!Wow! Sugoi! Oh em gee!Remember to save your avatar in .png if the avatar background is transparent because saving in .jpeg causes the transparency to be filled with white. And press flatten when it asks you to, just so ya know.Anyway, that's how you do it! Enjoy stacking hats and other things on each other now! This is my first tutorial I've actually ever written so if it's in any way unclear please tell me! Quote Link to comment Share on other sites More sharing options...
Veterans Zumi Posted December 1, 2015 Veterans Share Posted December 1, 2015 Aaaand I'll hat add some more transparent hats for you to use to this, just in case you're lazy and don't want to google them c: Happy hattening! Quote Link to comment Share on other sites More sharing options...
BlueMoonIceCream Posted December 1, 2015 Share Posted December 1, 2015 I gizzity got it done, and it feels nice and fresh Quote Link to comment Share on other sites More sharing options...
Shing Posted December 1, 2015 Share Posted December 1, 2015 Well something i can do for boredom i guess. Quote Link to comment Share on other sites More sharing options...
Komodojoe Posted December 1, 2015 Share Posted December 1, 2015 (edited) Wait a minute... How did I not know that paint.net was a thing? I've needed something like this for a while now. ...And now I have this and a hat. Today is a good day. Edited December 1, 2015 by Komodojoe Quote Link to comment Share on other sites More sharing options...
Cyaloom Posted December 16, 2015 Share Posted December 16, 2015 Here there are the hats I use for the Hattening (for the people that still need one), and they can be used by anyone who has Paint.net or Photoshop, so... hope you don't mind if I post here and bring this thread in the first page of the section again. Thank you c: Quote Link to comment Share on other sites More sharing options...
Recommended Posts
Join the conversation
You can post now and register later. If you have an account, sign in now to post with your account.