RedactedNPC
-
Posts
39 -
Joined
-
Last visited
Content Type
Profiles
Forums
Events
Reborn Development Blog
Rejuvenation Development Blog
Desolation Dev Blog
Everything posted by RedactedNPC
-
Right, I forgot to mention that one though I did encounter it. Thank you.
-
I realized that when I was typing up the guide for Obsidia. I felt too lazy to add it and was hoping no one would notice. Now that I've been caught, I'll go fill in those Pokémon. Thank you.
-
Yes, I'm still working on it. And yes, please. That would be very helpful. Where would you be getting these from?
-
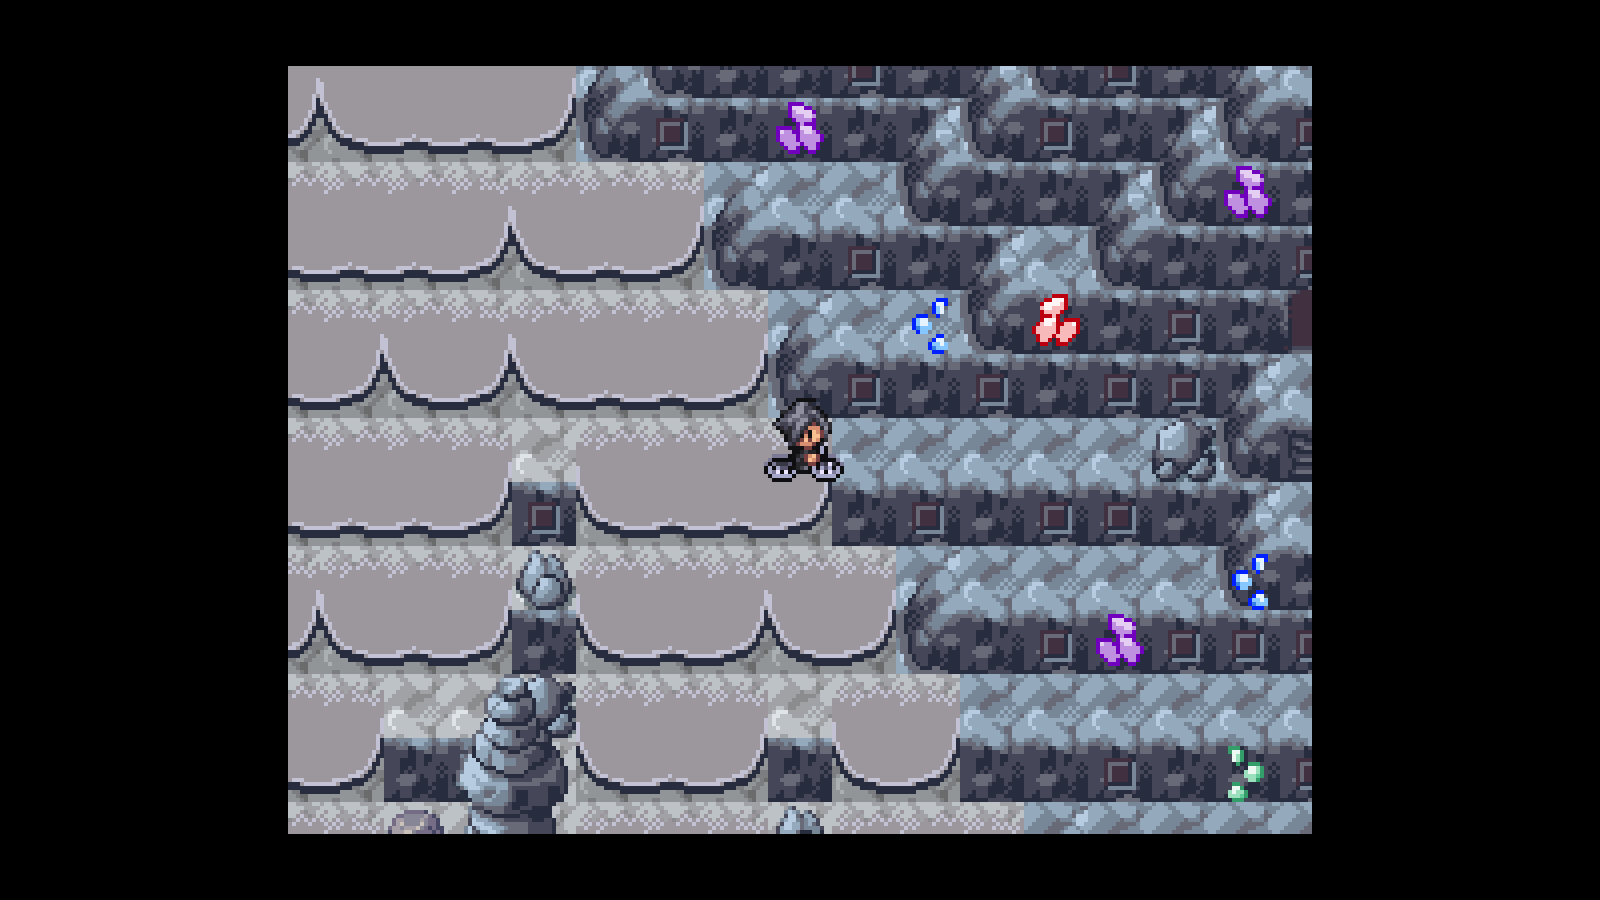
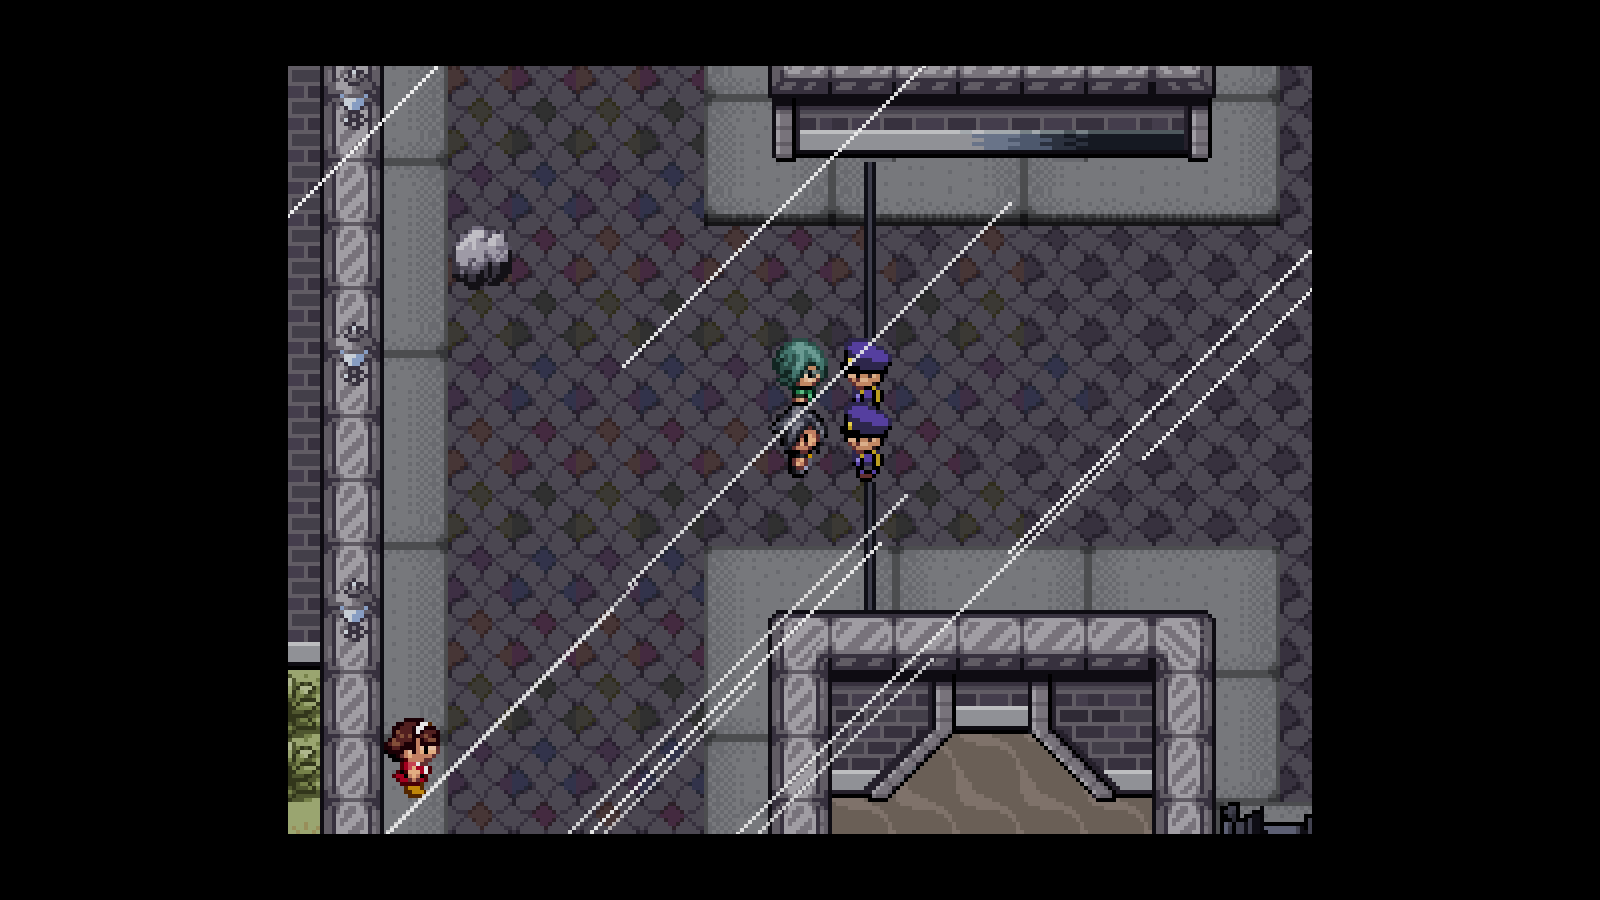
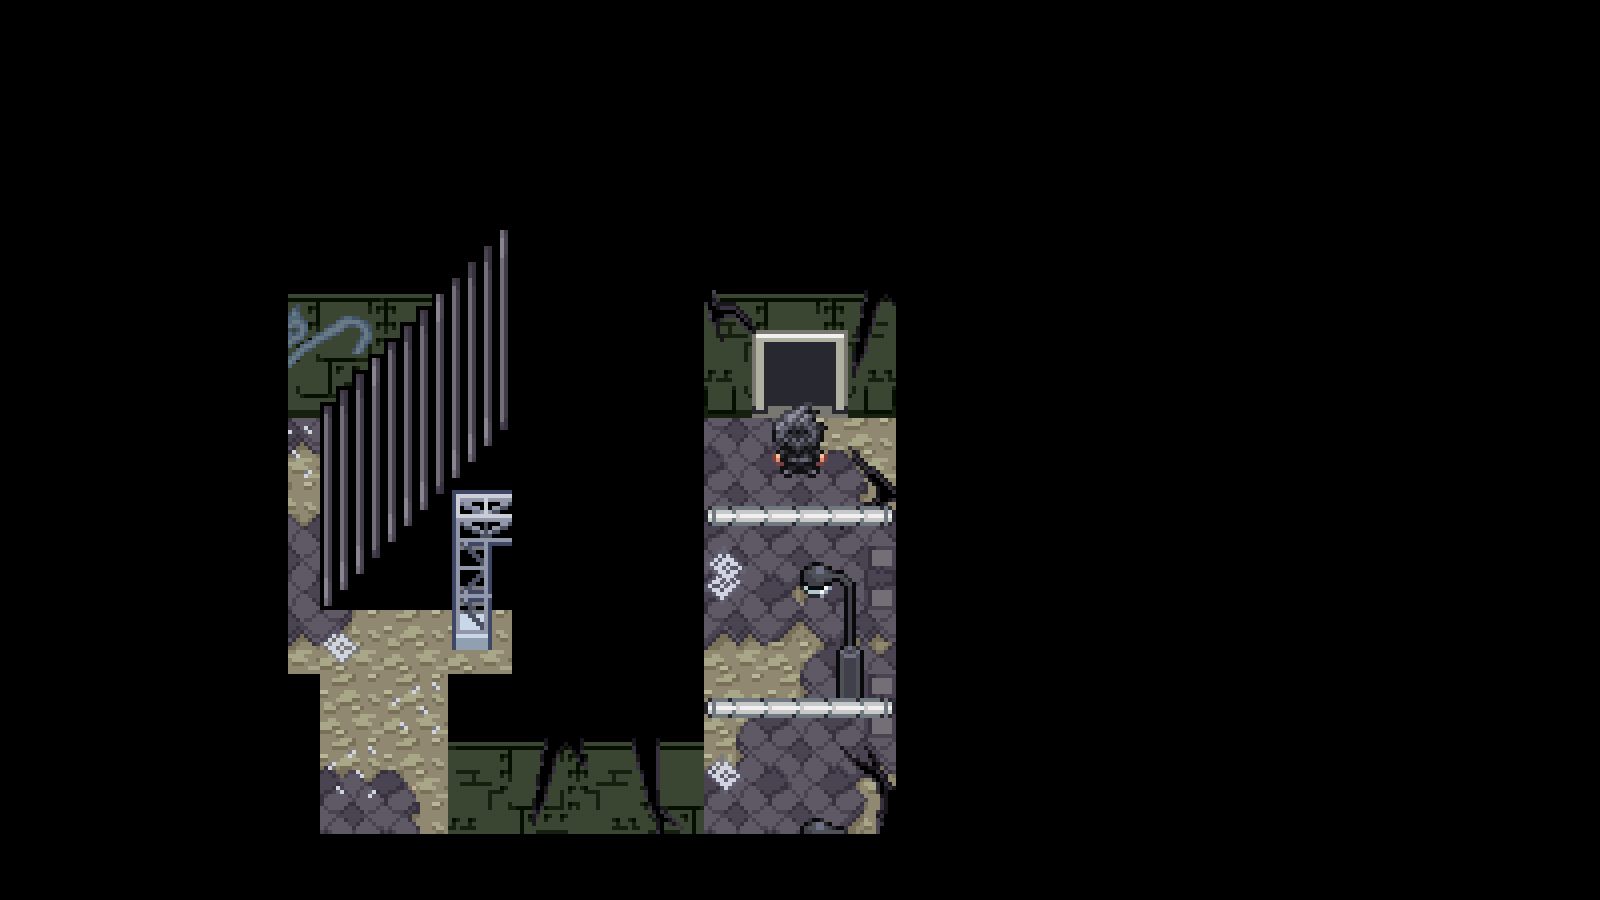
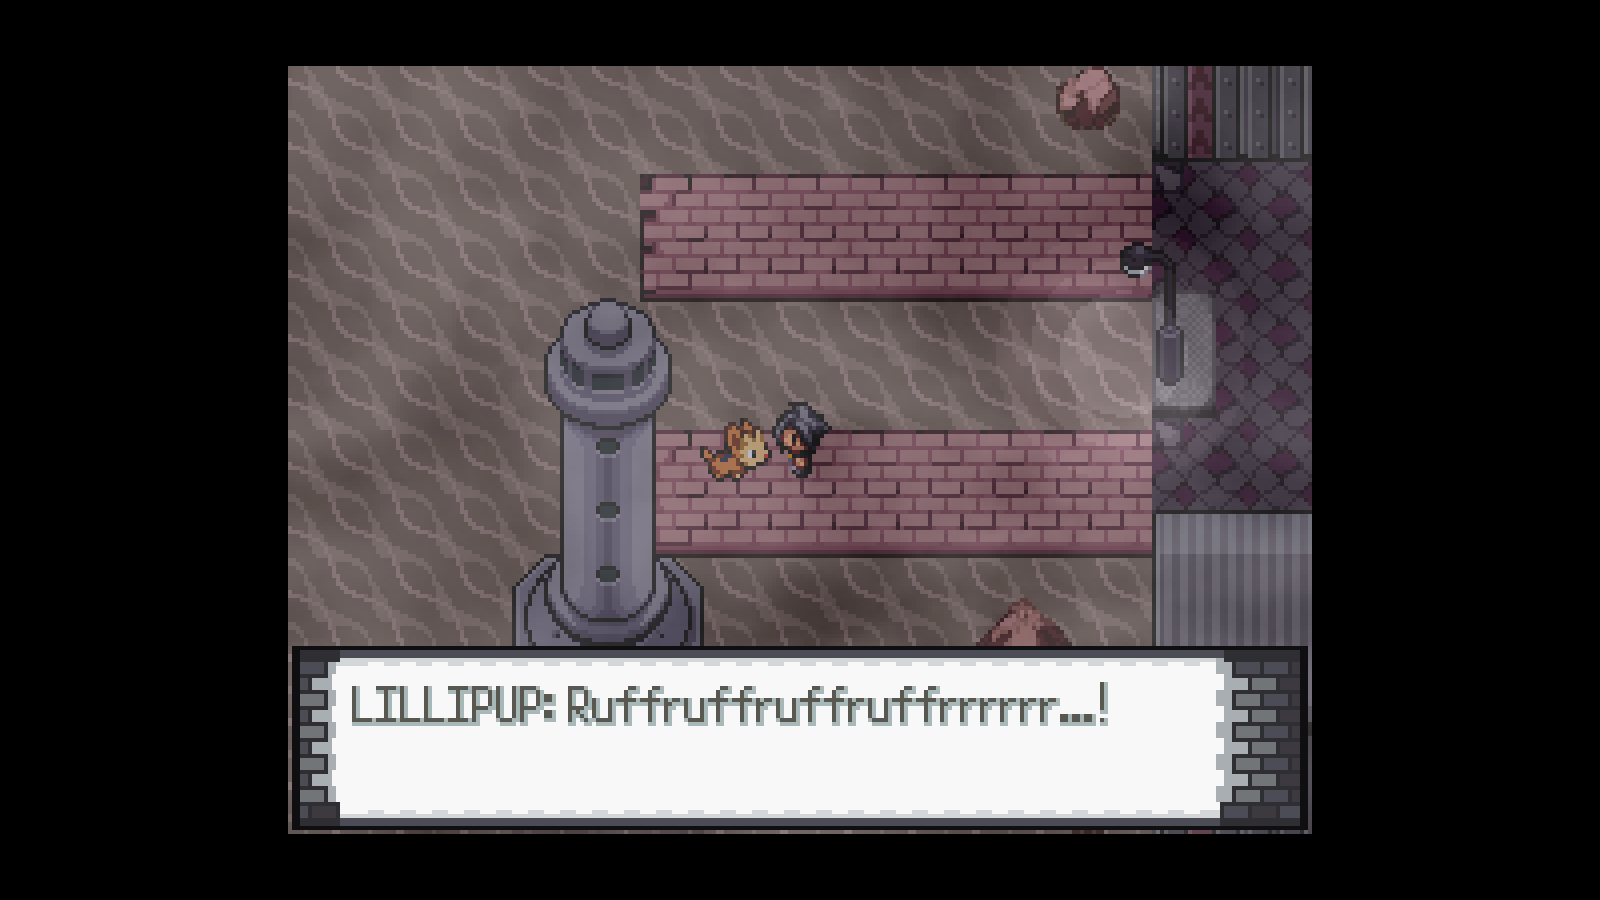
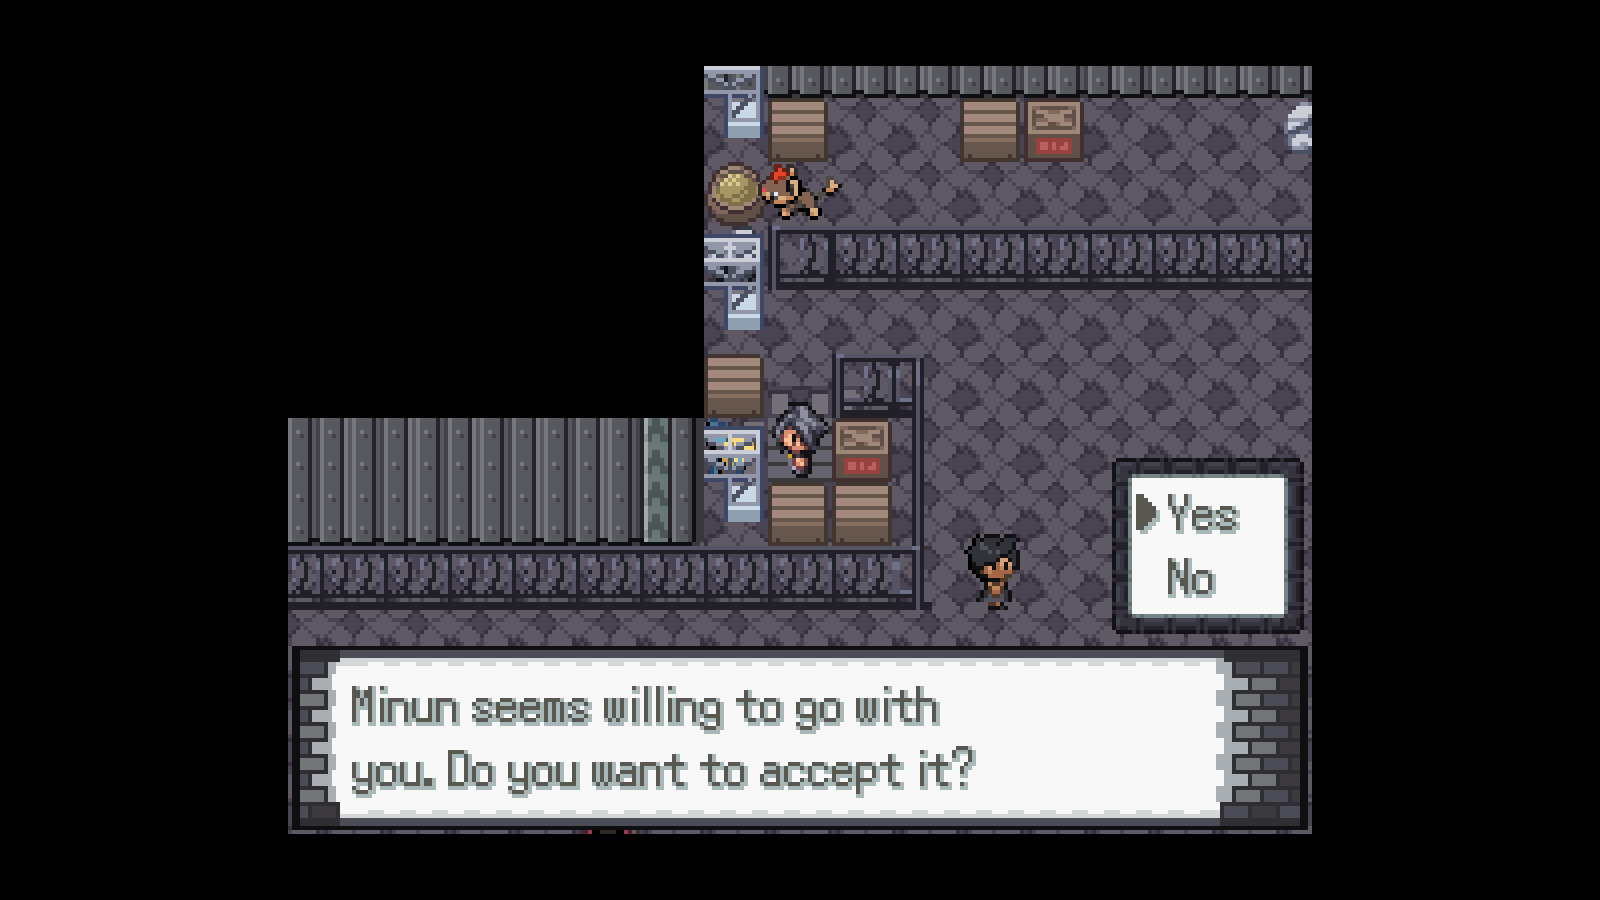
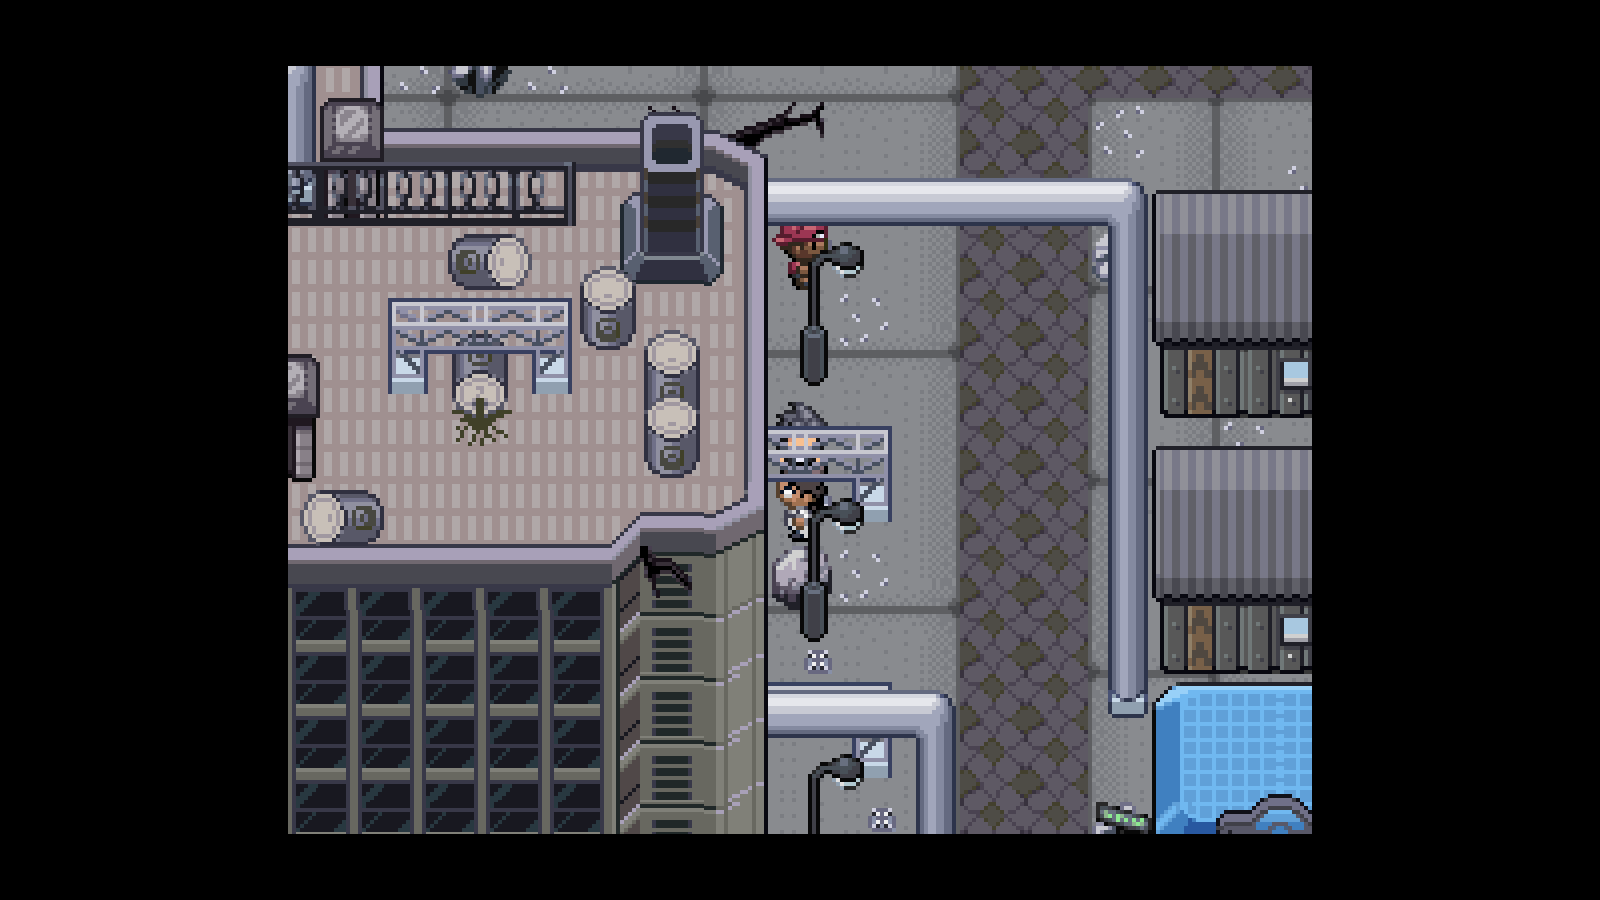
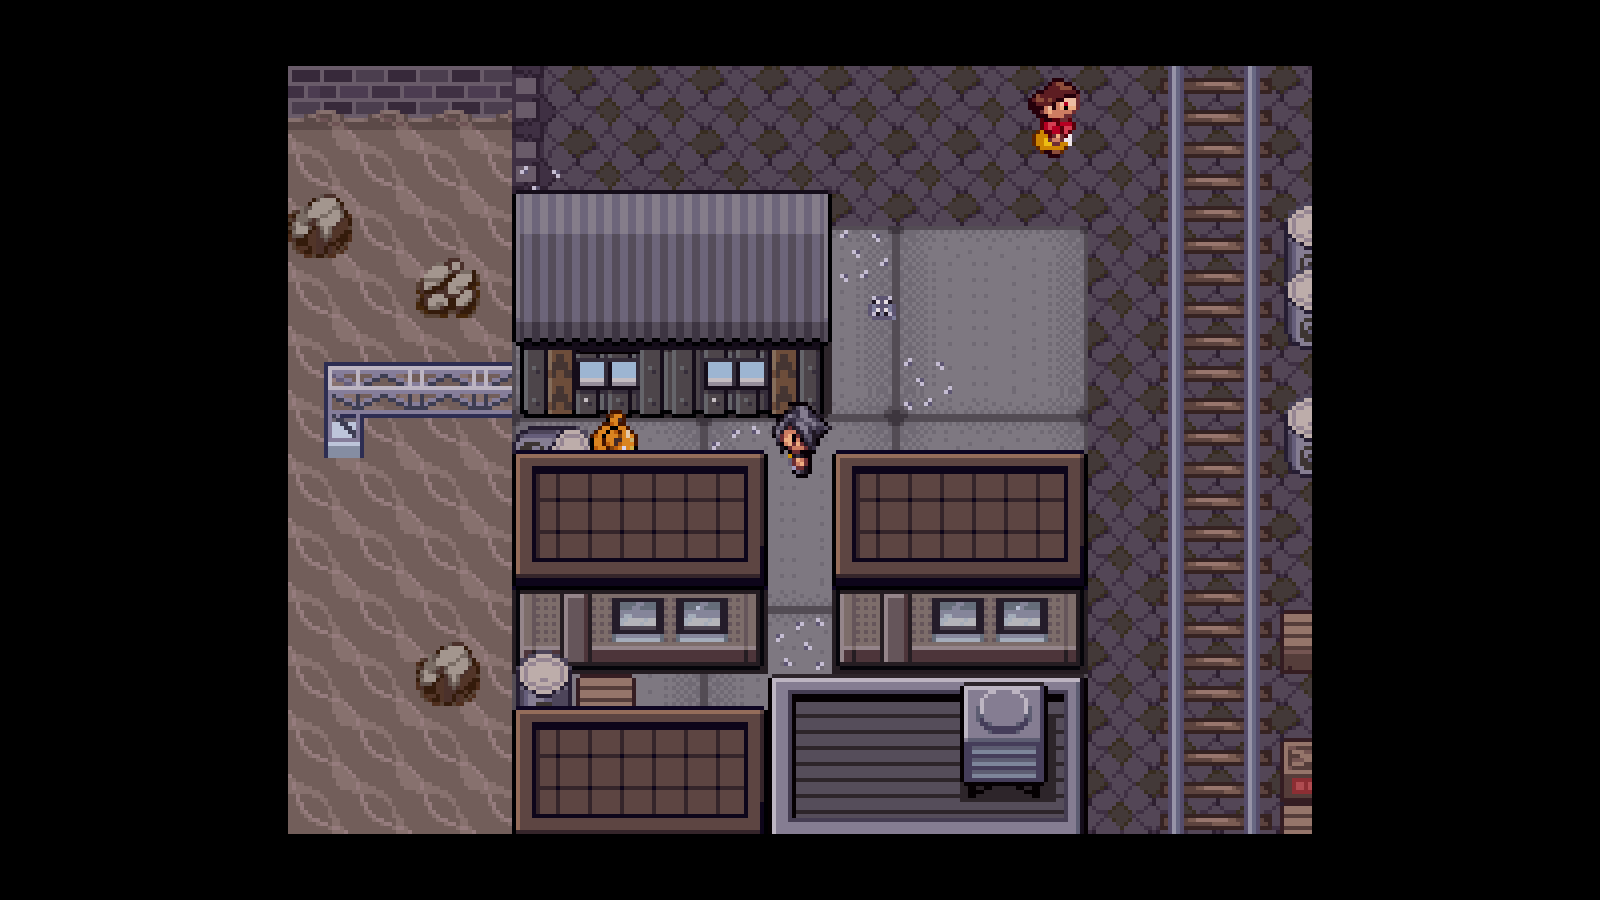
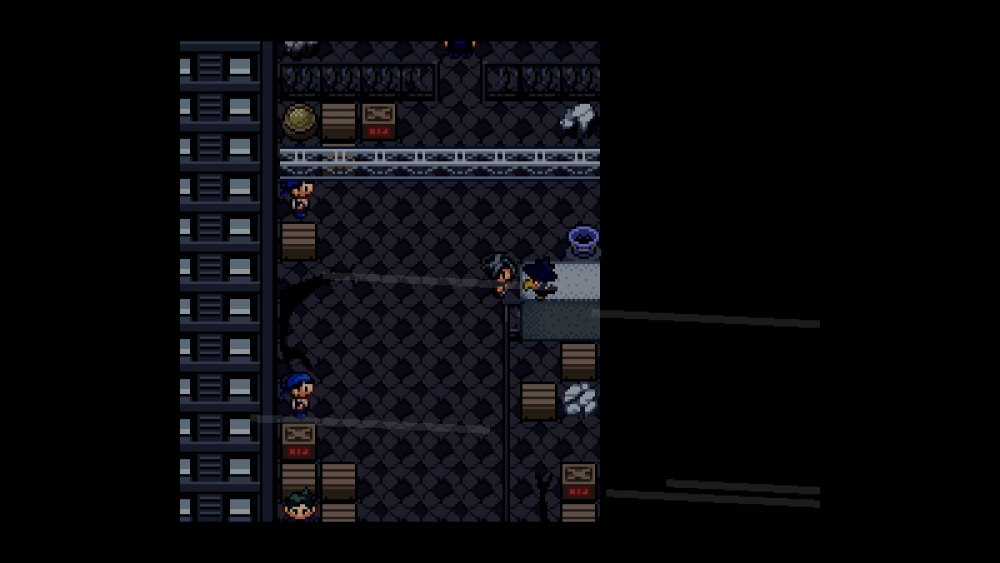
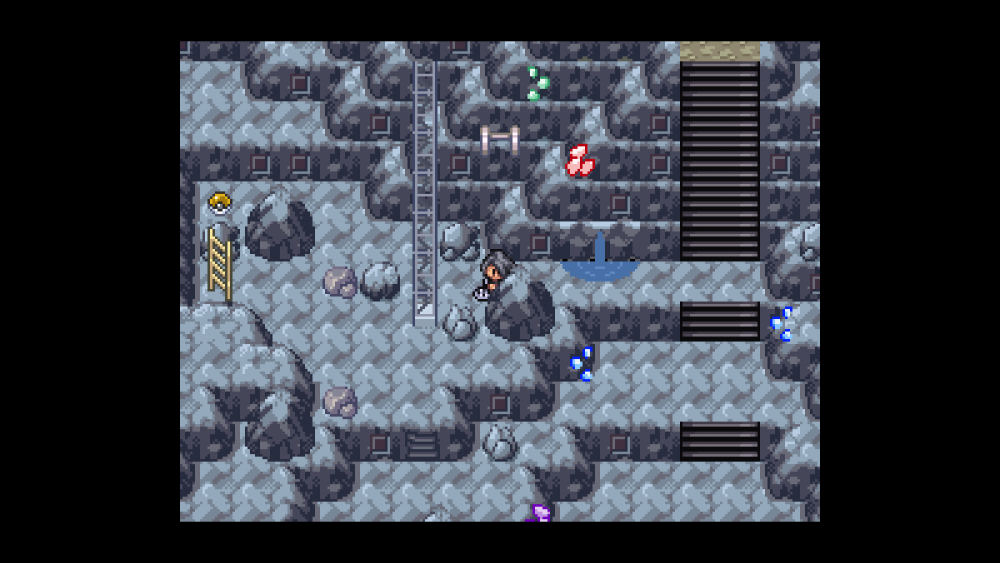
Chapter 4 Shelly's Gym Section start date: February 19, 2018 Section post date: February 23, 2018 Now you see why I don't call them "Gym 1" and "Gym 2". Corey didn't give you a badge, nor did he give you a TM. You'll have to fight a different Poison-type gym later in the game to get your badge and TM. As a quick aside, what happened to Corey wasn't your fault. He may have tried to blame you, but the alternative was giving in to his acts of terrorism which would have ruined many more lives. He was already on a downward slope. You didn't set him on that path, so try not to feel too bad about it. I don't know if any of you have a tendency to get too attached to stories in games, so I'm just making sure. As a final note, if you haven't already noticed, events that split the story or dialogue choices are labelled in yellow. I've been doing this for a while now, so I might as well make it official. Thank you to the following people for your contribution to this part of the guide: Sparsyle-0 (Sophie), Friz, Lostelle, Paperblade, Hallowilicious Your level cap is still 35, so don't over level. You can get Common Candies from most vendors as well as the Obsidia Department Store if need be. You need to enter the Lapis Ward. The northern exit of the Opal Bridge is now open, so battle your way through the new section of the bridge to first access North Obsidia. North Obsidia This another small ward, so I won't upload a map. One of the residents will reference a grim quote from Attack on Titan which should alert you that there's a problem. As an honourary member of the police force, you'll have access to this area. I'm not sure what the excuse is if you didn't save the cops, but you'll end up here regardless. Team Meteor has destroyed The Grand Stairway. Apparently a bomb was detonated from beneath the stairway, leading the police to find that the inside of the staircase is, in fact, hollow. How odd. Furthermore, some of the officers will tell you that the explosion radius was controlled by the attacker so that it would only destroy The Grand Stairway without damaging surrounding buildings. I would like to take a moment to commend the team who made this game. I feel like it isn't often that NPCs will acknowledge your help and will treat you like someone who's actually helping. The simple fact that we're a member of the police force makes me feel like the NPCs actually recognize and appreciate your efforts so far. I'll repeat this again in the far future. The first house on the left belongs to the Move Deleter. He can make your Pokémon forget any move it's learned. Even Amnesia. Step outside and grab the Super Potion in the rock to the left before entering the second house. If you give the man in here a Sunkern, he'll give you a Pokémon. Currently, I only know of two Pokémon he gives. Feel free to inform me of other Pokémon he gives. Furfrou (Level 1) Tackle, Growl, Refresh OR Mime Jr. (Level 1) ???Barrier, Confusion, Pound, Confuse Ray, Icy Wind, Hypnosis, Nasty Plot, or Tickle *Stantler (Level 1) Me First, Tackle, Megahorn Cryogonal (Level 1) Sheer Cold, Night Slash, Bind, Ice Shard, Sharpen, or Rapid Spin *Note that even if you got Stantler before, it's possible to get it again You can change the way your Furfrou looks if you go to the same salon where you received a Glameow in the Obsidia Ward. Listen carefully. You have the choice of joining the Magma Gang or the Aqua Gang in this game. Should you join the Aqua Gang, you will have two different ways to successfully complete Event: G. Keep in mind that completing Event: G is optional and there are other methods to successfully complete it. In fact, you already have Budew which can be used. I personally have always had a certain affinity to Fire starters and will be joining the Magma team in this playthrough. The following are the Pokémon and item you will receive depending on which team you join. The Pokémon (level 25) and the evolutionary stone you can receive within the next 15 minutes, but the second one (level 30) won't be available for a few hours. Aqua Gang Ponyta (Level 25) Stomp, Flame Charge, Fire Spin, (Low Kick, Hypnosis, or Morning Sun) AND Carvanha (Level 30) Ice Fang, Poison Fang, Assurance, Destiny Bond AND Receive a Water Stone OR Magma Gang Buizel (Level 25) Pursuit, Swift, Aqua Jet, (Fury Cutter, Baton Pass, or Switcheroo) AND Houndour (Level 30) Fire Fang, Odor Sleuth, (Thunder Punch, Sucker Punch, or Nasty Plot) AND Receive a Water Stone You cannot change which gang you join once you do. Something that I've noticed is that the Aqua Gang are almost a parody of the Magma game. I feel as though you were meant to play as the Magma Gang in your first playthrough and the Aqua Team in your second purely because of the references they make to the other and the dialogue they have. I can't document them all, so you'll have to see for yourself. If you played through as Magma the first time and you're using this guide in your second playthrough, I highly recommend joining the Aqua team just to see their dialogue. Anyway, you can join the Magma Gang by heading to the right, entering the back alleyway, and battling the two trainers you find there. You can join the Aqua Gang in about 15 minutes by heading into the Lapis Ward. If you joined the Magma Gang, you'll immediately have access to their alleyway. Inside you can find the following Pokémon: Magma Gang Alleyway Stunky (25%) Trubbish (20%) Poochyena (20%) Yungoos (20%) Espurr (13%) Mightyena (2%) If you joined the Aqua Gang, you can continue Event: SP in North Obsidia. As you move to the right, you'll find a Magma Gang member who had your Pokémon. He'll be steamed that his Pokémon was swiped by one of your compatriots. His team is powerful, so you might want to wait until you're around level 30 or higher to battle him. When you defeat him, you'll be able to talk to an Aqua Gang member in the Lapis Ward who will inform you that your Pokémon was sold in 7th street. You can't access 7th street for a few hours, so put the event out of your mind for now. We'll talk about the side quest you can complete for either gang once we encounter the Aqua Gang hideout. I'll also discuss Event: SP for the Magma crew later since talking to that same Magma member will only inform you that your Pokémon was stolen by an Aqua member in the Lapis Ward. The final thing to note is that if you approach the nightclub at night, you can talk to D.J. Arc. You may have heard him on the television if you check it regularly. He'll tell you that the nightclub is only accessible if you're an elite member or something along those lines. That means you can't enter. Now that everything else is sorted out, head left into the Lapis Ward. Lapis Ward The Lapis Ward map is unavailable at the time of posting this guide. In fact, it doesn't seem that any maps for any future areas are available. That means I'll have to describe things in detail and use more pictures going forward. In the first house you can enter, you'll find a lady with a sick husband. Her husband has fallen into a coma and she's too afraid to try the one thing that might help him. You can't do anything for her now, so exit the house. At the bottom left is the Bicycle Shop. The rock just outside the door contains a Pokéball. If you go inside, you'll find that a bike costs more money than you can hold in the game. The house just behind it is Ms. Craudburry's house. She'll put you in your place for charging into random people's houses and demand you leave. If you talk to the other residents of the Lapis Ward, you'll find that many of them will treat you in the same manner. Lapis Ward is the richest ward in Reborn which means it houses quite a number of snobs. As you stroll through the city, many of the high class citizens will request to battle with you. Some of them will also prevent you from going towards the gym since that's where Corey landed. In the center of the ward is a large building. There's a girl with purple pink purpink hair standing in front of it, but don't talk to her yet. Instead, go to the left side. You'll be blocked from progressing by two people battling. They'll be right to an apartment complex that you don't have access to. Remember this building. For now, let's call it Building 7. Go ahead and talk to the girl in front of the large building. You'll overhear her talking to herself. She'll tell her sister to be strong since today is her birthday and she'll be able to leave. Once she notices you, she herself will leave. Immediately to the right of the large building is the Aqua Gang alleyway. If you've already joined the Magma Gang, they'll tell you to leave. They won't fight you and you're sensible enough not to try and fight an entire gang by yourself, so there's no progressing here. If you wish to join the Aqua Gang, you can do so now. Here are the Pokémon you can find in this alleyway. Aqua Gang Alleyway Stunky (25%) Trubbish (20%) Alolan Rattata (20%) Alolan Meowth (20%) Espurr (13%) Alolan Raticate (1%) Alolan Persian (1%) Now, you might ask me if it's possible to run back and forth in the small space the alleyway allows you and find the Pokémon in each individual section. The answer is yes. However, there is an event Pokémon that only the Aqua Gang can currently reach. On windy nights, a Murkrow can be found perched on the wall in the back of the alleyway. Magma Gang members will be able to access it later. Catching Murkrow is one method you can use to complete Event: G assuming it knows Perish Song. For those of us who joined the Magma Gang, we will be able to get Murkrow before Event: G occurs, so don't worry. So far, if you've joined the Aqua Gang, you'll have 3 different ways to complete Event: G. Carvanha will be the easiest way, Murkrow would be the second easiest, and Budew would be the most difficult. If you joined the Magma Gang, you won't have Carvanha. There is one final Pokémon we can get to more easily complete Event: G, but it's not guaranteed that the Pokémon will be there. I should mention that you don't have to get these Pokémon to complete the event, but I recommend you have at least one of them to make it easier. Directly to the left of the PokéMart is an empty house. If you talk to the leader of your respective gang, he'll explain that he's a modern day Robin Hood in that your group steals from the rich and gives to the poor. However, *insert enemy gang here* is a bunch of greedy thieves. Tonight, you'll be stealing a Pokémon that they'll also be trying to steal. If you enter this home at night, you'll find your gang members waiting for you. They'll move out and attack Ms. Craudburry. She'll yell at you lot while one of your team members holds her aside, so enter the back of her house. You'll have to fight off two of the lowlife thugs from *insert enemy gang here*, so make sure you have Pokémon that can oppose them. Remember, you can leave and come back if you need to heal your Pokémon. After fighting off the last enemy, grab the Pokémon and the evolutionary stone. Again, these rewards depend on which team you joined. See the ones I listed up above. Go back to your team's alleyway and talk to your boss. He'll congratulate you on your success. Given that you got a Fire-type/Water-type Pokémon and you're part of Team Aqua/Magma, they own't have any use for it. You're free to keep the Pokémon while they lay low for a while. If you go back to Ms. Craudburry's house, you'll find that she filed a report with the police. She'll try to accuse you of the villainous act you just committed, but the police officer will inform her that you're an honourary member of the police force. Since she's such a rude individual, the officer won't believe her. Once you exit her house, he'll come back out and offer you a bike voucher for your troubles. You can redeem this at the bike shop to get a bike. Near the top left of the ward is a green building known as the Sweet Scent Flower Shop. Talk to the lady in the green dress to receive a Wailmer Pail. I recommend you also buy a Floral Charm and some honey to get some optional Pokémon later on. They aren't necessary for any event, but the more Pokémon you have, the better your chances at the lottery. I also just like collecting as many as I can. If you talk to the wandering lady with green hair, she'll tell you that she's the owner of the Budew that leaped into your arms in the Peridot Ward. I don't know what she says if you didn't get the Budew, but she'll tell you to keep it since it's clearly too hyper to be kept as a house pet. Finally, talking to the lady behind the counter in the back will allow you to play another tile game for free. Should you succeed, you'll be given a Spritzee. Here's the completed puzzle: Spritzee (Level 15) Round, Fairy Wind, Fake Tears, Play Nice If you wanted to, you could also find the solutions to the tile puzzles by going to the folder where you have Reborn saved and following this file path: Graphics > Pictures > Tile Puzzle. It helps when you know what the completed puzzle should look like, especially if you don't know these Pokémon. Moving on, the rock in the top left of the ward has a Blue Shard. These shards will be used as currency later in the game, so make sure you collect them now. If you make your way right from here, there's a move tutor in a house that will teach your Pokémon either Fire Pledge, Water Pledge, or Grass Pledge. These moves can transform terrains, so consider picking one up if you'd like. You've finished all the sidequests at the moment, so let's continue with the story. Make your way to the back right of the ward and talk to Shelly to continue. If you picked up the Kricketot in the Peridot Ward, you'll recognize her. She's one of the young gym leaders in Reborn. She and Victoria will be staring at Corey's body. Shelly will begin to break down when she realizes who the corpse was. On the rooftop nearby, Aster and Eclipse from Team Meteor will appear. They'll loudly confirm the death of Corey and threaten you to stay out of their business. As a final note, Aster will mistakenly tell you that Team Meteor was behind the destruction of The Grand Stairway and that there's something underneath it. Shade will appear while this happens. Shade is a sort of ghost that somehow functions as the gym leader for Ghost-types in Reborn. It's at this point you might begin to question why the Reborn League is how it is, but we'll get into that in a bit. Shade will take away the body and the blood from the gym. He'll then vanish. Follow the girls into the gym and head upstairs. You'll enter Shelly's room. Talk to Victoria. She'll tell you she came to challenge Shelly but Corey landed just as they were about to begin. She'll also tell you that Shelly is 12. As the Pokémon anime and future portions of the game will inform you, gym leaders are meant to act as mayors of each town or ward. They're responsible for their citizens which is an enormous amount of pressure to place on an individual. This is why a 12 year old, no matter how smart she is or how strong her monsters are, should not be a gym leader. Strength shouldn't be enough to run a ward. As you'll later learn, she's also a child prodigy whose intelligence is at the college graduate level. She'll already be ostracized from her peers due to her intelligence. Making her a gym leader will only make that worse. Well, let's not get too caught up in the story. Victoria will tell you she's heading to The Grand Stairway and will ask you to join her. Once you get there, you'll find that a ladder has been placed leading into the stairway. Use the ladder to climb inside. You'll find that Team Meteor has captured Victoria. Rather than trying to fight both of you at once, they cleverly decide to lock her away and use her as bait to take care of you. You don't have a choice either way, so you'll need to follow after them. You might consider bringing some Repels with you since Digletts have the ability Arena Trap which will force you to fight them. Head down the ladder. You'll enter what I will refer to as basement floor 1. Here are the list of Pokémon you can catch on each level of The Grand Stairway. The Grand Stairway Basement Floor 1 Sandshrew (30%) Graveler (21%) Noibat (20%) Diglett (10%) Geodude (10%) Chingling (8%) Dunsparce (1%) Basement Floor 2 Sandshrew (30%) Graveler (25%) Geodude (15%) Chingling (10%) Diglett (10%) Unown (5%) Dunsparce (5%) Basement Floor 3 Unown I believe you can also find an Alolan Sandshrew in this area, but I don't remember entirely. If you can't find it here, you can find it elsewhere. Someone let me know if they find one here, please. From basement floor 1, head directly south into basement floor 2. Now that you're in basement floor 2, there are four paths you can take. I will call them paths 1-4 from left to right. Save for the Ground Gem and Super Repel you can find by following it, path 1 is useless. It takes you back up to basement floor 1. Path 2 can be accessed via path 3, so ignore it for now since you'll come here eventually. Path 4 has a Focus Sash in this rock: Make sure you pick up that Focus Sash. Completing Event: G using any of my methods entirely revolves around using this item, so make sure you do not use it. Furthermore, path 4 will lead you down a ladder. As soon as you enter the new location, head to the cavern on your right. In here, battle a Pokémon that destroys the crystals in battle. An example would be battling a Graveler who uses Bulldoze. This will break the crystals on the field and in this room which will allow you to collect the item at the top right. It's information about a Crystal Cavern field. Exit the crystal cavern and grab the Star Piece in the rock on the left. Go up the ladder and grab the Magical Seed on your right. Since we don't have Rock Smash, we can't free the Lunatone/Solrock on the left side. Even though we can't use Rock Smash, we can teach it to a Pokémon. If you go back through path 2, you can talk to a man who will give it to you, but we'll do that in about 10 minutes. The rock just above the Lunatone/Solrock has a Heart Scale. Go up the ladder and grab the Ability Capsule on your left. Just before you leap off the ledge, the rock on your left will have an item for you as well. Leap and you'll find that you're on basement floor 1. Head back to basement floor 2. As you've guessed, the path to continue the story is the third one, so go through there. Grab the X Special in the rock before the ladder and descend. There's a light shard at the bottom of the stairs which should let you know what's about to occur. The lack of music should as well. Grind on the Unown here if you need to gain some levels. Heal, save, and move forward. You'll encounter the boss of Team Meteor. Not only will he not look at you, but it seems he hasn't bothered to learn your name either. He'll inform you that the infection known as the city Reborn was built over the holy lands. Meteor Boss will tell you the door has four rings of different colours. You've already learned of Ruby which stands for pain. The ring Corey had was the Ruby Ring. When you bring all four rings together, the sacred power of Reborn will ignite. Beauty will be restored to the world. He will tell you that he's allowing you and Victoria to go free. He'll also allow you to do as you please with Aster and Eclipse. In exchange, he wants you to spread word of the holy lands below Reborn. With that, he'll leave. To the left are Aster and Eclipse. Victoria will team up with you to fight both of them in a double battle. Meteor Grunts Aster & Eclipse Super Potion x2 Field: Crystal Cavern Lunatone (Level 29) Ability: Levitate Item: --- *Stats: HP 97 / Atk 42 / Def 48 / SpA 65 / SpD 60 / Spe 51 Rock Slide, Psywave, Hypnosis, Rock Polish Solrock (Level 29) Ability: Levitate Item: --- *Stats: HP 97 / Atk 65 / Def 60 / SpA 42 / SpD 48 / Spe 51 Rock Slide, Psywave, Fire Spin, Rock Polish Lycanroc [Midday] (Level 30) Ability: Sand Rush Item: --- Stats: HP 94 / Atk 83 / Def 53 / SpA 42 / SpD 53 / Spe 89 Accelerock, Bite, Fire Fang, Quick Attack Lycanroc [Midnight] (Level 30) Ability: No Guard Item: --- Stats: HP 100 / Atk 91 / Def 59 / SpA 42 / SpD 59 / Spe 63 Bite, Thunder Fang, Rock Tomb, Howl *Due to variations in nature, stats my alter Victoria will be released and the grunts will escape. She'll tell you that she's unharmed but that the Meteor Boss had told her about the gate as well. She'll then go check on Shelly. Now that we're done here, it's time to get the rest of the items. Go back up the ladder and leap over the ledge on your left. The left path splits into two stairways. The one on the left will lead you to a man who will give you HM7 Rock Smash. If you back track to this point: you can find TM63 Embargo. The path on the right will lead you back to the top of the cascade of ledges, so you may now exit The Grand Stairway. Go back to Shelly's room in the gym and you'll find Victoria. She'll express concern for Shelly who is still affected by Corey's suicide. She'll mention that there's a psychiatrist in the ward who has gained notoriety in the ward. His name is Dr. Connal. If you read the tombstones in the Beryl Cemetery, you may have noticed that one of them had the name Elizabeth Connal. Just an interesting connection I thought I should make. Victoria will ask you to find the doctor because she doesn't want Shelly scarred for life. Head outside and go towards the large, white building in the center of the ward. When you try to enter, a girl with vibrant pink hair will bump into you. She'll rejoice at her newfound freedom and quickly leave. Let's try this again. Enter the building. You'll be greeted by a girl with pig tails. She'll inform you that the girl who just left is named Laura. She'll also mention that you're glowing. This is Anna. She seems to be a psychic of sorts as she sees things in people that tell you about them. She'll introduce her and her brother's Pokémon dolls as Nomos and Nostra. Neither of them are alive, but Anna will speak of them as though they are. Her twin brother, Noel, is over on the couch. Try not to confuse his name with Nostra or Nomos as I always do. Charlotte, the girl with pink hair and purple highlights, is described as a girl with burn scars. In actuality, she doesn't have any. Charlotte will inform you that Laura is her sister and a member of the Elite Four. Charlotte and Noel also function as gym leaders. Noel will try to mention Anna's position but is swiftly cut off. You're finally told that this building is an orphanage. Because Laura is now 18, she is allowed to leave. Discharge from the orphanage only happens should the doctor who runs it releases you or you turn 18. According to the residents, the doctor conducts shock therapy with his Electric-type Pokémon. Anna tells you that previous patients probably died during shock therapy and that she hears a voice whenever the doctor is around. Remember what Victoria said about Dr. Connal? She referred to him as notorious. Look up the definition of that word if you don't know it. When Anna learns that you're looking for someone to help Shelly, she'll quickly change moods. She'll instruct you not to bring Shelly here at all costs. In comes the doctor. He'll introduce himself as Dr. Sigmund Connal and ask what you're here for. Anna will cover for you, claiming that you're here to challenge the gym leaders nearby. The doctor will ask one of his orderlies to test your strength. Like the doctor, many members of his staff use Electric-type Pokémon. Trounce them and the doctor will state that there's heavy reconstruction going on in the orphanage and it isn't a suitable place to fight. Nor can he allow the gym leaders to leave. If you recall, near the beginning of the story there was a lady in The Grand Hall who mentioned that someone was stopping her from battling some gym leaders. This is who's to blame. Anna will take the opportunity to force you out of the orphanage. As you're forced out, she'll heavily advise you find some other way to help Shelly. She'll tell you to have Shelly look out for Heather. Anna locks the door behind you, so head back to the gym and share what you've learned. Speak to Shelly and she'll realize that Anna is right. Heather is the one who will be most hurt by this. She'll offer to provide the gym battle Victoria was looking for, but Victoria will decline given the recent events. Shelly will leave to take her place at the gym so that you can claim your badge. Go downstairs and enter the gym proper. Victoria will descend and try to stop you because she's concerned that Shelly's stability is more important than your gym badge. Apprentice Victoria Super Potion x2 Pancham (Level 30) Ability: Scrappy Item: --- Stats: HP 86 / Atk 66 / Def 48 / SpA 34 / SpD 40 / Spe 37 Arm Thrust, Slash, Circle Throw, Work Up Kirlia (Level 31) Ability: Trace Item: --- Stats: HP 74 / Atk 36 / Def 36 / SpA 55 / SpD 49 / Spe 46 Magical Leaf, Psychic, Double Team, Calm Mind Pikachu (Level 32) Ability: Lightning Rod Item: --- Stats: HP 71 / Atk 47 / Def 37 / SpA 44 / SpD 44 / Spe 69 Fake Out, Nuzzle, Electro Ball, Nasty Plot Torracat (Level 33) Ability: Intimidate Item: --- Stats: HP 100 / Atk 82 / Def 52 / SpA 63 / SpD 52 / Spe 78 Bite, Fire Fang, Scratch, Lick Victoria will ask that when you win, you do so gently for Shelly's sake. Enter the gym. The puzzle here is actually pretty challenging and I find that every time I get to this part of the gym, I have to look up a guide to solve it. The trainers here will give you a hint on how to complete it and the monitors will display the colours of the bookcases they control. Your objective is to activate all the computers in the back before activating the two in the front. Let's call the two monitors in your current location monitors 1 and 2 from left to right. Then let's call the monitors in the back of the gym monitors 3, 4, 5, and 6. Remember that you can exit and re-enter the gym to reset all the monitors. Here is the key to the puzzle: 2, 4, 1, 3, 1, 2, 5, 6, 1, 2. If you leave the gym at this point, the puzzle own't reset, so make sure you're healed up. Go into Shelly's room and go to the right. There will be a final monitor here. Press it and go talk to Shelly, but not before grabbing the Leaf Stone below her. She'll mention that her brother (Bugsy) is a gym leader in the Johto region, though he refuses to acknowledge her. You'll be fighting Shelly in a double battle on a Forest Field. Bookworm Shelly Hyper Potion x2 Field: Forest Field Illumise (Level 32) Ability: Prankster Item: Damp Rock Stats: HP 88 / Atk 35 / Def 57 / SpA 61 / SpD 63 / Spe 63 Struggle Bug, Dazzling Gleam, Confuse Ray, Rain Dance Masquerain (Level 31) Ability: Intimidate Item: Silver Powder Stats: HP 89 / Atk 51 / Def 48 / SpA 64 / SpD 60 / Spe 59 Struggle Bug, Icy Wind, Bubble Beam, Energy Ball Anorith (Level 32) Ability: Swift Swim Item: Telluric Seed (+1 Attack Stage and applies Spiky Shield) Stats: HP 77 / Atk 79 / Def 44 / SpA 33 / SpD 44 / Spe 60 Aqua Jet, Rapid Spin, Knock Off, Rock Slide Araquanid (Level 32) Ability: Water Bubble Item: Damp Rock Stats: HP 92 / Atk 56 / Def 70 / SpA 44 / SpD 96 / Spe 38 Bug Bite, Bubble Beam, Aurora Beam, Rain Dance Yanmega "Heather" (Level 33) Ability: Speed Boost Item: --- Stats: HP 104 / Atk 53 / Def 66 / SpA 94 / SpD 46 / Spe 72 Struggle Bug, Giga Drain, Air Cutter, Ancient Power Volbeat "Bugsy" (Level 35) Ability: Prankster Item: Leftovers Stats: HP 105 / Atk 63 / Def 79 / SpA 53 / SpD 79 / Spe 79 Struggle Bug, Dazzling Gleam, Moonlight, Tail Glow I've struggled more with Shelly's gym than any other gym so far. In previous episodes, the telecom warned you about Shelly's Yanmega being the ace of her team. However, that wasn't my issue. It took me far too long to realize why the Rain Dance seemed to last forever and why the Anorith was so fast despite the fact that my Pokémon should have been faster. It's vitally important that you don't allow Illumise to set up Rain Dance. No matter how fast your Pokémon are, it somehow manages to always be faster, but only when it's trying to use Rain Dance. If you have a Water-type Pokémon leading off, her Illumise won't use Rain Dance for fear of making your Pokémon more powerful. KILL IT. Make sure her Araquanide doesn't use Rain Dance either. Without Rain Dance, Anorith should be too slow to hurt you. KILL IT TOO. I can't tell you how cathartic it was to finally realize what I had to do to destroy that thing. Did you realize its eyes aren't the red patterns on its skull? It's a goofy looking creature and I hate it because it was more powerful than my entire team. If you're still struggling, try leveling your starter to level 36 to evolve it before using a Common Candy so that its level drops back to a manageable one. You can transform the field with several fire-type moves, but I didn't need to use a Fire-type to defeat her. As stated before, Spearow evolves into Fearow who has the powerful Flying-type move Ariel Ace. The Blitzle that you could have caught can evolve into Zebstrika which knows Flame Wheel and Spark. These two moves are super effective against a large majority of Shelly's team. After making Anorith extinct once more, Shelly will explain the reserve leader system. When a gym leader retires, a reserve leader will take over. Now that Corey's gone, you'll need to inform Ame of what happened so she can contact the reserve Poison-type leader. She'll also reward you with TM76 Struggle Bug and the Cocoon badge. Now Pokémon level 40 and below will listen to you. You may have noticed that when you were going to fight Corey, Ame told you that the badge you receive won't increase your level cap. Ignore her. This was true in previous episodes but has been changed since. In my opinion, this was for the better. It was annoying going through a large portions of the game while being stuck at a specific level. Flip off Shelly, flip off her stupid, dead Pokémon, and leave.


-
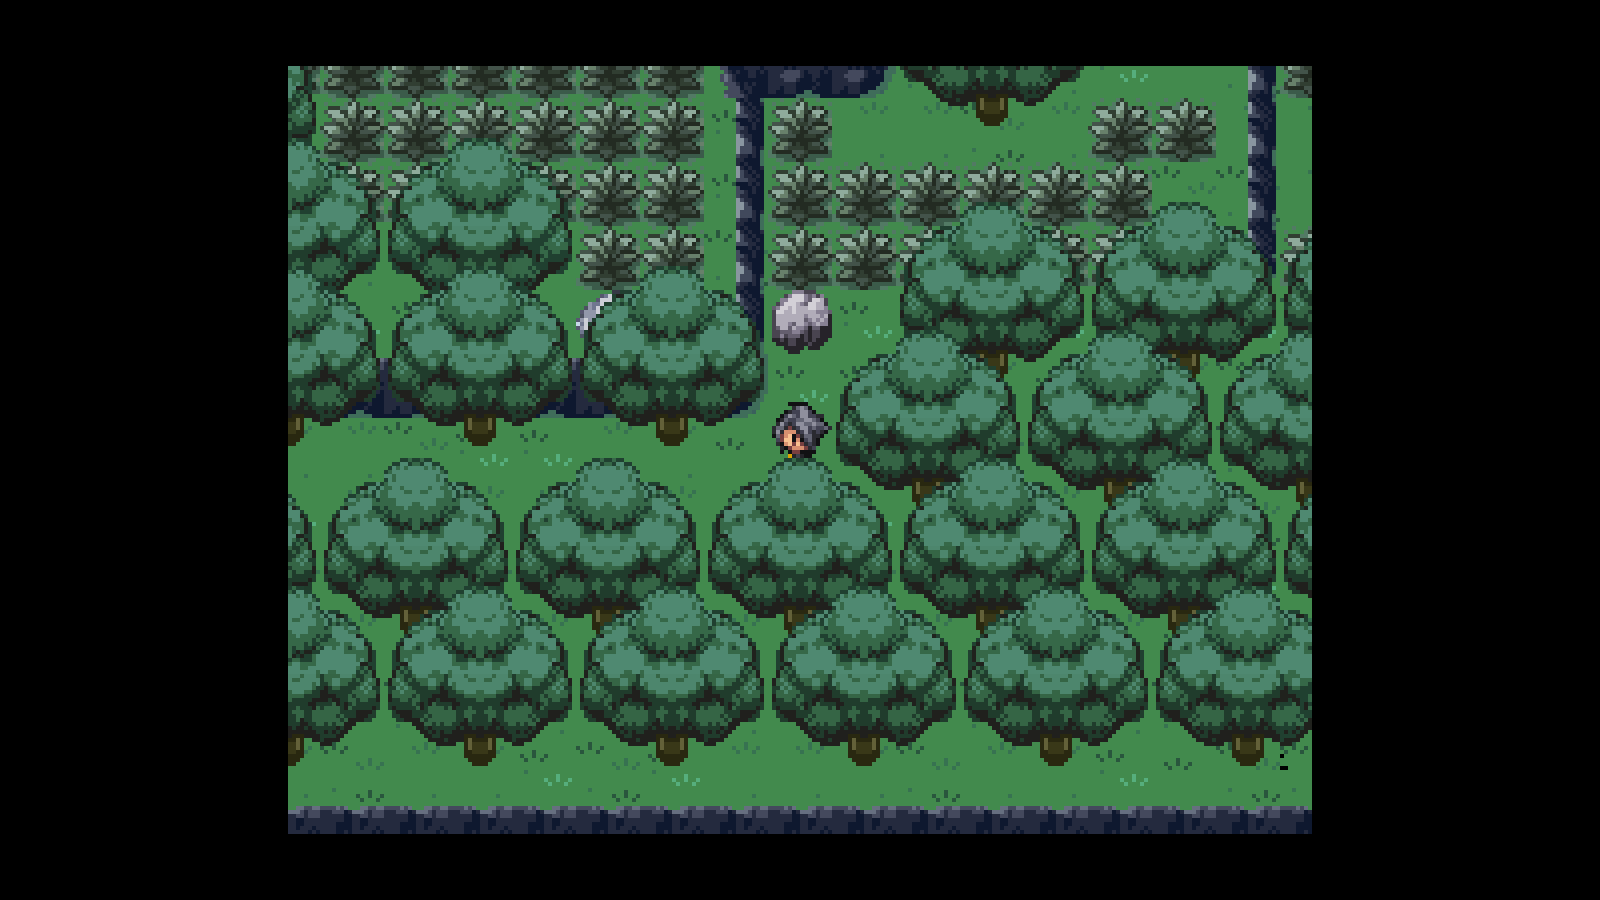
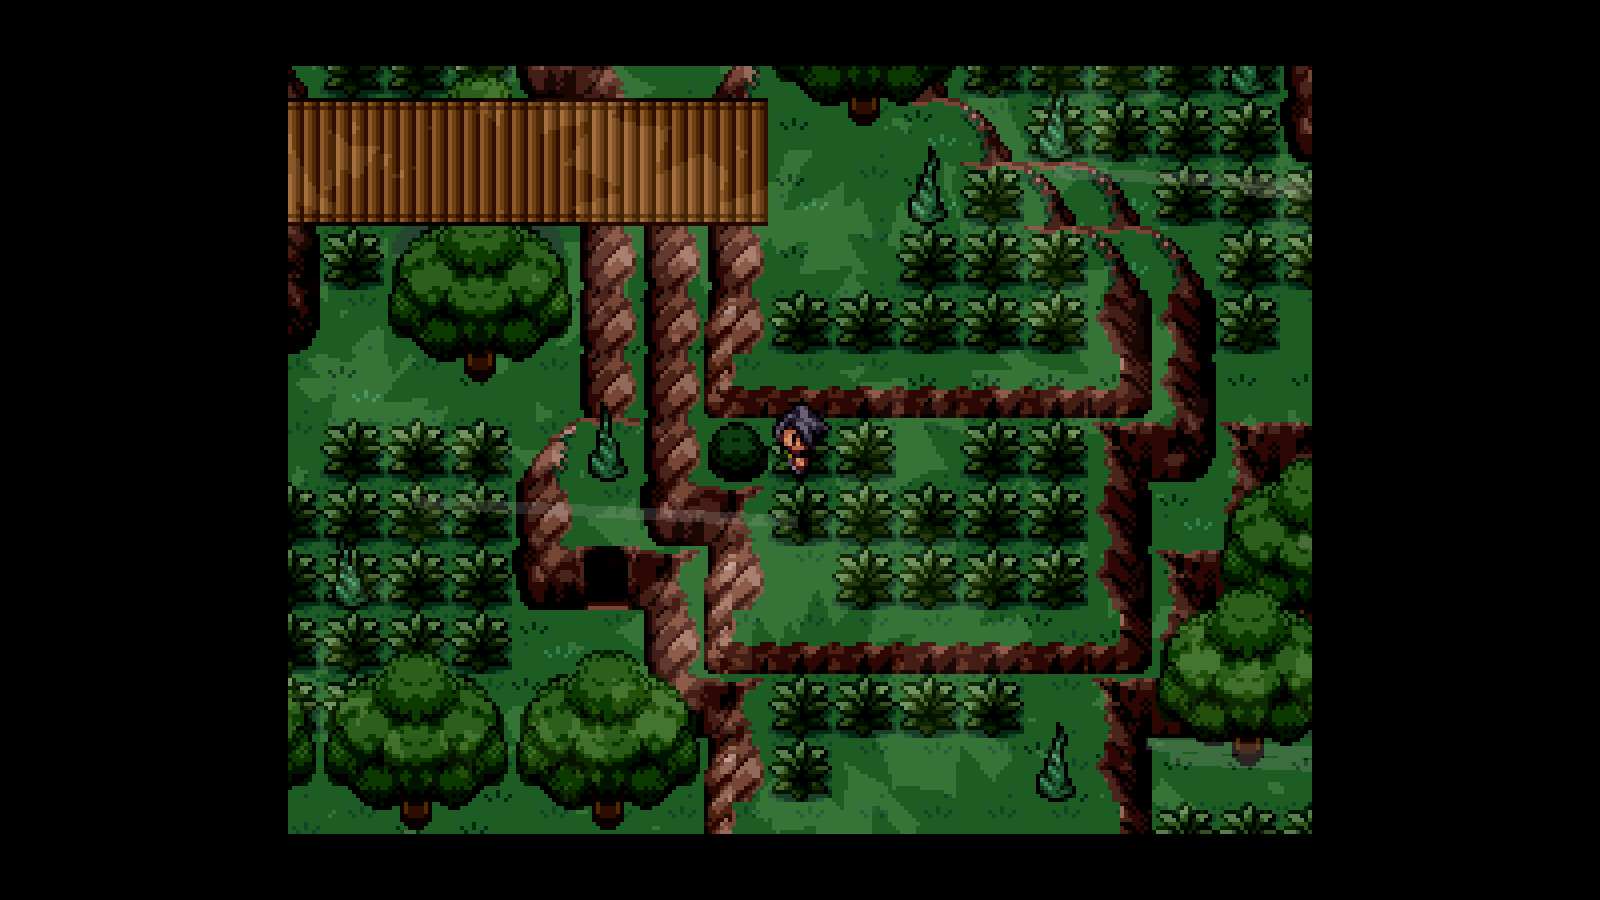
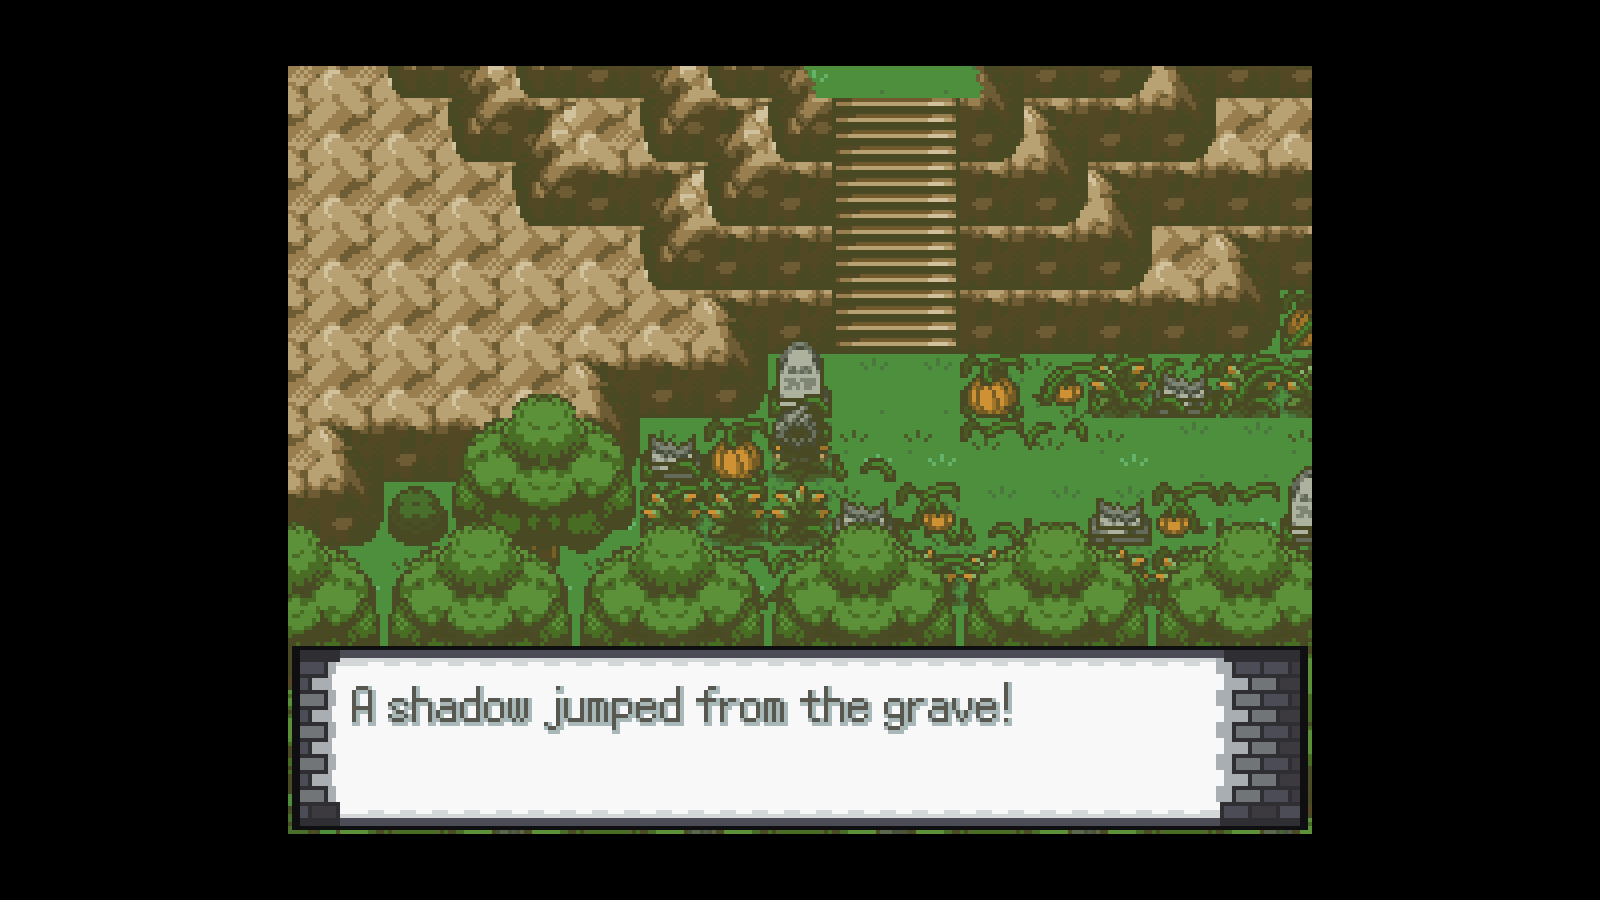
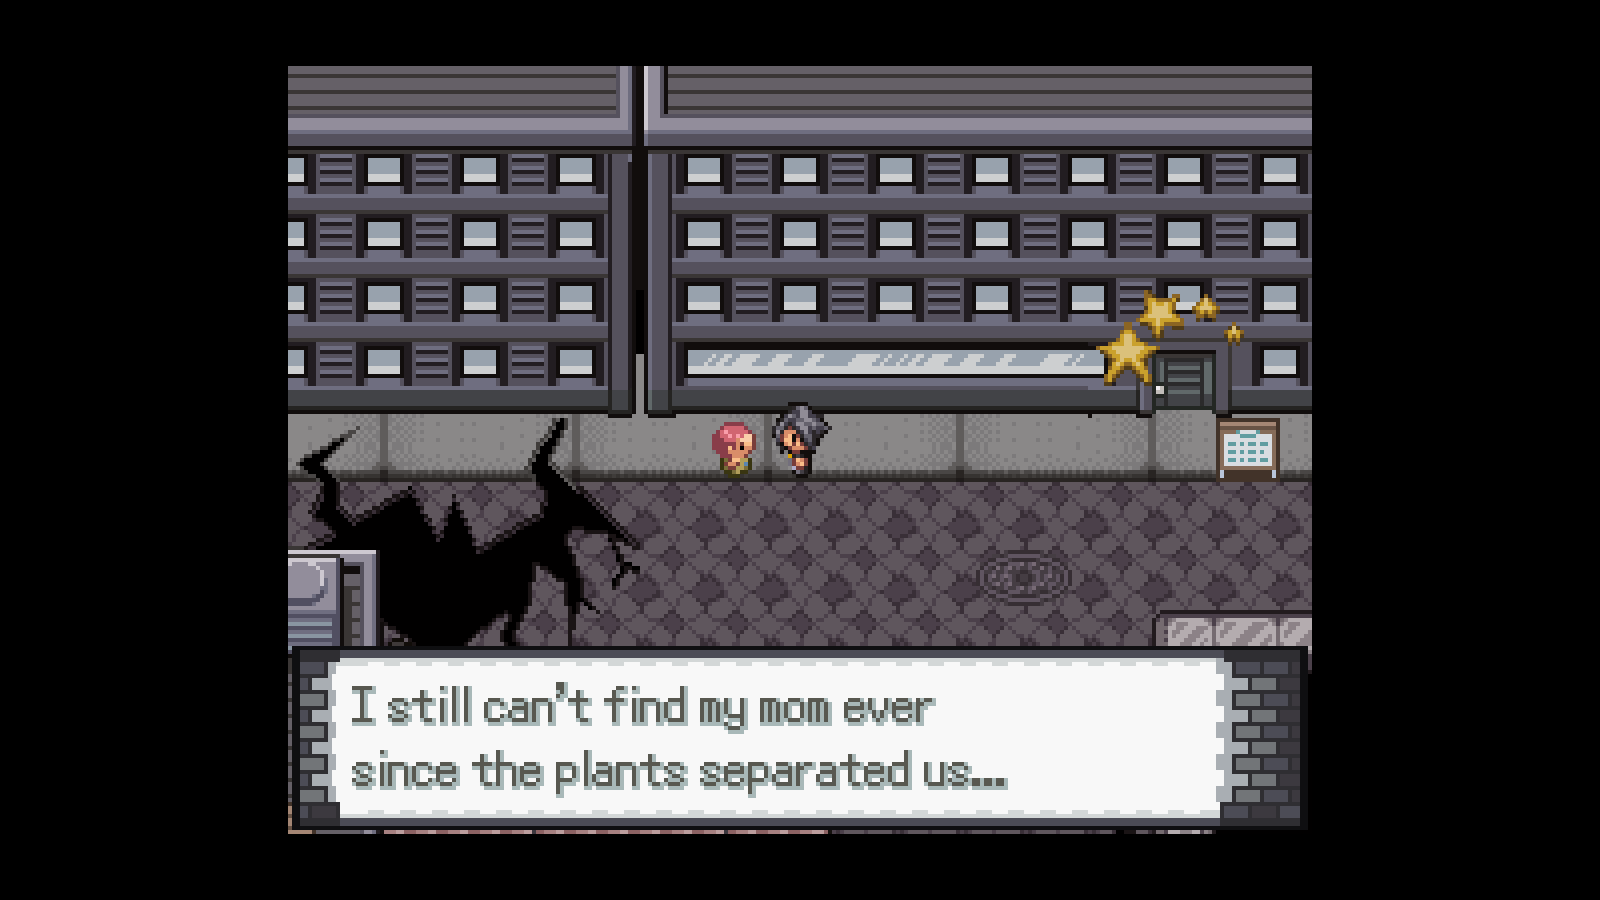
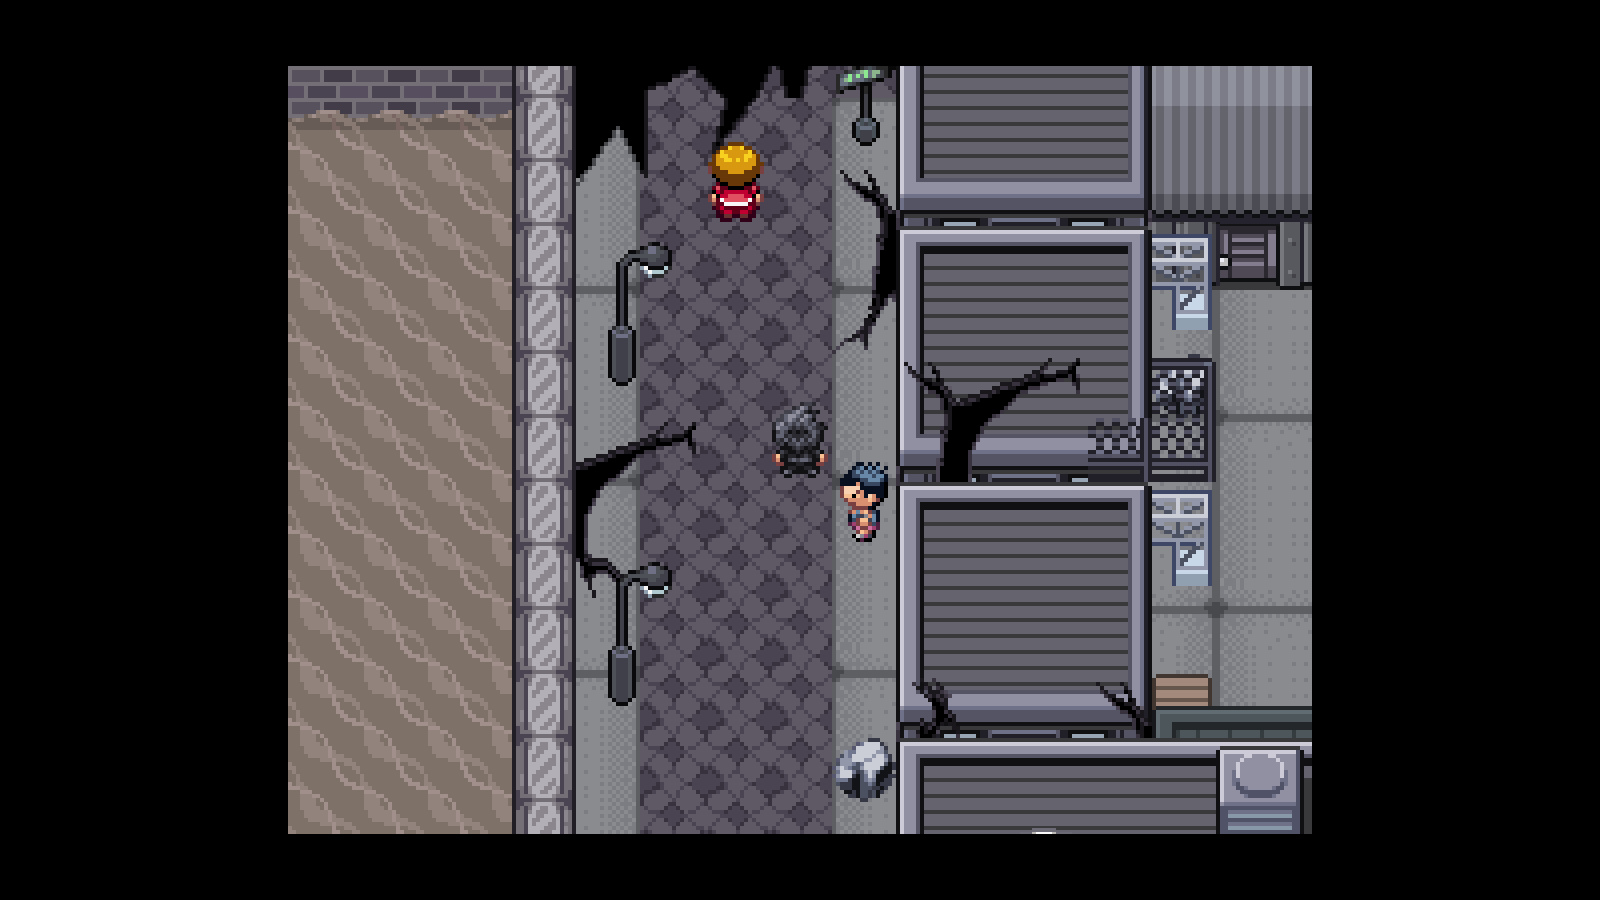
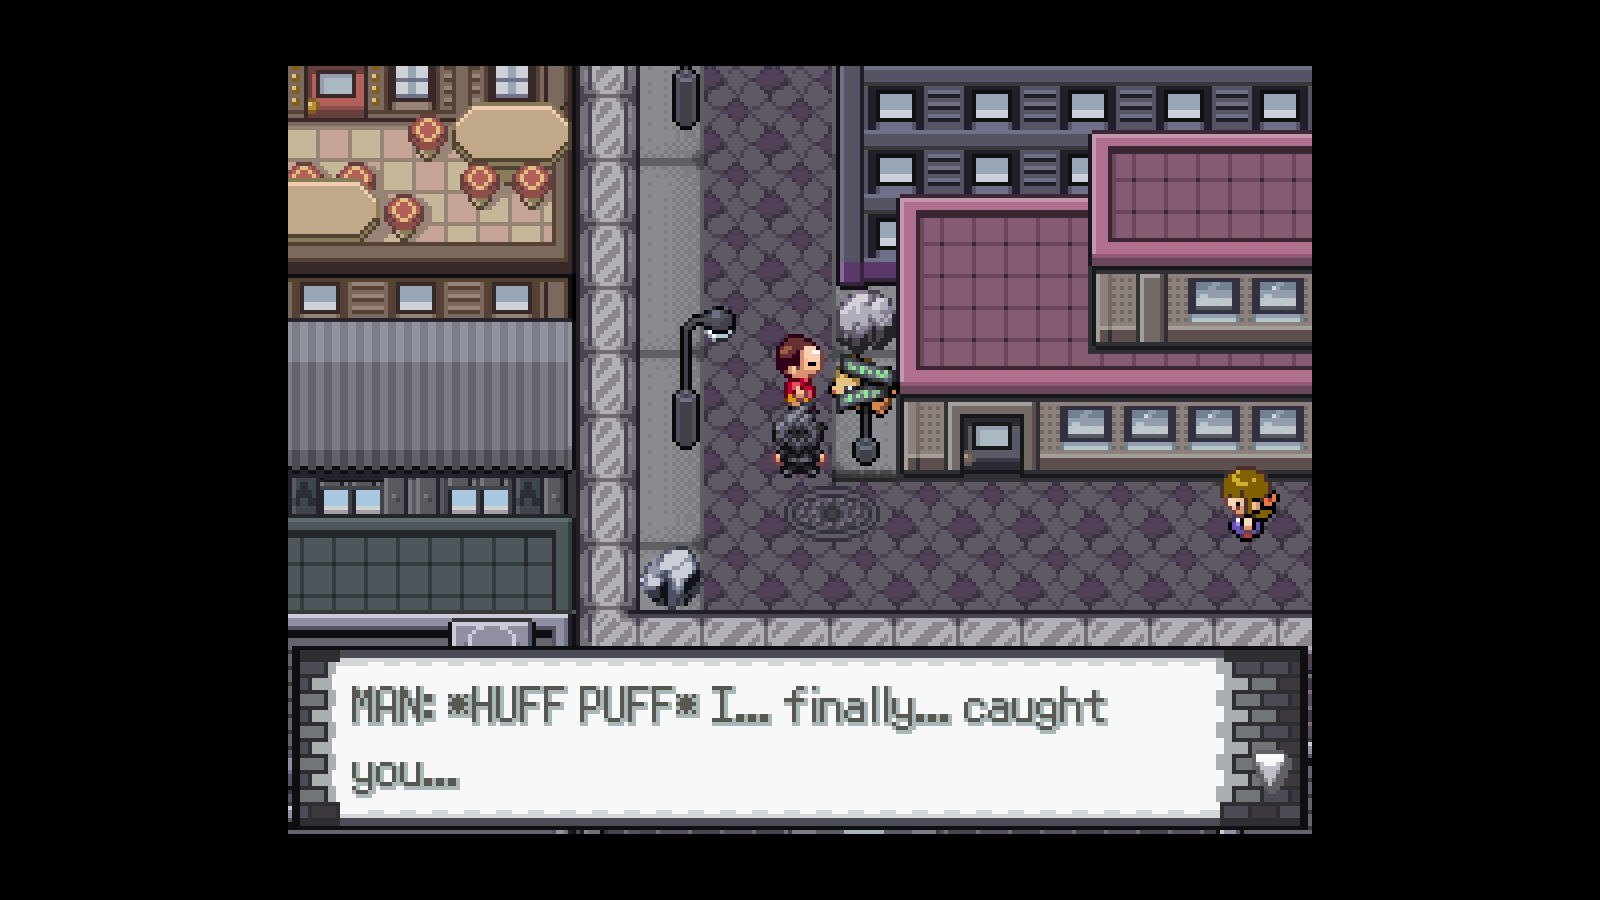
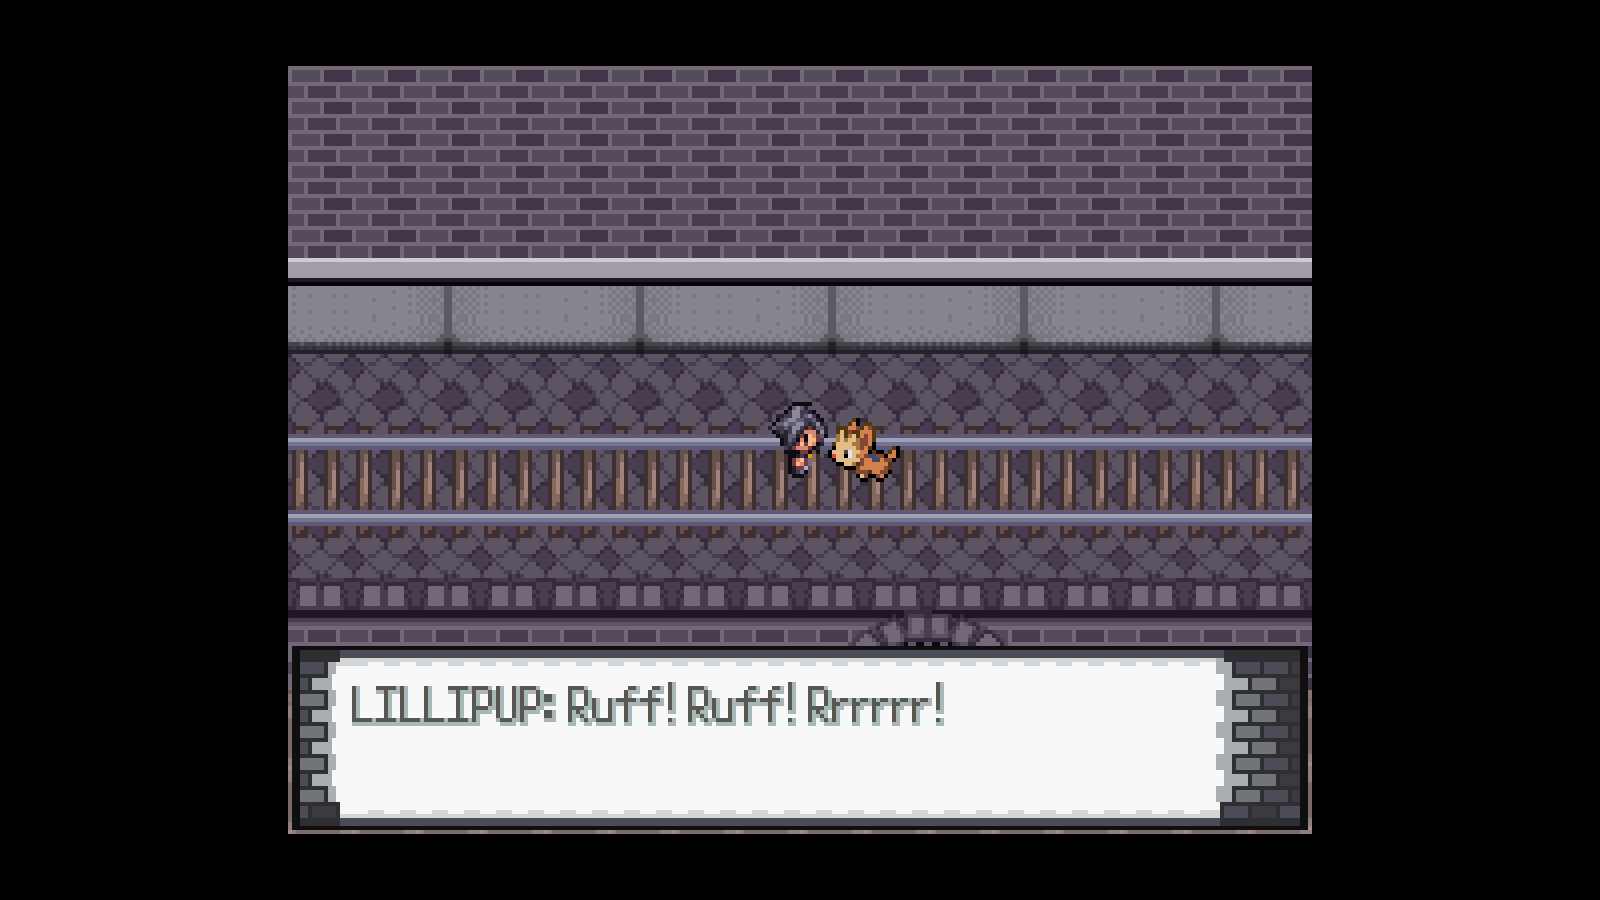
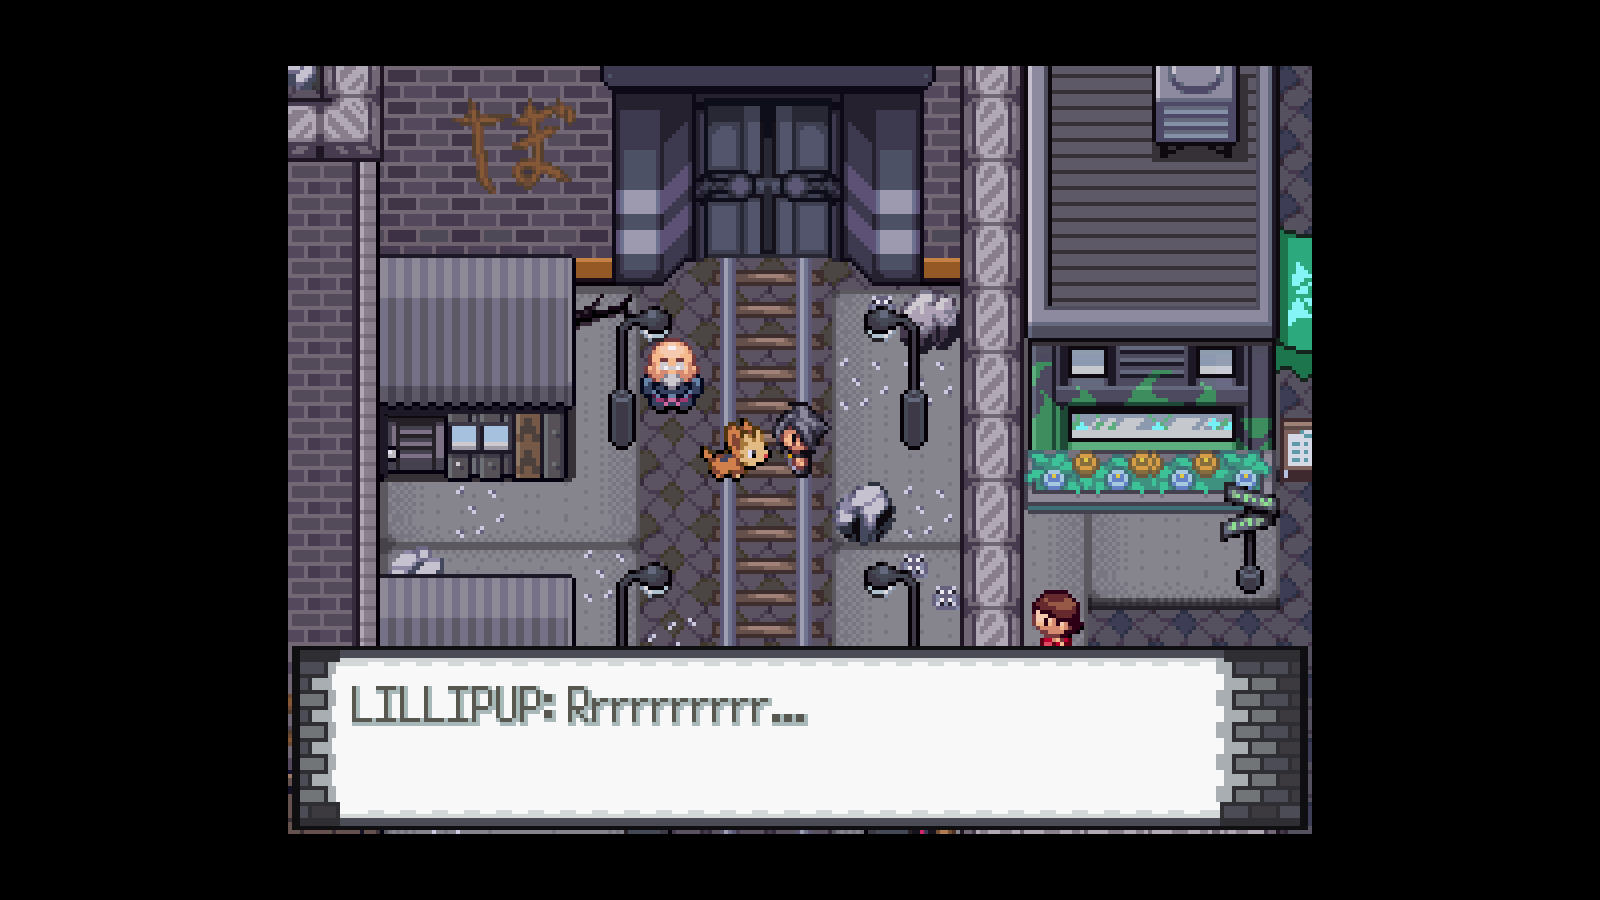
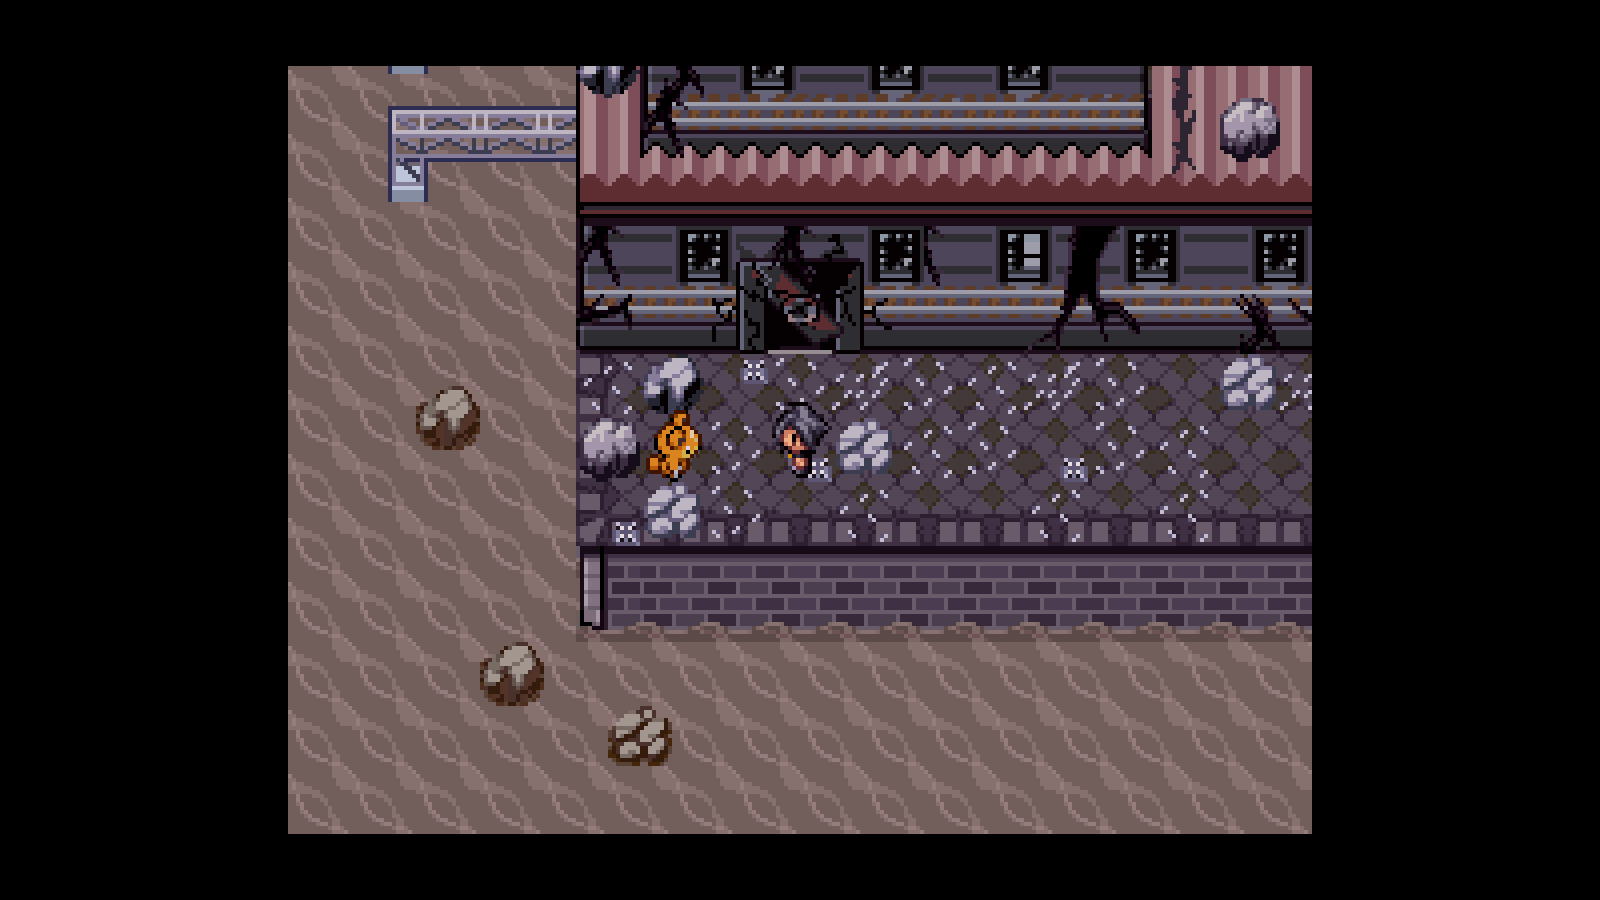
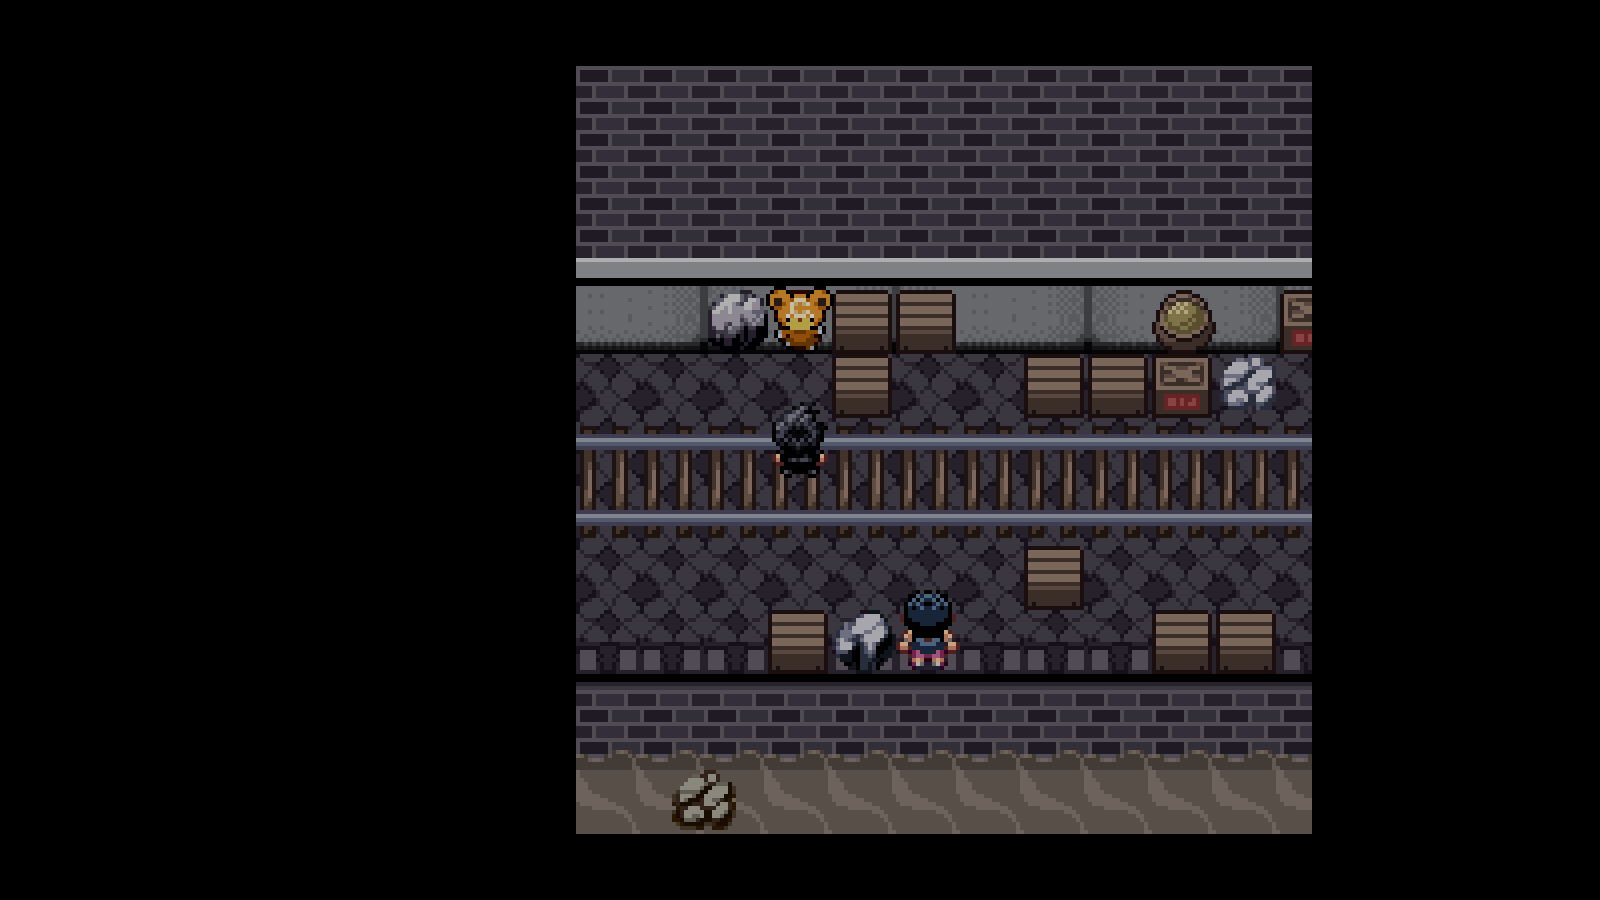
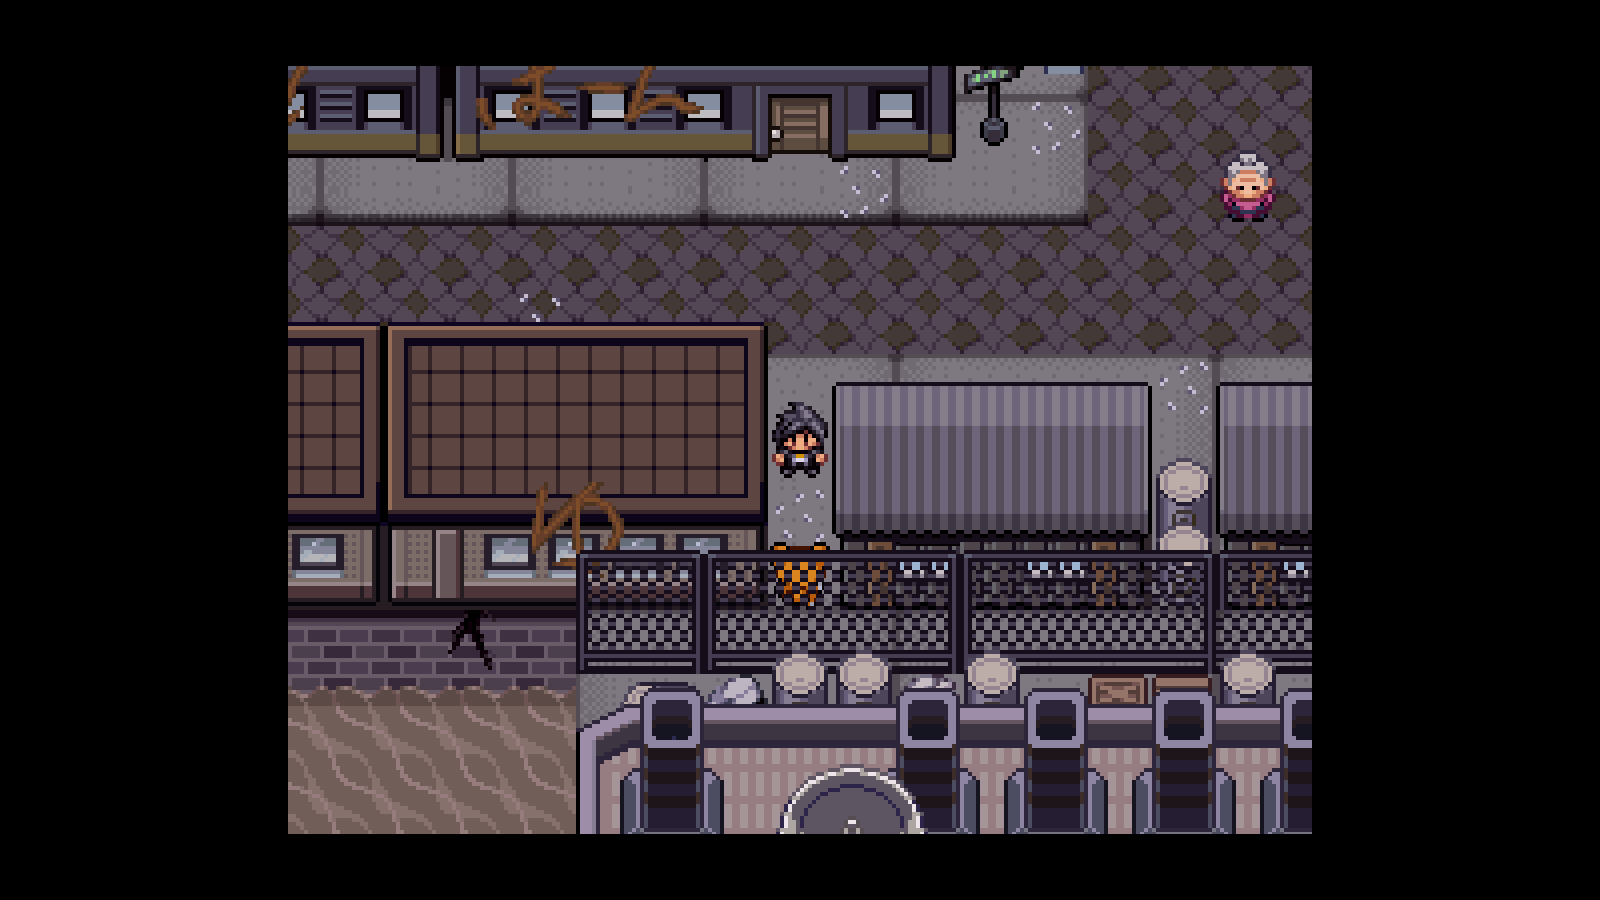
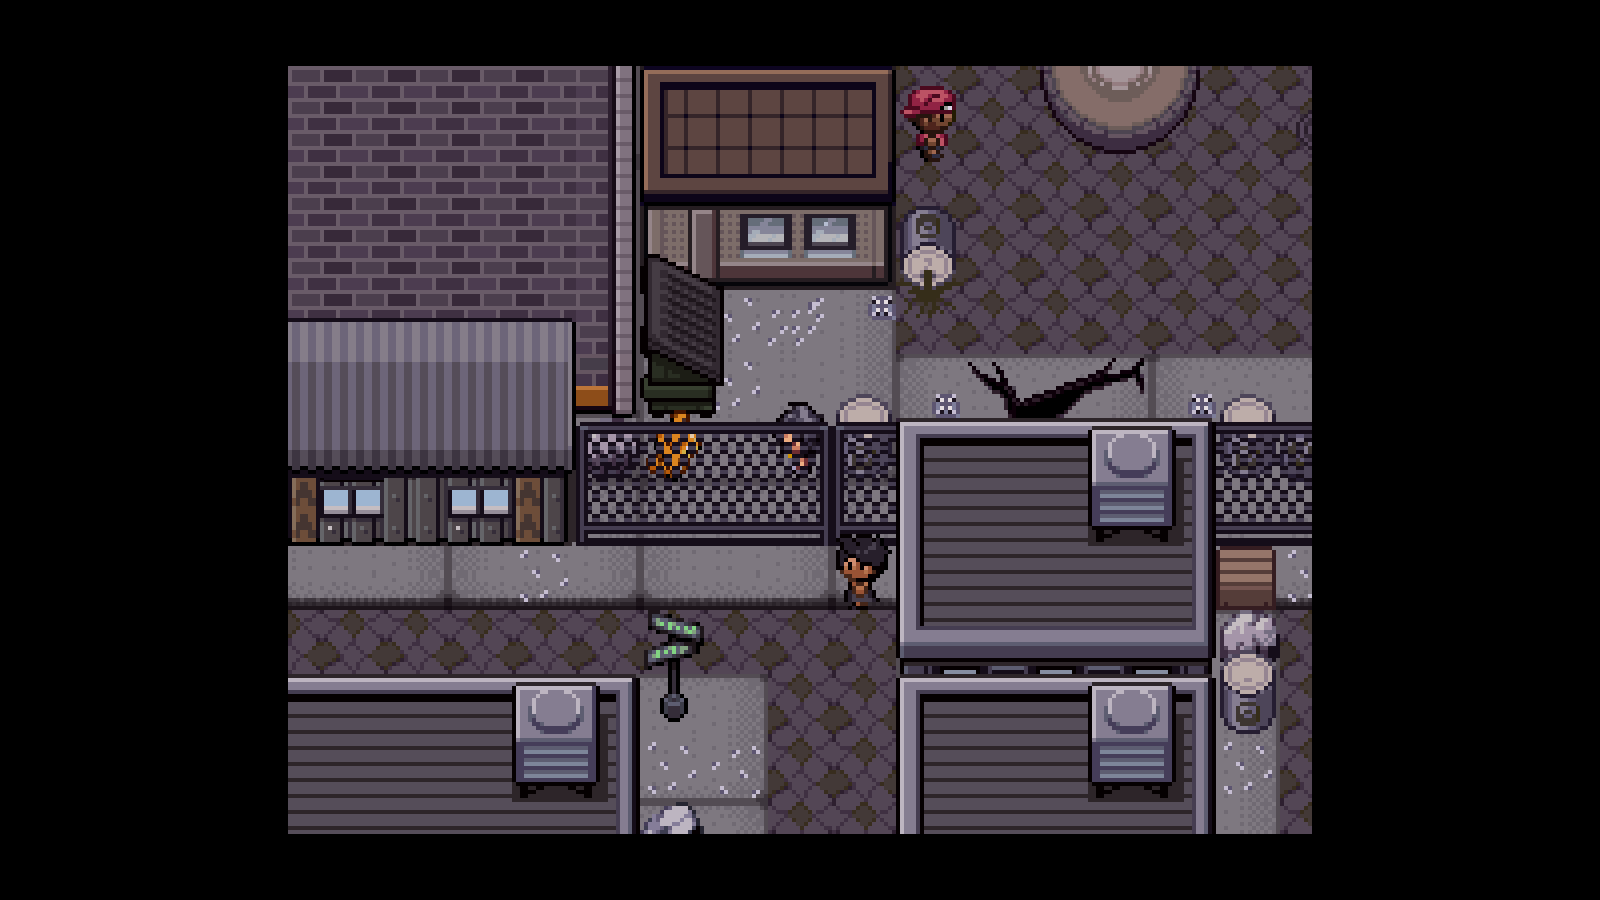
Chapter 3 Corey's Gym Section start date: 2/15/18 Section post date: 2/18/18 I'll continue the guide for a bit longer. If the parts aren't coming out fast enough for you, see the guide I linked above. Did you notice that there were less pictures last section? As I learned, there's a limit to how much data you can upload in each section, so I'll be cutting back on the pictures. If you need more or I'm not clear enough, let me know in the discussion thread and I'll try to upload a few more. Thank you to the following people for your contribution to this part of the guide: Sparsyle-0 (Sophie), Hallowilicious, Paperblade Friendly reminder that this game is not suited for children or those who are easily disturbed. Jasper Ward The Jasper Ward map is unavailable at the time of posting this guide. A policeman will be at the barricade. He'll debrief you about the situation in Jasper and Beryl and you'll soon see what would have happened to Obsidia had you not gotten there in time. The buildings are destroyed, Pokémon roam the street freely, and the few residents who didn't manage to evacuate but are still alive can be found scattered throughout the city. Jasper Ward Beedrill (25%) Sewaddle (24%) Scatterbug (20%) Pidgey (20%) Carnivine (7%) Pidgeotto (4%) The next gym is a Poison-type, so feel free to start leveling any Ground or Psychic Pokémon you have or find. The blue building is a police station. When you talk to the chief, an officer will enter after you. The officer recognizes the efforts you've made thus far and will relate this to the chief. Impressed by this, he will request that you help him find the missing officers they have. Should you manage to find all the officers, the plot of the story will change. Since saving the officers is optional, their locations will be marked by the same colour as additional quests and items. This side quest will be referred to as Event: Officer, so feel free to ctrl + f if you're searching for the officers. There are two in Jasper and three in Beryl. If you walk past the officer outside the building at night, he'll fight you. If you head to the right side, you'll fight a Meteor Grunt. Talking to the cops won't have him arrested for some reason. Other than that, not much else is going on in this neck of the woods, so head into the woods. You'll need to go through the building on the left in order to do so. If you go straight instead of turning left through the building, you'll find a PokéCenter. In the house to the right of the PokéCenter is a man who lost his Mareep. You'll find it later. On clear or sunny days, you can cut down the tree south of the PokéCenter to find a sleeping Emolga. It'll attack you once you awaken it. Emolga (Level 20) Nuzzle, Pursuit, Double Team, (Ion Deluge, Air Slash, or Roost) There isn't much else to do in this area, so head left through the house instead and enter the forest. Malchous Forest The Malchous Forest map is unavailable at the time of posting this guide. Morning Beedrill (20%) Sewaddle (20%) Scatterbug (20%) Ledyba (19%) Fomantis (10%) Pidgey (10%) Pansage (1%) Day Beedrill (30%) Pidgey (20%) Oddish (10%) Bellsprout (10%) Scatterbug (10%) Fomantis (10%) Pansage (9%) Carnivine (1%) Night Hoothoot (20%) Spinarak (20%) Scatterbug (20%) Paras (19%) Fomantis (10%) Pansage (6%) Carnivine (5%) Since this is a forest, all battles in this area will use the Forest Field effects. Head left and pick up the X Speed, then take the north east exit to continue Event: Officer. You'll end up in the Jasper Ward again. There's only one house you can access. Inside there's a policeman who's being cornered by a Team Meteor grunt. Defeat the grunt and free the officer (1/5). Head back into the forest and continue north west. Battle your way through the now linear path. When you start traveling south, you'll be able to jump off and grab a Big Root before continuing. Backtrack to where you were before and continue until you reach the light shard. Do whatever else you need to before jumping off the ledge as you'll have to complete a battle once you do. Feel free to look at my advice below the battle information if you feel you might need to change your team. Not looking forward to EV training all over again? Remember that I've uploaded a video on how to max EV train in the matter of a few minutes. Once you jump, you'll be greeted by a guy with a scarf and the Shoal Cave Remix. He's been waiting for you and knows what you're here for. He'll introduce himself as Taka. Unlike the other Meteor bosses, he seems a bit out of it. He'll explain that PULSE is actually an acronym and that the purpose of the machine is to amplify the power of any Pokémon attached. However, the amount of strain it puts on a Pokémon's body is too much for it to handle, so it eventually dies. He'll lazily tell you that he's been instructed to stop you, so battle him. Meteor Admin Taka Super Potion x1 Field: Forest Field Exeggcute (Level 22) Ability: Harvest Item: --- *Stats: HP 62 / Atk 26 / Def 44 / SpA 35 / SpD 28 / Spe 26 Bullet Seed, Barrage, Leech Seed, Poison Powder Zazu (Level 25) Ability: Keen Eye Item: --- *Stats: HP 76 / Atk 41 / Def 31 / SpA 54 / SpD 29 / Spe 54 Chatter, Nasty Plot, Sing, Taunt PULSE Tangrowth (Level 24) Ability: Filter Item: --- Stats: HP 85 / Atk 37 / Def 104 / SpA 42 / SpD 93 / Spe 13 Vine Whip, Mega Drain, Acid Spray, Growth *Due to variations in nature, stats my alter Having trouble? Remember that the Numel, Slugma, and Pansear that you could have caught all learn moves that destroy the Forest Field. Additionally, Spearow evolves into Fearow, a fast and powerful Flying-type Pokémon. Its type coverage makes it resistant to two of Tangrowth's three attack moves. It even has access to Ariel Ace which, with STAB included, is a 90 power move. This can tear through the Exeggcute that opens the battle and help with Tangrowth. The Blitzle that we caught earlier evolves into a fast and powerful Electric type which can easily one-shot Taka's Chatot with Spark and max Speed/Attack EVs. It also knows Flame Wheel which is super effective against Exeggcute and Tangrowth. With the machine destroyed, Taka will inform you that Jasper will return to normal. He'll also let you know about the machine in the Beryl Ward. If you haven't caught on already, he's not exactly happy with the way Team Meteor is operating. He'll encourage you to go destroy it before leaving himself. As soon as you jump off the ledge, you'll greeted by a girl with pink hair. She'll state that she'd finally gotten away from her father and was intending to attack Team Meteor herself. She'll throw a tantrum about her dad stopping her from fighting a terrorist organization. After oversharing, she'll tell you to stay out of her way while she destroys the machine in Beryl. She'll then call her Salamance and fly off. As soon as the cutscene stops, head south to access a somewhat hidden path. At the end of it, you'll find an abandoned egg. Tired of having to switch out your Pokémon every time you want to pick up an egg? There's a mod for that. If it wasn't clear enough, I enjoy using most of these mods because they remove some slightly annoying features. The egg may contain: Stantler (Level 1) Me First, Tackle, Megahorn OR Nincada (Level 1) Scratch, Harden, Night Slash OR Skiddo (Level 1) Tackle, Growth, Rollout OR Deerling (Level 1) Tackle, Camouflage, Synthesis Head back into the Jasper Ward via the northeast entrance. In the second building, you can take the elevator up to the fifth floor. Talk to the girl to make her realize that the power is back on and she can escape the building. If you head back into the Peridot Ward, the first house on the right is where you can find her again. Her friend will thank you by giving you an Obsidia Department Sticker. Since you start out with one as soon as you get the card, this is sticker 2/9. Reentering the Jasper Ward, you can go to the first house just east of the PokéCenter and enter the elevator in the back to find the Forest Field information. If you continue east, you can find an officer trapped behind some houses and a Paralyz Heal on his other side. He was previously trapped behind a vine grown from the Tangrowth. Talk to him to free him. That's the last officer in the Jasper region and officer 2/5 overall for Event: Officer. This event will continue in the Beryl Ward. The last thing you can do in the Jasper Ward is go to the house complexes east of the PokéCenter. In the bottom right you can find the Mareep that went missing. Give it a PokéSnax to calm it down and take it with you. Unfortunately, it seems the owner has already evacuated the city, so the Mareep is yours. Mareep (Level 14) Thunder Wave, Thunder Shock, Cotton Spore, Electric Terrain Heal up and continue into the Beryl Ward. Beryl Ward The Beryl Ward map is unavailable at the time of posting this guide. To the right is the Beryl Bridge. If you cross it, you'll find the Abandoned Power Plant. One of the rocks along the bridge has an X Speed and a rock by the Power Plant has a PokéSnax. On windy days, you can encounter a boy who has been kidnapped by a Drifloon. The Drifloon will attack you when you talk to it, and you can catch it. Drifloon (Level 20) Focus Energy, Payback, Ominous Wind, (Destiny Bond, Tailwind, or Weather Ball) He'll thank you for saving him and promise to go home. Before he does, he'll get cornered by two Venipedes and a Scolipede in the same spot in Jasper where we found cop 2/5. The Scolipede is level 30, so if you want to tango, make sure you come prepared. You can't catch these Pokémon since they're a gang, but you'll be able to get a Venipede several hours from now anyway. The boy will finally go home. He lives in Lapis Ward, so we can't get the reward just yet. Head back into the Beryl Ward. Beryl Ward Pansage (20%) Pidgeotto (20%) Spearow (15%) Bellsprout (14%) Scatterbug (11%) Sewaddle (11%) Oddish (9%) Head left. The only house you can access will have an X Attack. Head into the jungle, ignoring the feet you can see beyond the house. Rhodocrine Jungle Morning Sewaddle (30%) Ledian (20%) Scatterbug (20%) Spearow (15%) Ledyba (9%) Pansage (6%) Day Spearow (20%) Pansage (20%) Gloom (15%) Bellsprout (15%) Tangela (10%) Sewaddle (10%) Scatterbug (10%) Night Hoothoot (31%) Chiyo (24%) Ariados (20%) Tangela (15%) Spinarak (10%) Make your way left, making sure to pick up the Green Shard in the rock to at the bottom of the screen. Grab the Pokéball- oh. You fell into a trap. When you awake, you'll find yourself surrounded by Nuzleafs. They'll toss you into a trap and lock the cage. Press alt to speed up the game and wait. Eventually, Fern will drop by. Fern's the type of guy who gets angry at you for treating him the same way he treats you. He'll laugh, step away for a moment, then return. Now that you can't escape him, he'll take some time to tell you how he's been. Apparently he's already beaten both Julia and Florinia and is on his way to the third gym. At this point in my playthrough, I'd already accumulated 18 hours. To be fair, many of those hours were spent idle while I wrote this guide. Nonetheless, he seems to have blazed through the gyms quickly. He'll demand you beg to be let out. At this point, you have two options. Fern: I'll let you out if you beg. Whaddya say? >Yes Fern: Perfect. Now get on all fours and repeat after me: I, *Insert Name Here*, admit that I am an inferior trainer, battler, and person to Fern. >Yes Fern: Furthermore, I, *Insert Name Here*, swear that I will never get in Fern's way again, because I'm not worth the time it takes him to step on me. >Yes Fern: Finally, I, *Insert Name Here*, fully embrace the fact that I will NEVER be anywhere remotely as cool, stylish, popular, talented, good-looking, or likable as Fern. >Yes Fern: Ha! So desperate. Love it, man. No worries, I'll keep my end of the bargain. *Fern will open the cage door* Fern: That's that. I'm not saving you again, princess, so stay out of trouble, a'ight? Later, loser! Surprised that he actually let you out? So am I. However, there's no way we're actually going to say any of that, right? Saying no at any point yields the same result, so deny Fern the satisfaction from the very beginning. He'll tell you to rot in the cage and leaves. Press alt and wait about 2 minutes. Remember that the game's window needs to be active or else the game will pause, so be patient. Eventually, a Pokémon will appear and open the cage. You'll hear it repeating the instructions that were given to it, and you might even recognize it as the Chatot that Taka has. If you go past the caves and up the stairs, you can cross a bridge, jump down a ledge, and find an Ultra Ball in this bush. Go down the stairs and into the cave on the left to continue Event: Officer. In either cave, you can find these Pokémon: Rhodocrine Jungle Caves Scatterbug (35%) Noibat (30%) Morelull (30%) Bunnelby (5%) Woobat (in dark patches only) You'll find a police officer trapped in the same type of cage that had you. He'll even tell you that a group of Nuzleafs captured him in the fashion that you were captured. He'll thank you and return to the station (3/5). Exit and enter the cave on the right side. At the end you can find a Hyper Potion. Flip the lever next to the Hyper Potion (1/3). You'll see the use of this later. Exit the cave and head north east. If your Pokémon are wounded, don't bother retracing your steps to heal in Jasper. We're coming close to a healing location now. Head south at the fork and west instead of exiting into the Beryl Ward. Go up the stairs, cut the tree, and flip the switch (2/3). Then exit into the Beryl Ward. You'll find a Meteor grunt standing outside the building. After battling him, check the rock to the right of the building to find a PP Up, then enter the building. This is the Beryl library. A funny detail I noticed is that the music seems to get quieter when you enter the library. The boy in front of you will be grateful to find another survivor. He'll allow you to rest and heal up your Pokémon as many times as you'd like. Go up the stairs, down the hall, and walk on top of the bookshelves in order to reach the other side. You can find information about a Corrosive Field on top of some bookshelves here. Enter the room on the right side to further Event: Officer. Pick up the Ill-Fated Doll you find and speak to the Growlithe twice. It'll move aside so that you can look down the hole. It seems the officer fell into this hole while the library was being destroyed and perished. Maybe that Ill-Fated Doll had something to do with this. It doesn't matter. The Growlithe will now run back to the police station. Once they see it alone, they'll understand (4/5). Exit the library and take the northern exit through the building. Enter the jungle once more and flip the switch (3/3). Now backtrack to where that fork was and cross the newly formed bridge. Exit the forest into the Beryl Ward once more. Defeat the grunt in the way, cut the tree, and enter the building just before you head south in order to complete Event: Officer. You'll find a grunt guarding the last police officer. The grunt will attack you with a Growlithe and a Herdier. Once you defeat them, the officer will return to the police station (5/5). You've now completed Event: Officer. If you'd like, you can return to the police station right now to be rewarded with the Growlithe that you saw in the library. You'll also be made an honourary member of the police force. If you don't receive the Growlithe now, you'll have to wait until after you defeat Corey to receive it which is 30 minutes to an hour away depending on how well you do. Growlithe (Level 25) Reversal, Fire Fang, Take Down, (Close Combat or Morning Sun) The police officer behind the counter will change his dialogue after you've taken the Growlithe. He'll ask you if you remember the Growlithe that the grunt had fought you with. Apparently that was his, and the grunt had kept it. Rather than giving him the Growlithe of his fallen comrade, the chief had given it to you. If you talk to his buddy nearby, he'll ask you to breed the Growlithe you just got and give the egg to him. If you got a female Growlithe, you can do this right now. Just find a male Pokémon who belongs to one of these species. If you got a male Growlithe (looking for someone to confirm that this is possible), then you'll need to wait until we get a Ditto many hours from now. The police officer will give you a mystery egg in return. It can be one of the following eighteen Pokémon: Azurill (Level 1) Splash, Water Gun OR Axew (Level 1) Scratch OR Cottonee (Level 1) Absorb, Fairy Wind OR Drilbur (Level 1) Scratch, Mud Sport OR Elekid (Level 1) Quick Attack, Leer OR Gastly (Level 1) Hypnosis, Lick OR Larvesta (Level 1) Ember, String Shot OR Mareanie (Level 1) Poison Sting OR Pawniard (Level 1) Scratch OR Phantump (Level 1) Tackle, Confuse Ray OR Rockruff (Level 1) Tackle, Leer OR Shroomish (Level 1) Absorb, Tackle OR Sneasel (Level 1) Scratch, Leer, Taunt OR Starly (Level 1) Tackle, Growl OR Staryu (Level 1) Tackle, Harden OR Togepi (Level 1) Growl, Charm OR Vullaby (Level 1) Gust, Leer OR Vulpix (Level 1) Ember Return to the previous location in Beryl and head south past the building. You'll fight another grunt and be given a chance to heal your Pokémon using a Light Shard. I recommend Pokémon level 30, but I managed to defeat them with level 25. Prepare yourself for a double battle. You'll encounter three individuals, two of whom you've met previously. Taka and ZEL will introduce you as the one who's been taking down the PULSE machines. The third figure will threaten you but the party will be crashed by the girl with pink hair. ZEL will finally introduce her as Heather but the hooded figure will interrupt the backstory and even tip their hat as to who they truly are. They'll instruct Taka and ZEL to deal with you. You can skip dialogue by holding down the Escape key. Meteor Admin Taka and Meteor Admin ZEL Super Potion x1 Field: Forest Field Glaceon (Level 24) Ability: Snow Cloak Item: --- Stats: HP 68 / Atk 33 / Def 61 / SpA 70 / SpD 53 / Spe 39 Quick Attack, Bite, Ice Fang, Icy Wind Exeggcute (Level 22) Ability: Harvest Item: --- *Stats: HP 62 / Atk 26 / Def 44 / SpA 35 / SpD 28 / Spe 26 Bullet Seed, Barrage, Leech Seed, Poison Powder Chatot (Level 26) Ability: Keen Eye Item: --- *Stats: HP 79 / Atk 42 / Def 32 / SpA 56 / SpD 30 / Spe 56 Chatter, Nasty Plot, Sing, Taunt Espeon (Level 24) Ability: Synchronize Item: --- Stats: HP 68 / Atk 35 / Def 37 / SpA 77 / SpD 53 / Spe 61 Quick Attack, Swift, Psybeam, Future Sight Umbreon (Level 25) Ability: Synchronize Item: --- Stats: HP 89 / Atk 44 / Def 67 / SpA 38 / SpD 85 / Spe 44 Feint Attack, Quick Attack, Sand Attack, Confuse Ray PULSE Tangrowth (Level 25) Ability: Filter Item: --- Stats: HP 95 / Atk 45 / Def 115 / SpA 50 / SpD 104 / Spe 20 Vine Whip, Mega Drain, Acid Spray, Growth Moves in italics hit both Pokémon in a double battle *Due to variations in nature, stats may alter Having difficulty? The Espurr we found in the beginning of the game can have the ability Competitive (assuming you got Espurr in the Peridot building and not Minccino). This will sharply increase its Special Attack whenever any of its stats are lowered. It evolves into Meowstic at level 25. Having this out against the Glaceon might help since you'll get a free 100% increase to your Special Attack damage should Glaceon use Icy Wind. The Psychic moves it learns are also super effective against PULSE Tangrowth. The Blitzle we found outside Julia's gym during a thunder storm can learn Spark and Flame Wheel. Flame Wheel increases speed by one stage after use, thus negating the speed slow you'll get from Glaceon's Icy Wind. Spark can defeat Chatot in one hit if you already evolved it into Zebstrika (level 27). As discussed earlier, Fearow learns the powerful, never miss Ariel Ace which can take out Exeggcute in one hit. It's also super effective against PULSE Tangrowth. Both Taka and ZEL will run away once the PULSE has been destroyed. The hooded figure will show disdain before also running away. Whether or not you saved all the officers affects what happens next. If you didn't save them all, I believe he lectures you and tells you to meet him at the Beryl Gym. We'll be following the route where you saved them all. Heather will chase after the hooded man, and you'll soon follow. Up ahead, it seems he's been caught. Because we saved all the cops, the entire police force will have cornered the hooded figure. The chief will unmask the villain and reveal his identity to be Corey, the Beryl Gym Leader. He's also Heather's father. Heather, distraught over the fact that her father is a villain, will fly away on her Salamance. Corey will continue to spew his bitter pessimism before vanishing into thin air. As he's told you, he'll be in his gym, so head north. If you enter the first building that you encounter, you'll be able to get onto the roof and find a Helioptile on sunny days. Give it a PokéSnax to make it join your team. Heliptile (Level 24) Mud-Slap, Quick Attack, Razor Wind, Electric Terrain If you isn't much to do at the moment. To the left of the gym is a field of grass. You can find new Pokémon here. Beryl Cemetery (Grass) Morning Fearow (20%) Spearow (20%) Phanpy (14%) Arbok (11%) Ekans (10%) Doduo (10%) Fletchling (10%) Bunnelby (5%) Day Fearow (20%) Doduo (20%) Ekans (20%) Phanpy (14%) Arbok (11%) Fletchling (10%) Bunnelby (5%) Evening Meowth (44%) Noctowl (25%) Ekans (20%) Hoothoot (10%) Arbok (1%) Headbuttable Trees Pineco (55%) Burmy (35%) Aipom (10%) If you interact with this grave at night, you can find a Shuppet. Yes, it's a sunny night out. If you need to grind, do it here since the Pokémon here give better experience points than elsewhere. Go into the gym. If you didn't save the police officers, the gym will be empty. If you did, the chief will tell you that the poison that the pillars emitted drove the men mad. Battle them to bring them back to their senses if you'd like, but it isn't necessary. To progress the story, you'll need to turn all the pillars blue. This is a mind-boggling puzzle that even the most brilliant of minds will struggle with. Are you ready to see the complex code? Enter the secret room that opens in the back and speak with Corey. He'll lash out at you before entering his arena. To the left, you can find information about the Corrosive Mist Field that you'll be fighting on (assuming you saved the police). Go upstairs and enter the gym arena. If you didn't find all the police officers: Corey (before battling): Your resilience is admirable, but foolish. Wake up. Your hopes... Your dreams... Futile. I will show you the cruelty of what is real! If you found all the police officers: Corey will tell you to take your place. He will accuse you of taking away the one thing that held him to this world: Heather. Having placed the blame on you for ruining what's left of his life, he'll attack. Corey's team changes depending on if you found all the police officers. If you found all officers, his team is weaker. Gym Leader Corey (All Officers Saved Route) Super Potion x1 Field: Corrosive Mist Field Skrelp (Level 26) Ability: Adaptability Item: Focus Sash Stats: HP 65 / Atk 36 / Def 40 / SpA 44 / SpD 40 / Spe 24 Acid, Water Pulse, Venom Drench, Bubble Mareanie (Level 26) Ability: Merciless Item: --- Stats: HP 65 / Atk 36 / Def 40 / SpA 31 / SpD 38 / Spe 28 Peck, Bite, Venoshock, Protect Nidorina (Level 28) Ability: Hustle Item: --- Stats: HP 82 / Atk 45 / Def 52 / SpA 36 / SpD 41 / Spe 42 Double Kick, Bite, Venom Drench, Disable Croagunk (Level 28) Ability: Dry Skin Item: --- *Stats: HP 69 / Atk 43 / Def 31 / SpA 43 / SpD 31 / Spe 37 Sucker Punch, Drain Punch, Venoshock, Mud Bomb Skuntank (Level 28) Ability: Aftermath Item: --- Stats: HP 100 / Atk 61 / Def 46 / SpA 49 / SpD 43 / Spe 56 Pursuit, Incinerate, Acid Spray, Smokescreen Crobat (Level 30) Ability: Infiltrator Item: --- Stats: HP 96 / Atk 57 / Def 58 / SpA 52 / SpD 58 / Spe 96 Venom Drench, Venoshock, Air Cutter, Nasty Plot *Due to variations in nature, stats may alter As Paperblade has informed me, Corey's Crobat is completely useless against Steel-types in this field. Consider grabbing a Klink from the Underground Railway. OR Gym Leader Corey (Lost Officers Route) Super Potion x2 Field: Corrosive Field Skrelp (Level 26) Ability: Adaptability Item: Focus Sash Stats: HP 67 / Atk 37 / Def 41 / SpA 45 / SpD 41 / Spe 25 Acid, Water Pulse, Venom Drench, Toxic Spikes Mareanie (Level 26) Ability: Merciless Item: Telluric Seed (+1 Atk Stage and applies Baneful Bunker on the default field) Stats: HP 66 / Atk 37 / Def 42 / SpA 32 / SpD 39 / Spe 29 Peck, Bite, Venoshock, Toxic Nidorina (Level 28) Ability: Hustle Item: --- Stats: HP 84 / Atk 46 / Def 54 / SpA 38 / SpD 42 / Spe 43 Double Kick, Bite, Venom Drench, Disable Croagunk (Level 28) Ability: Dry Skin Item: Black Glasses *Stats: HP 69 / Atk 43 / Def 31 / SpA 43 / SpD 31 / Spe 37 Sucker Punch, Drain Punch, Venoshock, Mud Bomb Skuntank (Level 28) Ability: Aftermath Item: --- Stats: HP 101 / Atk 62 / Def 48 / SpA 50 / SpD 44 / Spe 57 Pursuit, Incinerate, Acid Spray, Smokescreen Crobat (Level 30) Ability: Infiltrator Item: --- Stats: HP 101 / Atk 61 / Def 62 / SpA 56 / SpD 62 / Spe 101 Venom Drench, Venoshock, Air Cutter, Nasty Plot Due to variations in nature, stats my alter If you didn't find all the police officers: Corey: ...You're only here for the badge, right? That's all? ...Good. Then take it and go. I'm sick of- *enter Heather* Heather: Hey! Oh, hi, *insert name here*. Anyway... I'm leaving. Bye. Corey: Excuse me? Heather: I'm leaving. For good. As in running away. And you KNOW you can't stop me, so don't even try! Corey: Stop. Stop this right- Heather: Make me! You can't! I'm done listening to you and your stupid rules! I'm sick of you saying I can't do anything ever! So I'm just... done... Bye. Corey: You are being completely irresponsible! You can't just fly away and hope all your problems will be solved! Heather: ...Watch me. Corey: Heather! Heather: What. Corey: You took your mother's ring, did you not? Heather: ...So what if I did? Corey: ...Don't lose it. *Heather leaves* Corey: So that's it... Ten years of torment... For her to vanish just as quickly... No. I'll be at your side soon... *insert name here*. I'm in no place to ask you favors, so... I'll put it this way: Come to Beryl Bridge if you want a show. If you didn't find all the police officers: Corey will tell you to that for every joyful moment you have, bitter anguish will soon follow. He claims that he'll answer your questions at the Beryl Bridge. In both situations, he goes to the bridge. In both situations, you don't get a badge. Go to bridge. You'll see Corey releasing all his Pokémon before finally confiding his past to you. He proposed to his love with a Ruby ring and the two were married. His wife later died in childbirth, allegedly. The doctor who delivered Heather stole the ring. Corey was only given the ring when he promised to join Team Meteor. He'll say that Heather has the ring and tells you to watch over her. He'll then leap from the bridge, ending his own life. Fern will approach moments afterwards. Fern's the type online teammate who tells you to go kill yourself just because you're doing poorly that game. He'll take a moment to make fun of Corey. I work at a vet clinic. Believe me when I say that people tend to soften up when dealing with death. About 5% of people keep their composure. The rest either break down crying or show their sadness somehow no matter how strong they are. It's not like watching a video of someone dying. There's a difference between seeing or reading about death and actually being there when something dies. Maybe it's because the body is far away from him, or maybe it's because he didn't care about Corey, but Fern somehow manages to remain insensitive. All I'm trying to say is that I was surprised and maybe a little disappointed. I digress. Corey is gone, and Fern will leave after telling you that the body fell into the Lapis Ward. Before we move on, head back to Corey's gym and enter his secret room. Pick up the Silver Ring you find. You can use this to get six unique Pokémon. Head back to the Beryl Library. You'll find a Gothitelle and her daughters have inhabited the place. She'll ask you to help them clean up the library. Interact with all the single books, confetti, and paper to clean. If you enter the room on the left, you'll find a Twisted Spoon. After you've cleaned everywhere, Gothitelle will give you a Soul Candle. You can also talk to one of her daughters now to take one with you. Gothita (Level 25) Embargo, Feint Attack, Psyshock, (Mirror Coat or Dark Pulse) You can take the Soul Candle to a pumpkin in the Beryl Cemetery and use it on a pumpkin to create a Pumpkaboo. It'll come to life and attack. Pumpkaboo (Level 27) Razor Leaf, Leach Seed, Trick-or-Treat, Bullet Seed, (Destiny Bond or nothing) If you didn't get the Growlithe before, you can get it now as well as the egg. The repeatable trainers in The Grand Hall have leveled up now, so you can fight them for more levels if you'd like. The Opal Bridge also has a few more trainers. Once you're ready, head back to the Opal Bridge and head North.


-
Thank you. Truth be told, I wouldn't have much time to work on the guide too often anyway. I know I made a joke about it but I do have a lot of classes and work to complete. I might continue during Spring Break and summer break, but for now I'll stop.
-
What unfortunate timing. It seems that a few hours after I started this guide on Monday, someone posted a complete guide with just about every optional event and everything that can be done for all of Episode 17. You can find the post here. Looks like it's pretty well made, so that means I won't be continuing this guide.
-
Chapter 2 Florinia's Gym Section start date: 2/12/18 Section post date: 2/15/18 If you've seen an opponent use a move I haven't listed or seen a different Pokémon at an event, please include a picture and as much information as you can if possible. I'll be placing moves in bold during certain fights if they're boosted by the terrain. I've also just learned of the follow feature on this website, so you can follow this post for updates rather than checking back on Sundays. Thank you to the following people for their contribution to this portion of the guide: Sparsyle-0 (Sophie), Frelop, Paperblade Heal your Pokémon and head towards the Opal Bridge to continue the story. You'll encounter new trainers on the bridge every time you defeat a gym, so go ahead and introduce yourself to them. Once you're done, talk to Florinia by the guards. Obsidia Ward map South Obsidia Ward map Coral Ward map As a gym leader and a Grass-type specialist, she'll have access to the Obsidia Ward. Given your recent help with the factory, she'll ask you to join her. As you've been informed, plants are destroying the city. Your job is to help her isolate what's causing it and put a stop to it. The source has been narrowed down to the park which houses many Grass-type Pokémon. She'll then leave you, so head into the Obsidia Ward. Despite the city's condition, many businesses are open. In the building labelled 1, you can find a grooming salon. Talking to the girl on the right side and showing her a Pokémon with maxed happiness will earn you a Soothe Bell. If you don't have any Pokémon that you've used throughout the playthrough, your starter should love you. In building labelled 2, you'll be able to buy special Pokéballs for a much higher price. In building 3, the man on the left will sell normal Pokéballs for a normal price. The rainbow building is a sweets shop. The kid at the vending machine wants an ice cream but doesn't have money, nor will they move to the side so you can buy them one. If a Pokémon on your team has Pickup, it may have already found a chocolate ice cream. If not, you'll have to buy one from an ice cream vendor outside The Grand Hall during sunny days. Give the child a chocolate ice cream and they'll happily move out of the way. The first vanilla ice cream you can buy will cost 1000 Poké and a Vanillite will drop from it. Vanillite (Level 15) Harden, Astonish, Uproar, Icy Wind The lady behind the counter on your left will allow you to complete a tile puzzle to get another Pokémon. Something I've noticed is that the bottom of each tile has a black line. It helps to organize the tiles in the correct order before solving the puzzle. You can play for free as many times as you'd like. Winning gets you the Pokémon in the puzzle. Here's the completed Swirlix tile puzzle: Swirlix (Level 15) Fairy Wind, Play Nice, Fake Tears, Round The mother in the PokéCenter will ask you if you've seen her child. You haven't yet, but you will soon. Buildings 4 and 5 are best left alone for now given their requirements. Move south towards the number 6 to enter South Obsidia and switch to its map. In apartment complex 1, you can talk to a man who has a disobedient Lillipup. It'll run from him, initiating another hide and seek event. We won't bother completing it right now because we don't have access to all the locations we can find it. Instead, head towards location 2. You'll run into Victoria who will tell you the thugs in the alleyway were harassing her. Unfortunately, this is the only way to get to the other side of Obsidia. If you tell her you aren't going through the slums, she'll agree that you've made the wiser decision and will try to think of another way around. As far as I'm aware, there isn't, so tell her you'll brave the slums. Concerned for your safety, she'll battle you to ensure that you're strong enough to survive. Apprentice Victoria Potions x2 Field: Default Ralts (Level 15) Ability: Synchronize Item: --- *Stats: HP 37 / Atk 17 / Def 17 / SpA 23 / SpD 20 / Spe 21 Disarming Voice, Lucky Chant, Teleport, Double Team Pichu (Level 16) Ability: Static Item: --- *Stats: HP 37 / Atk 22 / Def 14 / SpA 21 / SpD 21 / Spe 29 Fake Out, Thunder Shock, Nasty Plot, Sweet Kiss Torracat (Level 17) Ability: Intimidate Item: --- *Stats: HP 53 / Atk 38 / Def 26 / SpA 36 / SpD 26 / Spe 40 Fire Fang, Lick, Leer, Growl *Due to variations in nature, stats my alter If you've played all the other Pokémon games like me, you may forget that Ralts is a Psychic/Fairy-type now. Remember to keep its new resistances and immunities in mind when fighting it. After defeating her, Mother Hen will continue to express concern over you but will "allow" you to enter the slums. On windy days, you can encounter Hoppip floating about in this area. Hoppip* Poison Powder, Stun Spore, Sleep Powder, Encore, Grassy Terrain, Encore, Aromatherapy *Moves and levels may vary Fight your way through the slums, making sure to pick up the egg in the basket as you progress. The colour of the egg determines what Pokémon emerges from it. Drowzee (Level 1) Pound, Hypnosis, Nasty Plot OR Bronzor (Level 1) Tackle, Confusion OR Ducklett (Level 1) Mirror Move, Water Gun OR Cacnea (Level 1) Poison Sting, Leer, Seed Bomb Friendly reminder that you can use Cheat Engine to hatch eggs in a few steps. Here are the Pokémon that can be found in the slums. The rooms seem to have different ratios as to which Pokémon pop up more frequently, so explore. Obsidia Slums Pidove (30%) Trubbish (20%) Mankey (20%) Pancham (14%) Yungoos (10%) Makuhita (6%) You'll also be able to find the TM60 - Quash somewhere in the slums. Its use is limited but I like collecting the TMs anyway, so I picked it up. A Pokéball will be laying on the ground and will contain a Moon Stone. You'll notice that there's a locked door in the slums. We won't be able to open it for quite a number of hours, so forget about it for now. Speaking of forgetting, remember Event: SP? You can continue it in these slums. A boy will ask you if you're looking to have a rousing round of fisticuffs. Respond in the positive and give him what for. Afterwards, he'll inform you that he sold the Pokémon to someone in North Obsidia. The residents of the slums will inform you of a moving box. Chase after the box, but make sure to heal, save, and prepare yourself for a double battle before entering this room. You'll encounter a Pokémon gang here. They refuse to listen to words, so you'll have to fight your way out of this. If the game shows you a Pokémon sending out other Pokémon like this, you can't catch any of them since they're considered a team. Don't waste your Pokéballs. Pokémon Gang Field: Default Scraggy (Level 14) Ability: Intimidate Item: --- *Stats: HP 39 / Atk 27 / Def 26 / SpA 16 / SpD 26 / Spe 19 Feint Attack, Headbutt, Swagger, Sand Attack Scraggy (Level 15) Ability: Intimidate Item: --- *Stats: HP 42 / Atk 29 / Def 28 / SpA 17 / SpD 28 / Spe 21 Feint Attack, Headbutt, Swagger, Sand Attack Scrafty (Level 18) Ability: Intimidate Item: --- *Stats: HP 56 / Atk 42 / Def 51 / SpA 26 / SpD 51 / Spe 30 Feint Attack, Low Kick, Swagger, Sand Attack Scraggy (Level 16) Ability: Intimidate Item: --- *Stats: HP 44 / Atk 31 / Def 29 / SpA 18 / SpD 29 / Spe 22 Feint Attack, Low Kick, Swagger, Sand Attack *Due to variations in nature, stats may alter It seems the gang respects strength. Your newfound friends will remove the gate and allow you to exit the slums. The police here aren't aware of your involvement in the mission, so they won't allow you up north. As such, head south into the Coral Ward. Coral Ward Don't bother pulling up the map. The Coral Ward is the smallest ward in Reborn. If you search the rock on the right as soon as you enter, you'll find a potion. If you search a rock to the left of the first accessible building, you'll find an Ultra Potion. This will be needed in 2 minutes, so don't use it. The girl inside the building is blind and will ask you some questions to satisfy her boredom. Here are the answers: How many headbuttable trees are there in the area around The Grand Hall? 4 trees. Assuming you can see them all from one angle or another, how many satellite dishes are there in the Obsidia Ward? 7 dishes. How many banners and ribbons are there inside the Peridot Gym? 31 banners and ribbons. You might ask yourself how a blind girl knows the answers to all these. Who knows. I don't. If you get an answer wrong and try to answer her questions again, she'll comment on it. Your reward is information on the Misty Terrain. Coral Ward is covered in mist, so this will be useful if you choose to fish up some Grimer. Speaking of which... Coral Ward Fishing (Old Rod) Grimer It's the only Pokémon you can catch in this area. For now, at least. In the house by the broken down gym is an old lady, her grandson, and a Skitty he adopted. He refuses to take it to the PokéCenter next door because he wants to heal it himself. Talk to the grandmother and give her the Ultra Potion you just found. A regular potion or two would have worked, but whatever. The Skitty will feel better. Seeing her opportunity, the grandmother will try to force the Skitty on you. You can choose not to accept it, but that doesn't lead to any interesting conversations since you can come back later to get it. As such, take the Skitty. Skitty (Level 15) Foresight, Sing, Attract, Disarming Voice On rainy days, you can find a Lotad on the pier. Lotad (Level 15) Absorb, Bubble, Natural Gift, Mist That's all the event Pokémon for right now, so let's move on. There's a lady with blue hair looking out at a Water-type Pokémon by the lighthouse. Go over and talk to her. As a Water Pokémon trainer, she'll be concerned for it. The lake is too toxic for her to swim across and rescue it. Cain will appear and introduce the lady as Amaria, one of the highest ranked gym leaders in Reborn. Once he understands what's going on, he'll will send his Alolan Grimer to swim out to the Pokémon and rescue it. Grateful to its rescuer, Popplio will decide to join Cain's team to return the favour. It wants to prove itself, so it chooses to battle you.The poor thing doesn't realize you're the protagonist. Teach that to it. Pretty Boy Cain Potion x2 Field: Misty Terrain Alolan Grimer (Level 16) Ability: Poison Touch Item: --- *Stats: HP 54 / Atk 33 / Def 23 / SpA 20 / SpD 23 / Spe 15 Bite, Acid Spray, Disable, Harden Popplio (Level 16) Ability: Torrent Item: --- *Stats: HP 46 / Atk 26 / Def 26 / SpA 30 / SpD 27 / Spe 21 Aqua Jet, Disarming Voice, Baby-Doll Eyes, Growl Nidorino (Level 20) Ability: Rivalry Item: --- *Stats: HP 57 / Atk 41 / Def 31 / SpA 30 / SpD 30 / Spe 34 Double Kick, Fury Attack, Poison Sting, Focus Energy Cubone (Level 16) Ability: Rock Head, Lightning Rod, or Battle Armour Item: --- *Stats: HP 44 / Atk 23 / Def 37 / SpA 20 / SpD 23 / Spe 18 Headbutt, Bone Club, Leer, Tail Whip *Due to variations in nature, stats may alter If you lose, you'll restart at the PokéCenter and the game will act like you hadn't talked to Amaria, so don't throw the match. Cain will leave to go meet up with his sister in the wasteland. Amaria will mention Florinia and you'll tell her about the events at the Mosswater Factory. Realizing that you're helping them, she'll tell you to meet her at the park. Go back to South Obsidia and go north past where the policemen were before. They seem to have been called away for another matter. On a clear day, you'll run into a Spoink on your way up to the park. When you talk to it, it'll flee. We can't catch it right now, so we'll have to come back to it later. You'll find Amaria and Florinia by the park. You'll be given HM1 Cut and will be instructed to cut down the tree blocking your access to the park. You don't have to go back to the PokéCenter since a Light Shard is within the park. As a guy in the slums should have told you, those shards heal your team completely. They're also an indicator that an important battle is about to happen, so save your game. Don't like having to teach your Pokémon HM moves? Remember that mod page I keep linking? There's a mod that makes it so you don't have to teach your Pokémon HM moves. Simply having the required badge and the HM will allow you to use it outside of battle. When you cut down the tree, the girls will go before you only to be ensnared by vines. The Shoal Cave Remix will begin playing again which is a sign you're dealing with a high ranking member of Team Meteor. You'll encounter a being named ZEL. This person suffers from a sort of split personality disorder. You can tell which of the personalities is talking based on which letter is capitalized during the text. ZEL informs you that the machine is responsible for the overgrowth in the city. When a Pokémon is hooked up to it, its abilities are amplified. This usually comes at the cost of the Pokémon, however. ZEL will allow you to fight the Tangrowth hooked up to the machine. Meteor Admin ZEL Terrain: Default Pulse Tangrowth *Shiny* (Level 22) Ability: Filter Item: --- Stats: HP 79 / Atk 36 / Def 96 / SpA 39 / SpD 85 / Spe 12 Vine Whip, Mega Drain, Acid Spray, Growth With the Pulse machine attached to it, the Tangrowth will gain a Poison typing. Adjust your team accordingly. E will yell at Z about not using mission-critical Pokémon in battle. Z will inform the other two that the plants will revert back to normal now that Tangrowth is down. The machine is boxed up and taken away. Amaria will commend you on your battle while Florinia surmises that Team Meteor may be responsible for the other problems that are happening in all the other wards. Amaria will leave to inform Ame that Team Meteor is a much larger threat than initially perceived. Florinia will return to her gym in the Onyx Ward and will invite you to come challenge her. Now that you have access to the park and you're stronger, let's finish up some sidequests. In the park you can find the following Pokémon: Obsidia Park Morning Buneary (40%) Bellsprout (20%) Oddish (20%) Sunflora (9%) Slakoth (6%) Sentret (5%) Day Oddish (20%) Bellsprout (20%) Bonsly (15%) Venonat (14%) Slakoth (11%) Sentret (10%) Buneary (10%) Night Hoothoot (40%) Bellsprout (20%) Oddish (20%) Venonat (18%) Bonsly (2%) Headbuttable Trees Pineco, Slakoth Remember the mother looking for her son? He's on the right side of South Obsidia. While you're here, let's knock out two birds with one stone. The shop in the image is a competitor of the grooming salon (building 1 from Obsidia map). Go in there and talk to the lady. She'll demand you go find out why the other salon is doing better than hers. Talk to the mother in the PokéCenter. You'll inform her of her son's location and she'll give you an Ability Capsule as thanks. Then go to building 1 on the Obsidia map and talk to the lady with green hair. She'll ask if you'd like to groom your Pokémon for 1500 Poké. You don't need to accept, but you can if you'd like to raise your Pokémon's happiness. Go back to the other salon and tell the lady what you've learned. Grateful for your help (and in an attempt to increase marketing), she'll allow you to take one of the salon's mascots. Talk to a Glameow to take one with you. Glameow (Level 20) Growl, Hypnosis, Feint Attack, Fury Swipes Go to house 4. The daughter is displeased with her birthday gift. You can give her a Furret to receive her Castform. The only way to get Furret right now is to level up a Sentret from the park. They evolve at level 15. Castform (Level 15) Water Gun, Ember, Powder Snow, Headbutt In house 5, you can find the daycare couple, though they have terrible customer service. Continually talk to both of them until they finally reveal that they're Team Meteor members you've run into before. They'll announce that they've been stealing Pokémon from unknowing trainers and will engage you in a double battle. The reason I had you wait to fight them is that their Pokémon are a higher level than when you first entered the ward. It's easier to fight them now that you're more powerful. After you defeat them, they'll run away. In house 7, you can find a warehouse key. Grab this and head into the Coral Ward. You'll be able to open up all but one of the warehouses and each one contains something different. The warehouse on the left has the elderly couple who run the daycare. Team Meteor had kidnapped them and hidden them away in there. They'll be grateful you've freed them and will return to their home. You can now use the daycare service to breed Pokémon. You can generate and hatch eggs in a matter of a few steps if you use Cheat Engine. The warehouse in the middle is where you continue the Spoink event. Check each box and eventually you'll find Spoink. Trapped, it'll attack. You can choose to capture it now. Spoink (Level 15) Psywave, Odor Sleuth, Psybeam, Psych Up The warehouse on the right contains a Team Meteor member, most likely the one you just ran out of the daycare. Funny enough, you don't even need to talk to him. In the back is a lost Happiny. You can grab the Happiny and leave if you'd like since there's no reason to talk to the grunt or to avoid him. He doesn't fight you, only warns you to stay out of their affairs before leaving. Happiny (Level 10) Pound, Charm, Copycat, Refresh Finally, let's complete the Lillipup quest. You'll need to hunt down Lillipup. It won't always be in the same spot across different save files, so you might not have to check all of them. You only need to find it twice before its owner will catch it. Here are its potential locations: The final location with be in the Onyx Ward. The man will realize he can't offer Lillipup the time or attention it requires, so he'll offer it to you. If you say no, he'll continue to stand there, so just take it. Lillipup (Level 15) Baby-Doll Eyes, Helping Hand, Take Down, (Fire Fang, Thunder Fang, or Ice Fang) You can also enter the alleyway just south of the of the grooming salon that gave you the Soothe Bell. Inside you can find the following Pokémon: Obsidia Alleyway Trubbish (45%) Koffing (22%) Yungoos (20%) Poochyena (13%) If you enter at night, you can find a pair of Mightyenas cornering an Electrike. As soon as you draw close, the two will attack in a double battle format. They're level 25 and they both have Intimidate, so come prepared. Once defeated, the wounded Electrike will ask to join your team. Electrike (Level 18) Quick Attack, Spark, Odor Sleuth, (Crunch, Flame Burst, or Ice Fang) If you come down to this corner, either a Minun or a Plusle will pop out once it smells any PokéSnax you have on you. You can feed it and take it along. Interestingly enough, you can get both by visiting more than once. Just exit and enter the alleyway. You'll need a PokéSnax to make them appear. Plusle (Level 20) Bestow, Swift, Electro Ball, (Sing or Wish) AND/OR Minun (Level 20) Switcheroo, Swift, Electro Ball, (Sing or Wish) As you can see in the picture, there's also a Litleo that appears in the daytime. Talking to it will scare it off. If you go to the house just left of building 4, you can find it again. It'll run downstairs. The Pokémon you can find in that area are Underground Railnet (Obsidia Access) Noibat (80%) Klink (20%) Swoobat (Dark patches only) as well as the Klinglang that's about to attack the Litleo. This level 35 Pokémon will be considered a trainer and can't be caught. Once you defeat it, Litleo will force itself into your party. Litleo (Level 18) Ember, Work Up, Headbutt, Noble Roar It's rather powerful compared to the other Pokémon you've encountered up to this point and it has access to Ember. Consider using it for the upcoming Grass gym if you're having difficulty, but be warned that it doesn't evolve until level 35 which you can't control right now. Finally, enter the Obsidia Department Store. It's right next to the entrance to the Onyx Ward. Talk to one of the ladies by the counter (not behind) to receive a store card. This store is the mega complex you've seen in other games. You'll need to get stickers to access the higher floors which contain better items such as berries to lower EVs or evolution stones. We've dealt with all the sidequests we can at the moment, so let's move on. Enter the Onyx Ward. Onyx Ward The Pokémon Lottery Center is the first building you'll come across. You don't have a Coin Case just yet, so you can't participate. I would recommend you don't bother entering right now. You can talk to everyone, but you'd have to talk to them again to get some free coins once you get your case. In one of the houses, you'll find a girl who expresses concern for the daycare couple. She'll ask you to check on them. Since you already did, you can talk to her again and she'll be grateful to you. So much so, in fact, that she'll reward you with an egg. The egg contains a Water-type Pokémon. Clamperl (Level 1) Whirlpool, Iron Defense, Muddy Water, Body Slam OR Seel (Level 1) Headbutt, Perish Song OR Remoraid (Level 1) Water Gun, Acid Spray OR Spheal (Level 1) Powder Snow, Water Gun, Stockpile, Signal Beam OR Frillish (Level 1) Bubble, Water Sport, Acid Armour, Confuse Ray OR Clauncher (Level 1) Splash, Water Gun, Aqua Jet The people on the right side will be too busy talking to move out of your way, so enter the school from the left side. You'll run into Fern. If the sensation of wearing wet socks were a person, it would be Fern. His hate boner for you is still going strong, so he'll instruct his goons to keep you out of the school and will lock the west entrance. Walk outside and enter the school from the right side. Fern's lackeys will try to stop you, so you'll need to battle your way through the entire school. You can find a gamer who's frustrated with the arcade on the second floor. He'll give you his Coin Case in an attempt to stop himself from wasting more time on those games. You can now enter the arcade center. If you talk to the people in there, you'll be able to get coins for free. I recommend playing Voltorb Flip. It's free, fun, and always earns you coins no matter how poorly you do (though you get more the better you play). You can use this website if you want to significantly increase your "luck". The prizes for the Lottery are as follows: Last digit: Full Restore Last two digits: Max Revive Last three digits: PP Up Last four digits: Experience Share All digits: Master Ball I recommend you obtain as many Pokémon as you can for two reasons. The first is that at one point in the game, you'll have limited access to different types of Pokémon but you'll still have to battle at least 3 gyms. You'll want to have a broad selection of Pokémon to choose from should struggle with an event. Even if you think a Pokémon is weak, you might reconsider later or use it to breed. The second reason is for the lottery. Free items. You can also buy the following Pokémon from the arcade center: Slugma (Level 20) Rock Throw, Harden, Incinerate, Clear Smog AND Nidoran♂ (Level 20) Focus Energy, Double Kick, Poison Sting, Fury Attack AND Shinx (Level 20) Charge, Baby-Doll Eyes, Spark, Bite Slugma has access to Fire moves which will be super effective against the upcoming gym. However, Florinia's Grass-type Pokémon have access to moves which oppose Fire-types and Slugma is rather slow which ensures that it'll be hit by them. The slightly safer route if you're looking for Fire-type moves would be to take the Blitzle you caught outside Julia's gym (see Blitzle event from part 1). At level 18 it learns Flame Wheel which also increases its speed after every execution, thus helping to set itself up for a sweep. Just be wary of her Pokémon with Ground-type moves. Additionally, you can buy the following TMs: TM45 Attract, TM42 Facade, TM90 Substitute. Facade is a physical 70 power Normal-type move that doubles its strength if the opponent has a status effect. It's a better alternative to Cut, especially if you downloaded the mods I recommended. If you dig around, you can find a bit of backstory about Julia, Florinia, Amaria, and another girl you've yet to meet named Titania. Unlike the others, Titania's diary will chastise you for reading other people's private journals. There's a computer that's spazzing out in another room. Several hours from now you'll need to return here to get a Porygon. As things are, you can't receive it right now. What you can receive in this room is the item Protective Pads. Also on the second floor is a kid with a hat by a plant. If you talk to him from his right side, he'll leap backwards and bump into the plant on the side. The teacher standing nearby will leave to get a janitor, leaving open a set of doors as he does so. For those who missed what the teacher says before you talk to his student, here's the dialogue. You're a gym challenger, aren't you? Visitors are frequent here, but they usually don't have to come upstairs. Are you lost? Not very interesting, but I'm one of those people who likes to read everything. Follow where the teacher went and you'll find info for Desert Field, the exact same field you'll be fighting Florinia on. When you return to the first floor after battling through the second, make sure you head right and unlock the gate so that you can quickly access the PokéCenter. As you battle your way left in the west wing, you'll find more terminals. You need to unlock all of them in order to reach Florinia. Throughout the school is the information you need. Throughout the rest of this paragraph are the answers from the rightmost computer to the leftmost: Starmie learns Rapid Spin at level 001. Huntail is number 367 in the PokéDex. It's true that areas have field effects that can increase or change the power, accuracy, and type of some attacks. Corsola's base stat total is 410. It's true that field effects can have special characteristics that may dramatically alter a battle. Cubchoo evolves at level 037. 15 Pokémon can learn the attack Lava Plume. It's true that field effects can be destroyed or transformed by certain attacks. With that out of the way, proceed left. You'll run into Fern. Fern's the type of person who calls himself a nice guy but gets angry and yells at girls for rejecting him. He'll block access into Florinia's gym, so you'll have to battle him to get him out of the way. Fern Super Potion x2 Field: Default Sandile (Level 23) Ability: Intimidate, Moxie, or Anger Point Item: --- Stats: HP 62 / Atk 44 / Def 27 / SpA 27 / SpD 27 / Spe 41 Bite, Rage, Mud-Slap, Sand Attack Roselia (Level 24) Ability: Poison Point Item: --- Stats: HP 70 / Atk 40 / Def 37 / SpA 65 / SpD 55 / Spe 55 Poison Sting, Mega Drain, Leech Seed, Stun Spore Dartrix (Level 25) Ability: Overgrow Item: --- *Stats: HP 84 / Atk 52 / Def 52 / SpA 50 / SpD 50 / Spe 41 Razor Leaf, Pluck, Astonish, Nature Power (Tri Attack) *Due to variations in nature, stats may alter Fern will get angry at you for defeating him and will decide to best you by attempting the Pokémon Gym League as well. Now that you've defeated him, you can go to the same apartment complex where you got that egg. Talk to Skye, the boy the blonde hair. He'll ask for forgiveness and grant access to his rooftop garden. It has higher level Pokémon but they seem to give lower experience points. If you need to grind, you can do so either in the alleyway or the slums. Rooftop Garden Bellsprout, Kricketune, Pidgey, Pidove, Spearow, Tranquill, Venonant If you have a PokéSnax on you, you can also encounter a Pichu up here. It'll attack you for your PokéSnax. Pichu (Level 9) Sweet Kiss, Tail Whip, Charm, Thunder Shock, Fake Out, Wish, or Volt Tackle Now that you're ready, it's time to face Florinia. Though you were helpful with the events at the factory and the park, your actions weren't enough to merit a badge. She makes note to mention that it's not because she's unthankful she battles you but rather because it's simply procedure. She'll tell you she expects you to lose. Prove her wrong. Head Instructor Florinia Super Potion x3 Field: Desert Field Maractus (Level 22) Ability: Water Absorb Item: --- Stats: HP 67 / Atk 44 / Def 36 / SpA 53 / SpD 36 / Spe 33 Nature Power (Sand Tomb), Pin Missile, Needle Arm, Spikes Ferroseed (Level 22) Ability: Iron Barbs Item: Telluric Seed (+1 Def/SpD/Spe, but holder is placed in a Sand Tomb) Stats: HP 54 / Atk 29 / Def 47 / SpA 18 / SpD 45 / Spe 12 Nature Power (Sand Tomb), Pin Missile, Leech Seed, Sandstorm Breloom (Level 23) Ability: Effect Spore Item: --- Stats: HP 62 / Atk 66 / Def 43 / SpA 34 / SpD 34 / Spe 39 Mach Punch, Mega Drain, Spore, Leech Seed Cottonee (Level 24) Ability: Prankster Item: --- Stats: HP 61 / Atk 26 / Def 45 / SpA 27 / SpD 37 / Spe 44 Nature Power (Sand Tomb), Leech Seed, Protect, Poison Powder Cacnea (Level 23) Ability: Sand Veil Item: Big Root Stats: HP 61 / Atk 54 / Def 28 / SpA 44 / SpD 28 / Spe 26 Pin Missile, Nature Power (Sand Tomb), Sand Attack, Leech Seed Cradily (Level 24) Ability: Suction Cups Item: --- Stats: HP 81 / Atk 49 / Def 57 / SpA 44 / SpD 68 / Spe 31 Smack Down, Recover, Stockpile, Sandstorm Now that you've beaten Florinia, she'll give you The Canopy Badge which makes Pokémon levels 35 and below listen to you. She'll also give you TM96 Nature Power. Because she's an instructor and a gym leader, Florinia can't abandon her position. However, the Jasper and Beryl wards are still being destroyed by plants. Since you're the only one so far that's managed to put an end to this disaster, she'll request that you go aid the police forces there as well. She'll install the PulseDex on your PokéGear, thus giving you information on certain Pulse monsters you'll fight. You'll have to find the information, though. She'll contact the police and make sure you can enter Jasper ward before wishing you luck in her own unique way. Before we move on, there are some events you now have access to. On sunny days, you can find a Petilil taking in the sunlight in the Obsidia Park. Give it a PokéSnax to take it along. Petilil (Level 15) Growth, Leech Seed, Sleep Powder, Mega Drain You can also go to the house all the way in the top left of Peridot by the Jasper Ward sign. Here you can receive the Snubbull/Stufful you encountered before. Snubbull (Level 20) Bite, Lick, Headbutt, (Close Combat or Heal Bell) OR Stufful (Level 20) ??? You're done here, so let's move on. Head to the Jasper Ward.
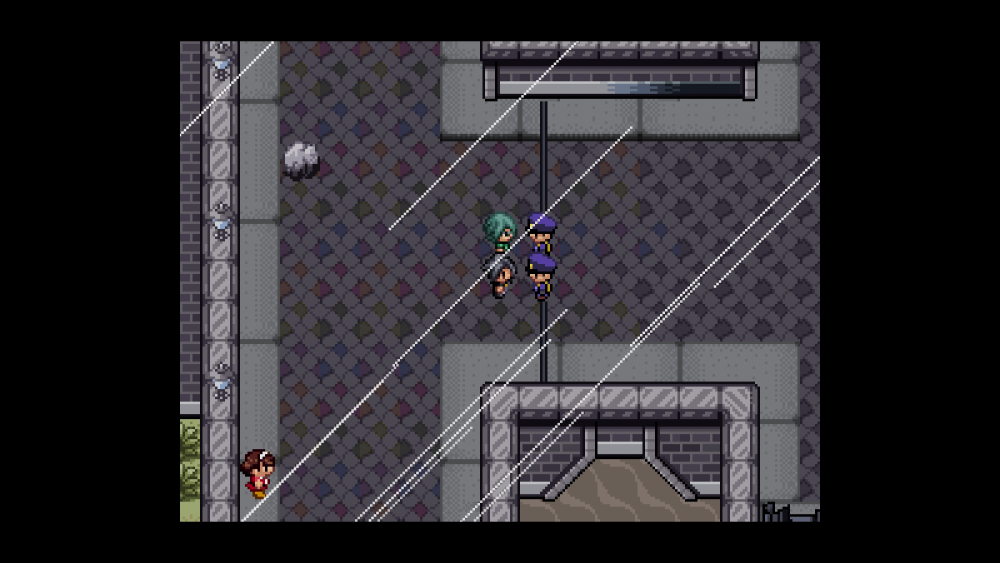


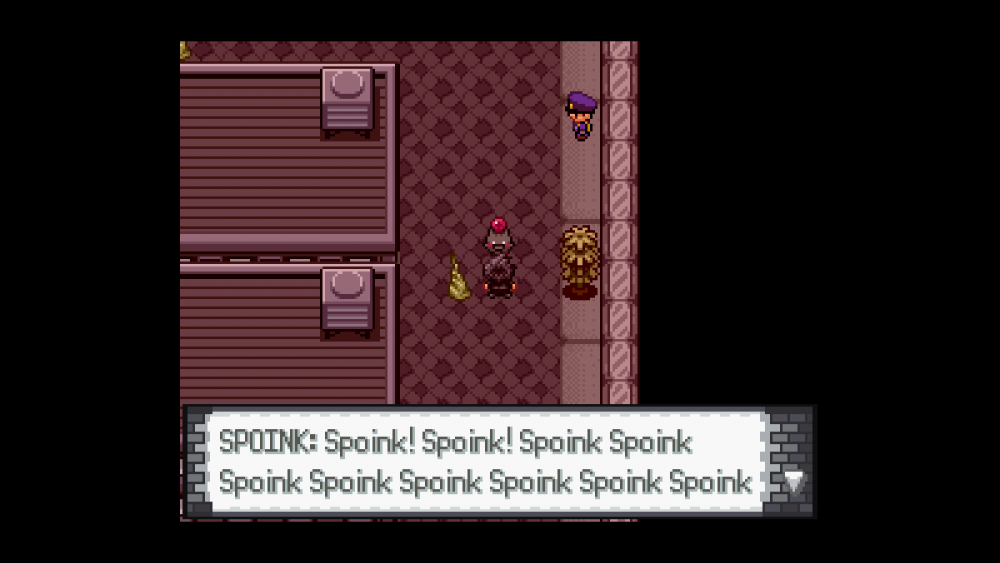

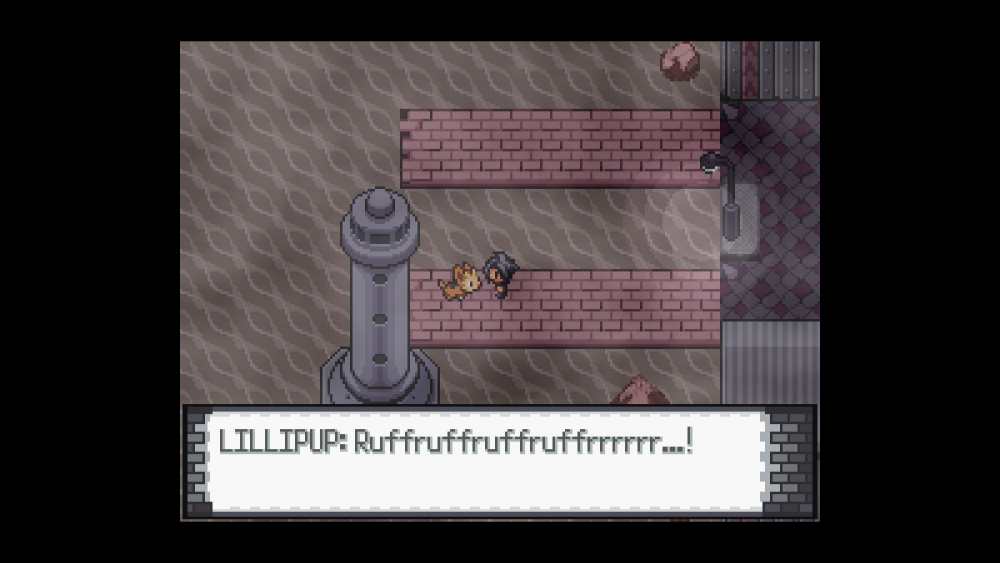

-
Thank you for your help.
-
Pansear is level 7? Panpour is level 10. Are you certain?
-
Thank you for your help. You wouldn't happen to know the levels and movesets of those Pokémon, would you?
-
PLEASE DO NOT COMMENT ON THIS THREAD. Keep all comments on the discussion thread provided. I will be updating this guide regularly and will let you all know when I decide to stop. You can subscribe to the thread by clicking follow at the top right. Most people (myself included) skip the intro, so I'll keep this short. I'll be making a guide of Episode 17 of Pokémon Reborn. Originally I was following Sophie's guide. She in turn was following Nickaboo's guide. Just as my predecessors before me, I will most likely not be completing this guide. Not because I'm a busy college student, but because Edit 3/9/18 I lied. My classes are destroying me. That being said, here is my general format: Items/Sidequests/Events Where to go next (For those who just want to know how to progress the story) General tips Starting date: 2/10/18 Starting episode: 17 If I miss anything, feel free to alert me on this separate thread. I would also like to take time to thank those who helped contribute to the guide. I'll update as more people tell me what I've missed. Thank you to the following people for their contributions to this part of the guide: Sparsyle-0 (Sophie), Walpurgis, Frelop, Paperblade Chapter 1 Julia's Gym For reasons that will be made clear later, I will be ordering the gyms in order of the gym leader you're meant to fight rather than calling them "Gym 1" or "Gym 2". You'll start by choosing your protagonist. During the train ride, a... ghost, for lack of a better term, appears. Ame (the same person who made the game), recognizing the ghost as an omen, looks out the window and notices that the train isn't decelerating. She'll grab you and jump out the window, narrowly saving your life. The other protagonists who had the misfortune of not being picked will be killed in the crash. You'll awaken in the Lower Peridot Ward. Julia, the first gym leader, will have a brief conversation with Ame before the latter departs. The gym leader will then ask you if you plan on taking on the Pokémon lead and you'll be given your first choice. As far as I'm aware, choosing one or the other doesn't affect the game. However, if you're curious like me, you'll be interested to know what the dialogue becomes based on your choice. Keep in mind that you can save your game at any time by pressing D. So long as there are no current dialogue boxes, you can save. This means you can save in the middle of a conversation if people are moving about or if there's a brief pause. This can help you in the future when you have to go through a series of battles. You can also reload previous games by using the navigation pathway C:\Users\YourNameHere\Saved Games\Pokemon Reborn, deleting the file that says "Game", and renaming whatever file you want to "Game". Anyway, here are the results: Are you going to take on the Reborn League? >Yes Julia: Correct! Then I'll be seeing you very soon, because I'm also the Electric Gym Leader! >No Julia: Whaaaaaaat? That's no fun! You simply must! Hm? Why do I insist? Well, because I'm the Electric Gym Leader! She'll then direct you towards the Grand Hall. Before moving, you can find a Normal Gem in one of the rocks that surrounds you. If you give this to a Pokémon to hold, it'll boost the first damaging Normal-type move they use but will consume the item. Since all starters begin with a Normal type, you'll give yourself a slight edge in your first battle. It might not be necessary based on your starter, but you'll soon learn that you're not dealing with the average Pokémon game anymore. I digress. There's only one route to progress given that the police are blocking your route up north, so start moving to the right. Once you enter the Opal Ward, you can speak to a lady with purple hair to get a Potion. This can also be useful for your upcoming battle. There are two ways to access the Opal Bridge, but the cool kids will stop you since you don't have Pokémon. Head towards the large building up above and you'll be stopped by a girl named Victoria. She'll act like your rival, in a sense. She'll take you inside and Ame will inform you that the person in charge of blowing up the station was caught. Ame will take you upstairs where you'll be able to choose any Fire, Water, or Grass starter from every generation. Yes, it is possible to get a shiny starter. The shiny rate in this game is increased compared to the normal game, but it can still take beyond an hour to get a shiny. If you save in the room and restart, you'll be able to change IVs, natures, abilities, and shiny status of all the starters in that room. Don't bother searching for the perfect ability because in about two hours you'll be able to change it anyway. Again, quick save is D and soft refresh is F12. If you're not interested in any of them, you can download this mod to choose your own starter from any Pokémon. For any who care, the first gym is an Electric gym and the second is a Grass gym. If you mess up your Pokémon's name, don't worry. In about an hour you'll find the Name Rater. Finally, Pokémon level 20 and below will listen to you if you have no badges while Pokémon level 25 and below will listen to you if you have one. After you choose Charmander, you'll be taken downstairs. Victoria will ask what starter you chose but won't counter pick you as she always chooses the same one regardless. You'll be introduced to Cain while she's away. He'll immediately engage you in a battle. Attacks in red are health based moves. Attacks in orange are physical moves. Attacks in blue are special moves. Attacks in grey are non-damaging moves. Pretty Boy Cain Field: Default Nidoran ♂ (Level 5) Ability: Hustle Item: --- Stats: HP 19 / Atk 10 / Def 9 / SpA 9 / SpD 10 / Spe 10 Scratch, Leer I wonder if it's possible for your opponents to have shiny Pokémon? Also, I will not always be able to get all the moves of each opponent, so enjoy them while they last. It doesn't matter if you win or lose since the story will progress the same. Furthermore, you won't have to pay any money for losing. I'll assume that you've won given that you have the Normal Gem and a potion on your side, but I'll put the text just in case. Battling Cain Should you win: Post battle: Cute AND Talented. Cain: Very nice! Should you lose, the text moves too far past the box. He says something along the lines of: "Hey, that's pretty unlucky, but don't take the loss too hard. I mean, unless you're into that." I'm not sure if the dialogue changes if you're a girl, but I'm interested to know if any of you chose one. Cain will take you over to the PokéCenter where you have the option to heal your Pokémon or not. Yes, you can choose not to heal your Pokémon, but you'll soon regret it. Victoria will emerge from the Starter Room with Ame. After clearing up a misunderstanding, Ame will take Cain away while you battle Victoria. You won't have a moment to buy more items. If you chose not to heal your Pokémon after your tango with Cain, you'll have to continue fighting with your lowered health. Remember that you can save while Cain is walking you to the healing desk, so you can retry your battle with Victoria by reloading your save game. Apprentice Victoria Field: Default Litten (Level 5) Ability: Blaze Item: --- Stats: HP 20 / Atk 12 / Def 9 / SpA 11 / SpD 9 / Spe 12 Scratch, Growl You'll have the advantage if you won against Cain as you'll have leveled up. You'll also gain money for defeating both of them. As stated above, it doesn't matter if you win or lose. Regardless, here's the dialogue. Battling Victoria Should you win: Post battle: Wow... I don't know what to say! Victoria: You're no ordinary trainer, are you... Should you lose: Victoria: Yay, I won! Don't get down though, every loss is a lesson. Cain will drop by to tell you he's leaving. You and Victoria will then go back to the Information Desk to talk to Ame. She'll give you a PokéDex, PokéGear (with which you may access the map and other, future tools), and Running Shoes (hold with the space bar to run or press S to toggle). She'll then leave to interrogate the terrorist who attacked the train station. Victoria will give you 5 Pokéballs to start your adventure and then leave. You're now free to do as you please. You can access your PC in order to find a free potion. It wasn't available until now because you were forced to walk to certain areas once you entered The Grand Hall. If you watch the T.V., you'll be able to watch many different channels. The only ones that might affect your actions are the Hunting channel and the Weather channel. Check the Hunting channel once a day to get the latest scoop on new Pokémon. If you talk to the lady in a green dress, you'll be able to battle her and her darling in a double battle as many times as you'd like. Their Pokémon level up as you progress throughout the game, so they're a source of free levels and money if you're able to best them. You can buy items on the right, but I recommend saving at least 500 poké. Always buy Pokéballs in sets of 10. This way you'll get a free Premier Ball as well. The Premier Ball has the same "strength" as a normal Pokéball. Even if you don't want to use it, you can sell it for 100 Poké which is half the price of a normal Pokéball. I personally use them to catch Shiny Pokémon. Once you're done buying items, head towards the exit. There will be a fisherman on the right side. He'll offer to sell you a rare Pokémon for 500 poké. As soon as you buy the Pokémon, the man on the left will steal it from you before you even have a chance to see it. As the fisherman will tell you, you'll be able to find the man in North Peridot. This will become a sort of hide and seek event that you'll have to play throughout the game. I'll reference it as Event: SP, the SP standing for Stolen Pokémon. You can ctrl + f to find out where next you need to go to continue the event. If you ever forget where to go next, you can talk to the people in The Grand Hall for directions. For now, you may exit The Grand Hall. A short cutscene will play in which you see Ame and a few police officers torturing information out of the terrorist. Opal Ward map Sometimes when I speak, I'm not clear in what I'm trying to say. I'll be dropping maps in this guide and marking them to better explain locations. I recommend having them open in a second tab. Outside The Grand Hall you'll be trapped by a girl trying to talk to her Pokémon who ignores her. If you defeat Victoria, it will be a Snubbull. If you lose to her, it'll be a Stufful. Certain event Pokémon are chosen at random and may not be the same throughout your playthrough. They're supposed to be chosen at random, but from what I can tell, this Pokémon is decided based on whether you win or lose your match against Victoria. This girl serves as a reminder not to over level your team. If you do, they'll stop listening to you. Common Candies can be used to lower the level of your Pokémon by one. Anyway, with the path clear, you can proceed to catch your own Pokémon in the grass to the right and left. Pokémon Reborn uses a weather system as well as a day and night cycle. You can monitor the weather by watching the Weather channel on any T.V. Weather can cause certain event Pokémon to appear. If you fiddle with your computer's date, you'll be able to change the weather to something random. If you want something more certain, you can use a mod from the page I linked earlier. Additionally, the time in game is based on the time on your computer's time as well. This will have an effect not only on event Pokémon but also what types of Pokémon appear in the grasses around you. 6am-12pm is morning, 12pm-7pm is day, and 7pm-6am is night. If you're having difficulty catching a Pokémon and you have a Dusk Ball, you can always set your computer time to night so that the effects of the Dusk Ball kick in. Here's the Pokémon you can catch in the grass nearby: Morning/Day Rattata (30%) Bidoof (30%) Patrat (15%) Pidgey (15%) Meowth (5%) Ekans (5%) Night Rattata (30%) Meowth (20%) Ekans (20%) Hoothoot (17%) Spinarak (13%) Headbuttable Trees Pineco (40%) Combee (30%) Spearow (30%) While it's possible to catch Alolan Rattata here, they seem to be exceedingly rare. Don't bother wasting effort trying to catch them here as you'll be able to find them much more frequently in a few hours. I'm also adding this video on how to EV train quickly in Reborn for those who don't have the patience or who are playing from the beginning again (like myself). You can now battle the cool kids to gain VIP access to the cool bridge. In the top right corner, a few kids will be trying to push a Pokémon into a heavily polluted river. Again, the Pokémon here changes depending on your specific playthrough, but across the five times I've restarted it's always been Pachirisu. You'll have to fight the first kid's trash followed by double battling the thugs behind him. Once they're defeated, the Pokémon you've saved will request to join your team either out of gratitude or because it knows you'll keep it safe. Pachirisu (Level 5) ??? OR Zigzagoon (Level 5) Tail Whip, Tackle, Growl Pachirisu has some pretty good stats for an early access Pokémon. It doesn't evolve, but you might find it useful to hold onto. As you progress through the game, you'll notice that the condition of the city is as poor as its residents. You won't be earning a lot of money from battles, but there are a few Pokémon (namely Pachirisu, Meowth, and Teddiursa) that can have the ability Pickup. The items they gain you are based on their level as shown by this chart. You can either sell them or keep them for use. Your selection of Pokémon early on isn't great, so I would recommend running a team with Pickup until you find better Pokémon to replace them. Anyway, head left towards the Peridot Ward. Lower Peridot Ward Lower Peridot Ward map You may have noticed that there are items called PokéSnax. These can be used to get event Pokémon. They can also be fed to the Pokémon on your team to increase their happiness by a factor of about 10. One thing I would recommend is that you talk to and search everything throughout the game. It's the best way to get items or learn about events. Speaking of events, we'll begin by identifying the events on the right side and moving left as that's ultimately where you'll want to head. As you enter the city, you'll encounter a Teddiursa. This little monster will hide in various spots but it will always be somewhere in the Lower Peridot Ward, Peridot Ward, or Upper Peridot Ward. Search thoroughly as it hides in different spots between different save files. For what it's worth, I'll upload the locations where I found it. Some of the locations aren't in Lower Peridot but in Peridot and Upper Peridot, so just keep an eye out for them as you travel. Teddiursa Baby-Doll Eyes, Lick, Fake Tears, Fury Swipes You'll overhear two people talking about a Pokémon that they stole and hid in a house due to not having a Pokéball. If you go to where the 1 is marked on the map, you'll find a man standing there. After giving him a total of 150 Poké, he'll step aside and sleep. Inside the house that the alley leads to, you'll find a Pokémon. This traumitized Pokémon is the one those thugs stole. If you have a Pokésnax on you, you'll be able to take it along with you. You'll never encounter the owner, so you might as well care for them. Note that you don't have to feed it a Pokésnax, so you can hold onto it for later use. Espurr (Level 4) Scratch, Leer OR Minccino (Level 4) Pound, Baby-Doll Eyes In the house below that one marked 2, you can also find a Whismur. If you have a PokéSnax on you, it'll attack. You can choose to capture it, defeat it, or run away. This Pokémon is only available before defeating the first gym. Whismur (Level 5) Pound, Echoed Voice If you check the dumpster marked 3 behind the Whismur house while you have a PokéSnax on you, you'll be attacked by a Gulpin. Gulpin (Level 10) Pound, Yawn, Poison Gas, Sludge The 4 next to the gym is where a Blitzle will appear during storms. Blitzle (Level 15) Tail Whip, Charge, Shock Wave, Thunder Wave If you defeat the lady where the 5 is marked, you can talk to her after the battle to receive a Rose Incense. This is a held item which increases Grass-type moves by 20%. At the top right of the map is an 6. After fighting a trainer, you'll have access to an alleyway. Here you can find Poochyena, Stunky, and Trubbish. Morning/Day/Night Trubbish (60%) Stunky (22%) Poochyena (18%) You can also find a Tynamo there in Stormy weather. Tynamo (Level 10) Tackle, Thunder Wave, Spark, Charge Beam On windy nights in any alleyway, you can find a Zangoose rummaging through the trash. This begins a hide-and-seek event where you must search alleyways throughout the game to find the Zangoose. I currently haven't found it myself, so I'll update this post when I do. From what I've heard, it's too high a level for you to currently catch. Zangoose (Level 40?) ??? To the right is a further extension of the Opal Ward. On rainy days, you'll find a Pokémon hiding under the bridge. If it's a Panpour, you'll have to fight it to catch it. Pansear will simply join your team as it's probably just happy to be out of the rain. Panpour (Level 10) Play Nice, Leer, Lick, Water Gun OR Pansear (Level 7) Scratch, Play Nice, Leer, Lick If you go even further to the right, you'll enter the Underground Railnet. Underground Railnet (Peridot Access) Noibat, Woobat (in dark patches only) In the house just to the right of the alleyway is a girl with a Kricketot. Talking to her will reveal that it is sick. Shelly, the Bug-type gym leader, will come in on a house call. She'll realize the Kricketot is bored sitting at home all day and ask if you'd like to take it along with you. If you refuse, she'll take it herself and return to her gym. Kricketot (Level 3) Growl, Bide Over on the left side is a house marked 7. The man in there will give you his Old Rod. Currently, the only Pokémon you can fish up are Grimer since the toxicity of the water has caused all other Pokémon to flee. The man in the house marked 8 will battle you. His level 10 Goldeen packs quite the punch with its Horn Attack move, and it's rather fast. After defeating him, you'll gain access to the pool in the back of his house. In this pool you can fish up Finneons and Goldeens using your Old Rod. Don't forget to grab the Sea Incense at the top right before leaving. Like its rose counterpart, it increases Water-type moves by 20%. Goldeen (70%) Finneon (30%) The Name Rater is on the left side of the map under the letters 9. In the 10 apartment complex, there's a man who's tired of meeting bad trainers. If you defeat him, he'll give you access to his garden. Here are the Pokémon you can find there: Morning Ledyba (30%) Cherubi (28%) Wurmple (21%) Caterpie (21%) Day Caterpie (45%) Wurmple (45%) Cherubi (10%) Night Hoothoot (30%) Spinarak (24%) Wurmple (20%) Caterpie (20%) Stunky (5%) Trubbish (1%) Headbuttable Trees Pineco (55%) Burmy (45%) That's all the events you can currently complete in Lower Peridot. We'll come back to the rest later. You'll notice that if you try to enter the gym, it'll be locked. A note will be left on the door by someone you'll soon meet. You'll soon learn that her character was made by running all of her words through thesaurus.com Here's the translation for what it more or less says: "Julia, maybe you shouldn't do things that make you sleepy before agreeing to meet up with us during what's normally your nap time. We'll be at the factory. Join as soon as you can." For now, move to the top left corner of the map and access the North Peridot Ward. North Peridot North Peridot Ward map You can complete your hunt for Teddiursa now that you've reached this area. The man in the house marked 1 will ask for your Bibarel and will give you a Munna in return. The only way to get a Bibarel is by leveling a Bidoof to level 15. Munna (Level 15) Lucky Chant, Yawn, Psybeam, Imprison The alleyway marked 2 will have the following Pokémon: Morning/Day/Night Trubbish (45%) Poochyena (34%) Purrloin (21%) The fountain marked 3 will have a Surskit during rainy days. Surskit (Level 11) Bubble, Quick Attack, Sweet Scent If you talk to the woman in the house marked 4, she'll send you away for fear that the thieves who stole one of her Pokémon will come back for the other. If you visit the house near where the number 2 is, you'll find that two people are discussing going back to steal her other Pokémon. They'll demand you stay out of their way. Visiting the lady's house at night will cause you to encounter them. They'll finally introduce themselves as Team Meteor and will recite a chant you'll never hear again. After a brief battle, they'll run away. The lady will ask you to take her Pokémon with you for fear that they may come back to kidnap it. Igglybuff (Level 5) Charm, Defense curl, Pound, (Perish Song, Misty Terrain, or Wish) On clear or sunny days, a Budew will be walking along the edge of the wall at 5. If you have the Rose Incense on you, the Pokémon will be attracted to the smell and will jump into your arms (you'll need to "talk" to it for this to occur). Budew (Level 5) Absorb, Growth I recommend you go catch Budew for an event that will occur later in the game. Though this is a walkthrough, I don't want to spoil the event until you get to it. For now, I'll simply refer to it as Event: G. If you visit the apartment complex labelled by the number 6 at night, you'll enter a dark room. Someone will tell you that a Pokémon is absorbing the electricity and will ask you to find and stop them. If you can't see, turn up your screen brightness. The Pokémon is over on the right side of the room. Talking to it will initiate a battle where you can catch it. Joltik (Level 10) Absorb, Spider Web, Thunder Wave, Screech OR Grubbin (Level 10) Vice Grip, Mud Slap, String Shot, Bite Finally, head towards the house at the very top of the map. In there, you'll be able to continue Event: SP. The thug who stole the Pokémon will demand another 500 Poké from you which you must give to progress. His partner, the fisherman, will then come out of hiding and the two will engage you in a double battle. After defeating them, the thug will say that on the way to the house, a kid in Obsidia stole the Pokémon from him. Having gotten 1000 Poké out of you, the two will run away. If you really hate the idea of them stealing 1000 Poké from you, you can wait until much later in the game to battle them. When your Pokémon are around level 65, battling them will get you 1100 Poké as prize money. They'll still comment about getting 1000 Poké from you, but you'll be the one who ended with a net positive. Those are all the events on this side of the map, so you're ready to continue. Head towards the number 7 on the map. You'll run into a guy with green hair named Fern. Fern's the guy who talks really loud about how hard he partied last night at 4am. Fern's the guy who keeps interrupting the professor in the middle of lecture. Fern's the guy who puts ketchup on his steaks. Fern yells at people who are just trying to do their job like cashiers and waiters. If Blue from Generation 1 of Pokémon had angry hate sex with Joffrey from Game of Thrones and a child was made from it, Fern would be that offspring. As you'll soon find out, Fern is a character designed for you to hate. Surprisingly enough, I don't. He's so over the top that it's difficult for me to imagine someone as terrible as him. He's just a mild annoyance in my eyes. You'll find that he's supposed to meet Julia outside a factory but came to the wrong one. He'll then engage you in battle because why not. Blue But Worse Potion x1 Budew (Level 12) Ability: Natural Cure, Poison Point, or Leaf Guard Item: --- *Stats: HP 32 / Atk 13 / Def 14 / SpA 18 / SpD 10 / Spe 10 Absorb, Growth, Water Sport, Stun Spore Rowlet (Level 13) Ability: Overgrow Item: --- *Stats: HP 43 / Atk 21 / Def 21 / SpA 20 / SpD 20 / Spe 18 Leafage, Peck, Astonish, Growl Sandile (Level 10) Ability: Moxie Item: --- *Stats: HP 30 / Atk 20 / Def 12 / SpA 12 / SpD 12 / Spe 18 Rage, Bite, Sand Attack, Torment *Due to variation nature, stats may alter Losing to him doesn't change the dialogue since you blackout and have to try the battle again. As such, don't lose. He'll act like he's too busy and leave. Head back to the gym where you'll bump into Julia. She'll inform you that the people who destroyed the train station are at the factory and asks you to join her. Head to the factory marked 8. You'll run into Julia, Fern, and Fern's sister, Florinia (the 2nd gym leader). The factory is apparently Team Meteor's hideout. They're the ones behind the train station demolition, and Julia gives back to them by blowing up the entrance to the factory. Before entering, check the barrel on your left to get an Ability Capsule. This can change a Pokémon's abilities and even grants access to dream world abilities. Enter the factory to be hit by an overwhelming stench. Florinia will tell you the lake is about 90% polluted if not more. Julia will state that the terrorist group needs to be stopped and will pair up with Florinia. They'll take the right half of the factory, leaving you and Fern to explore the left side. Should you try to leave, Fern will say the following: "Just where do you think you're going? I told you not to slow me down. But if you've gotta go do something, go right ahead! I'll just wait here." You'll then be allowed to leave to continue grinding or do whatever else you need. Despite the high stress environment, you can leave the story at any time to go complete sidequests or level up your Pokémon. It may take you out of immersion, but it can help you to better prepare for a battle you might otherwise fail. When you're ready, continue to the left inside the factory. You'll be engaging in double battles with Fern whose Pokémon never seem to gain levels while you battle. Your Pokémon will automatically be healed after each battle. There aren't any hidden items here though there are visible ones thrown about. Take notice of the change in battle field. You can find the effects of this Factory field in the provided link. The path through the factory is relatively straightforward. Eventually you'll find Florinia and Julia waiting for you. A gate that could most likely be destroyed with an explosion by a Pokémon blocks your path. You'll be instructed to go find explosives in the path below you while Florinia attempts to hack the gate. Before you do, go through the door on the right to find a Rare Candy. Once you find the explosives, talk to Julia. She'll place them in front of the gate, but the door will open before they can be set off. Don't forget to save your game. This will be your first "boss battle" of sorts. You'll enter the room to be greeted by my second favourite track in this game. You can find it here. The man with the eyepatch will tell you that you were meant to progress this far into the factory. Apparently the grunts before you were only meant to slow you down enough for them to delete whatever data they needed since the factory is no longer important to them. They even opened the final gate for you because they grew tired of waiting. You'll fight the pair Aster and Eclipse for the first, but not last, time. Team Meteor Grunts Aster & Eclipse Potion x1 Field: Default Rockruff (Level 16) Ability: Steadfast Item: --- *Stats: HP 44 / Atk 30 / Def 22 / SpA 18 / SpD 22 / Spe 30 Thunder Fang, Bite, Rock Throw, Howl Rockruff (Level 16) Ability: Vital Spirit Item: --- *Stats: HP 44 / Atk 30 / Def 22 / SpA 18 / SpD 22 / Spe 30 Fire Fang, Bite, Rock Throw, Howl *Due to variation in nature, stats may alter Matching Pokémon. How cute. Delete them. Their boss will be disappointed that they were defeated so quickly. They'll all disappear somehow. Julia will explode the factory since it's most likely still polluting the lake. Fern will offer one last insult to you before leaving. Florinia will install a Field Notes app on your PokéGear regardless of how you respond to her. It'll have information about Electric Terrain which is the field Julia fights on in her gym. Julia will lament about the old days throughout the conversation before inviting you to her gym and leaving herself. It's now time to face her, so level your Pokémon well and head to your first gym battle. I personally keep my Pokémon a level below the level cap (currently that's 20, so my Pokémon are level 19). This way, if I sweep the gym with a single Pokémon, it won't get past the level cap and start ignoring me. Her gym, much like the factory, is straightforward. One thing I feel I should note is that if you leave the gym, your progress won't be restarted. Growing up, I always went through gyms in one go without stepping out to heal my Pokémon because the thought never occurred to me. What may be obvious to you might not be obvious to me, and vice versa. As such, I'll probably say some things that are obvious every now again. I don't know how you build your team, but I personally find that a team full of sweepers meets my needs in this game. Julia has a Voltorb which knows Sonic Boom, a move that always reduces your health by 20 points no matter what. I found it best to have at least two Pokémon available to sweep her team for this reason. The Voltorb is fast, so either take it out in one hit or have Pokémon with more than 40 HP. This is the first Pokémon game I've ever actually lost a trainer battle in (of course I save before big battles in this game and restart so that nobody knows I lose, but still). Episode 17 seems to be a lot easier than my memory of episode 16. You don't necessarily need to grind in order to be prepared for Julia's team if you've been using the same Pokémon throughout the playthrough thus far. Cheer Captain Julia Potions x2 Field: Electric Terrain Minun (Level 12) Ability: Minus Item: --- Stats: HP 38 / Atk 14 / Def 18 / SpA 26 / SpD 27 / Spe 29 Nuzzle, Quick Attack, Charge Beam, Encore Voltorb (Level 12) Ability: Aftermath Item: --- Stats: HP 34 / Atk 16 / Def 19 / SpA 19 / SpD 21 / Spe 31 Sonic Boom, Explosion, Rollout, Charge Beam Alolan Geodude *Shiny* (Level 11) Ability: Galvanize Item: --- Stats: HP 32 / Atk 27 / Def 29 / SpA 12 / SpD 14 / Spe 12 Rollout, Self-Destruct, Tackle, Charge Pom-Pom Style Oricorio (Level 14) Ability: Dancer Item: --- Stats: HP 47 / Atk 26 / Def 26 / SpA 34 / SpD 26 / Spe 33 Pound, Air Cutter, Work Up, Tailwind Plusle (Level 13) Ability: Lightning Rod Item: --- Stats: HP 40 / Atk 17 / Def 17 / SpA 30 / SpD 26 / Spe 31 Nuzzle, Quick Attack, Charge Beam, Encore Electrode (Level 15) Ability: Aftermath Item: --- Stats: HP 47 / Atk 24 / Def 30 / SpA 33 / SpD 33 / Spe 54 Sonic Boom, Rollout, Charge Beam, Charge You know how earlier I asked if people you face can have shiny Pokémon? Julia will have a shiny Alolan Geodude. This was written into the story rather than mere chance since the shiny colour makes the Pokémon match the colour theme of the gym. I was able to defeat her team with a level 17 Pachirisu using Spark and my starter at level 15 for any who need help. Her Pokémon have other moves, but I was only able to see certain ones before her team was defeated. If you know the others, feel free to inform me. Julia will award you the Volt Badge and TM75 Charge Beam. You may now use the TM Cut outside of battle (though you don't have it yet) and Pokémon level 25 and below will now obey you. Your opponent seems to have fallen asleep, so feel free to leave the gym. As soon as you exit the gym, Victoria will be waiting for you. She'll tell you that plants are attacking the Obsidia Ward and runs off to go help. Before we move on, there are a few more event Pokémon you can obtain now that you've cleared the first gym. If you talk to a hiker near the train station, he'll tell you that he's lost his home. Returning to the house where the Whismur is will reveal an apartment landlord who's looking to the place. Speak with him and then go back and inform the Hiker. The hiker will enter the home. Satisfied that he's now found shelter, he'll offer you his Onix in return. Onix (Level 15) Curse, Rock Throw, Rock Tomb, Rage You can also encounter a Numel at the train station if it's raining outside. Numel (Level 15) Focus Energy, Magnitude, Flame Burst, (Stockpile, Growth, Iron Head, or Body Slam) You can talk to this man to update your Pokégear with information about a Factory Field. PLEASE DO NOT COMMENT ON THIS THREAD. Keep all comments on the discussion thread provided. I am working on the next part of the guide. It will take me a few days to complete. Subscribe for updates.


-
This post is meant for people to alert me to anything I missed on my guide. You can find it here.