Happy New Year folks! Well it’s already 24 days into the year… And a lot has already happened. Hope it’s treating you well, and if it ain’t then I hope that it does soon enough. In today’s development blog I will be touching on the changes within the Desolation Development Team (we have new members! Yes.. plural.) and I will be providing a bit of an “in depth” analysis about how I proceed with the level design for the game. A lot of you enjoyed our blog regarding the creative process Darius and Rust follow in producing original music for Desolation, so I wanted to showcase a bit of my process as well when it comes to mapping! I will also be including a sneak peek at a map coming to EP7 but before we jump into that, lets discuss… changes.
A new year brings along new challenges and prospects, and in Desolation’s case, new team members. Please give a warm welcome to @MaggeyAttackey and @wiresegal as they join the Development Team! Mags will be joining us as an eventer, someone who will be working alongside me developing sidequest content and giving me a hand with main story elements. He has already proven himself with his creativity in the quests he has been working on, and it has been a real bit of fresh air to see what he is bringing to the team! Wire, on the other hand, joins us as a scripter who will be giving Yumil a hand in that department (can’t believe their reveal was leaked…). Wire has been contributing heavily to the community scripts project which for those who don’t know, Desolation shares a codebase with Reborn and Rejuvenation, so any changes that happen across one game is then passed onto the others, so everyone benefits! In their short time they have been here, they have already identified areas in Deso’s scripts to be optimised and incorporated some new systems into the game, some of which we will reveal at a later date so keep an eye out!
The team has really expanded in the last few years, it’s weird to think how EP5 was only myself, Ruby and Caz and now we host a team of 10 who all share the same passion in continuing developing Desolation. The year is looking bright and I look forward to what’s to come. With that said, let’s move into the next segment of this blog, mapping.
The Mapping Process
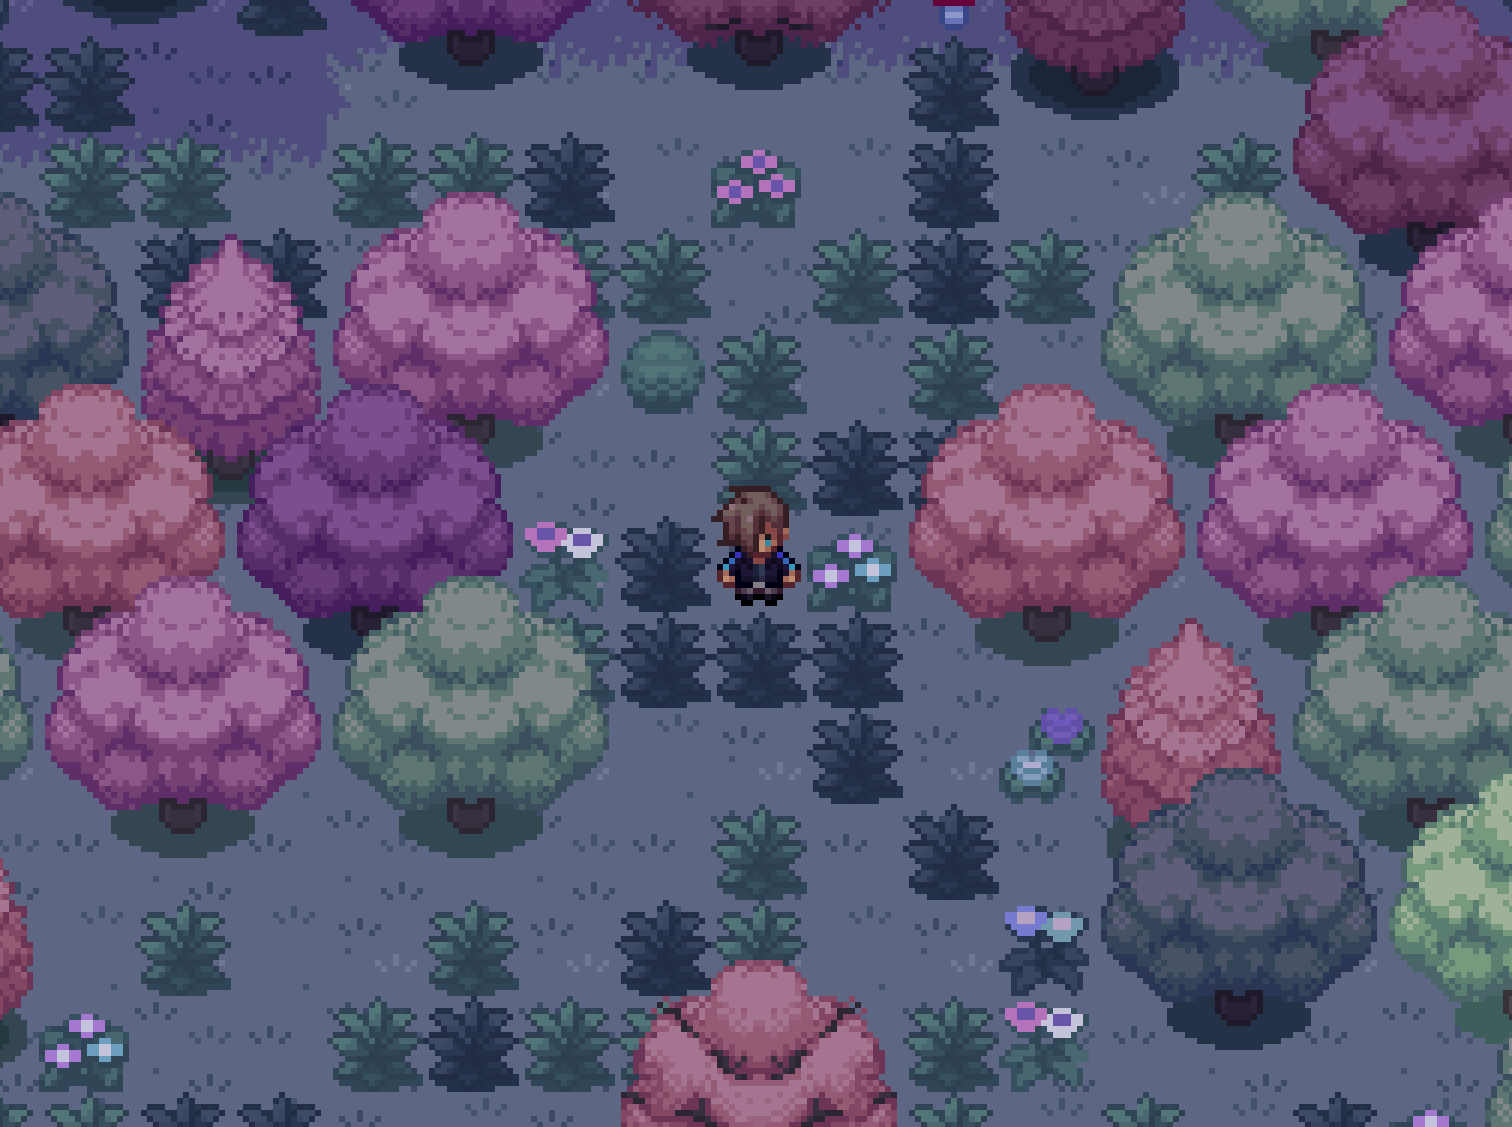
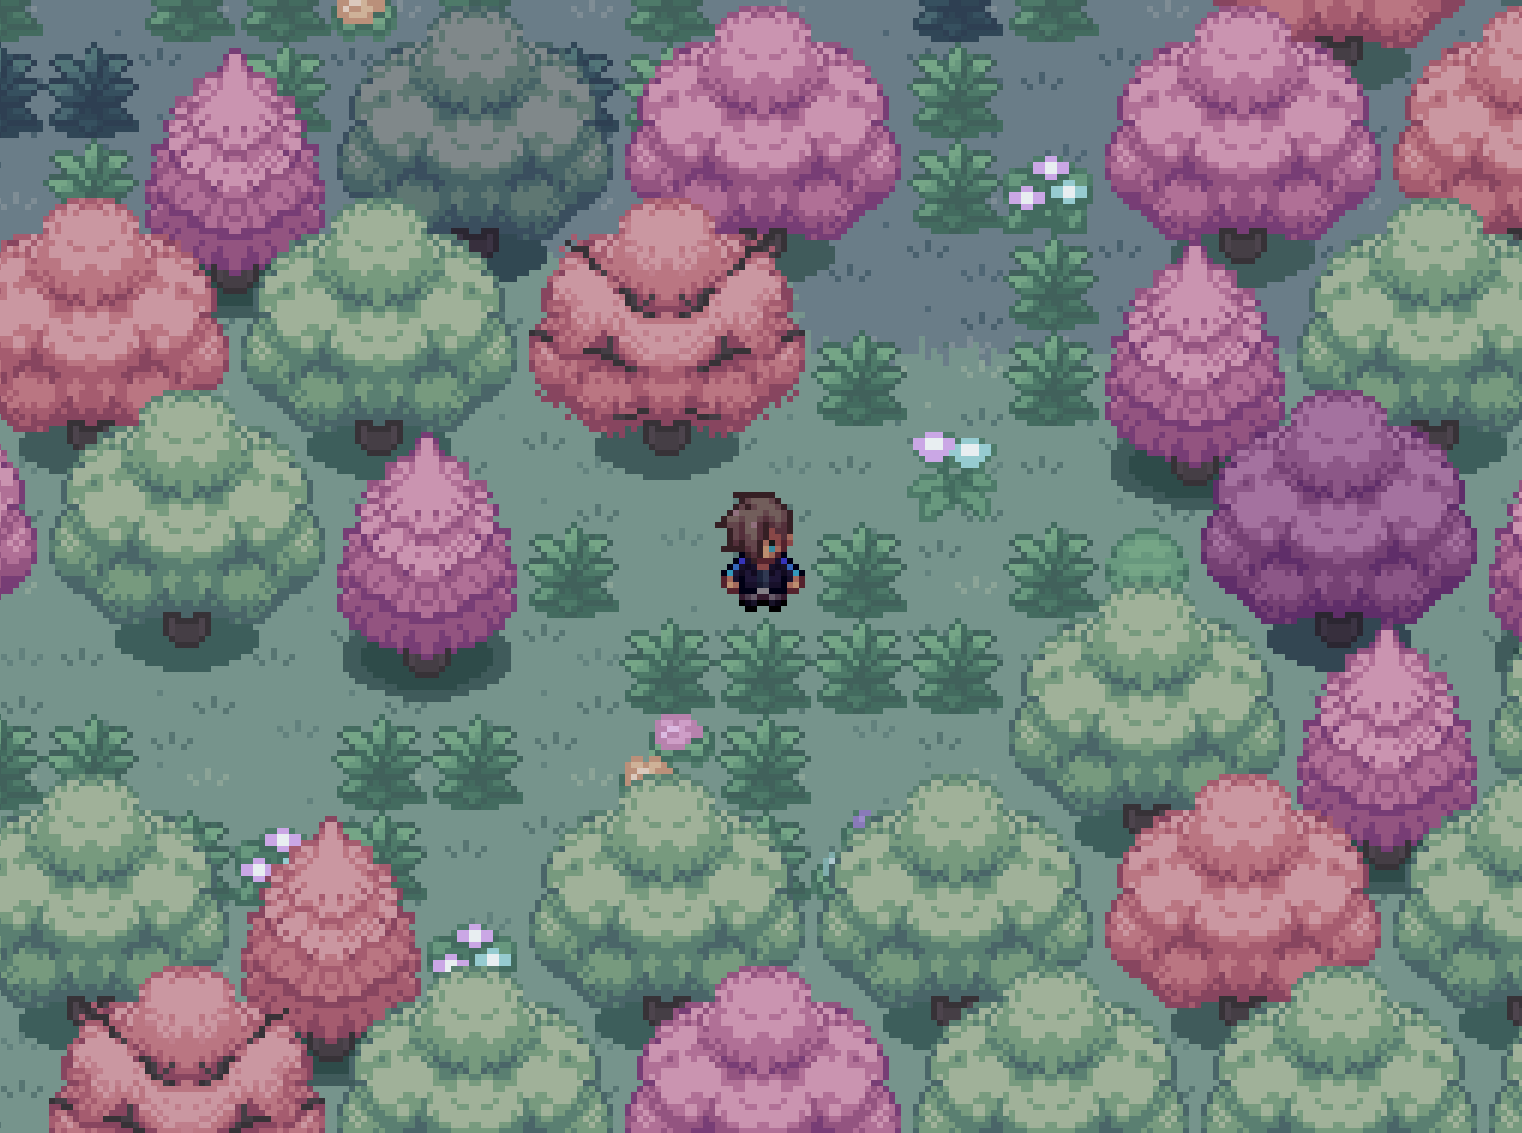
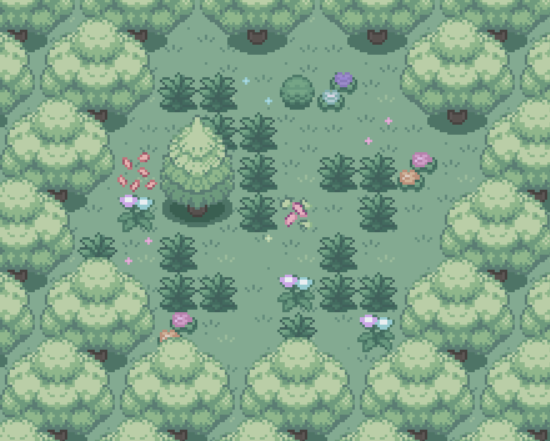
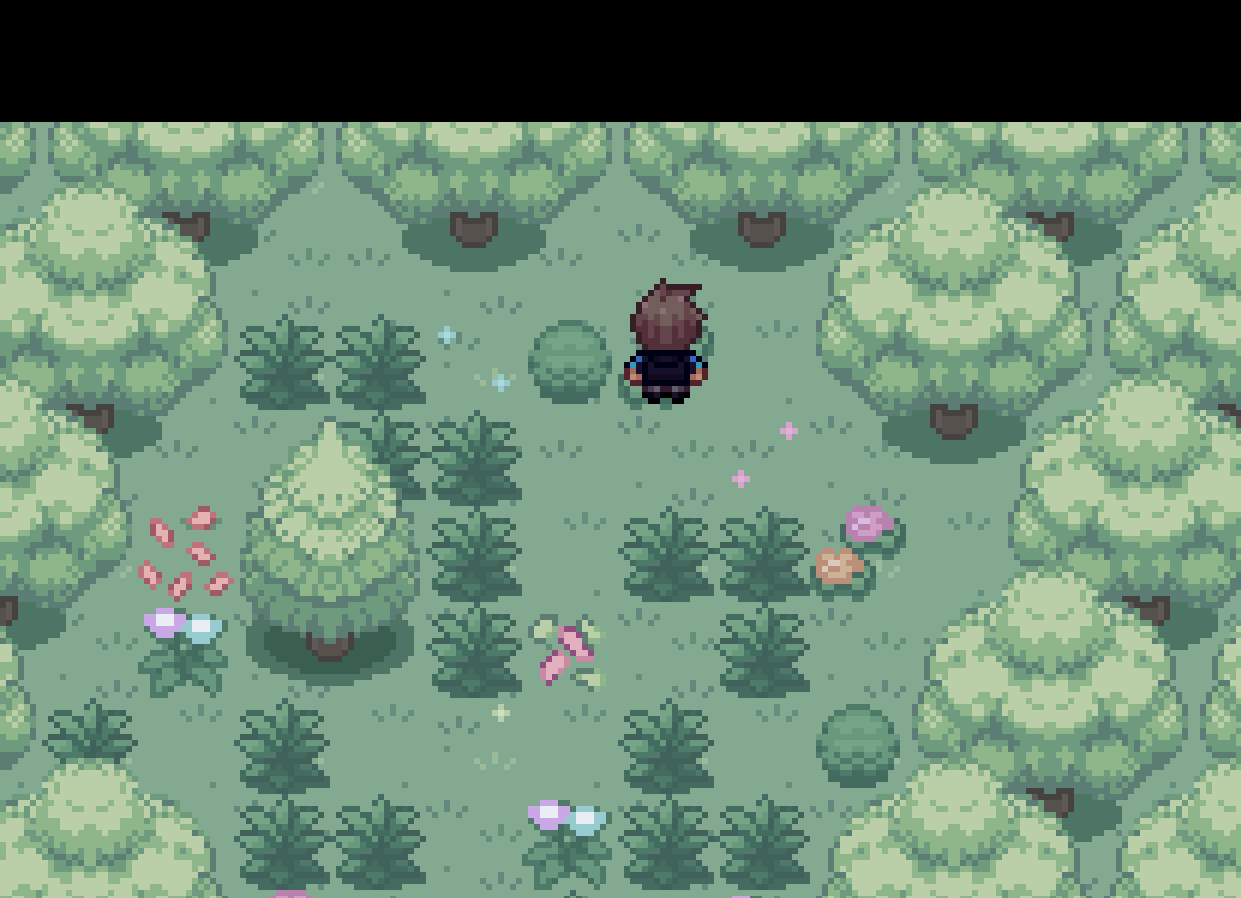
So let’s talk about maps. Level design is something that I was initially looking at as a career path… until I realised that my prospects were more suited for Digital Marketing and Content Creation, but I still really enjoy mapping new areas for Desolation. With that said, how do I go about my maps? The best way to start this off is by showcasing the final design for a new area in EP7, here is Astraciel Wildwood, you’ll see that this version of the map is different from what was originally mapped in our public stream back in December 2024, but keep reading and it’ll make sense!
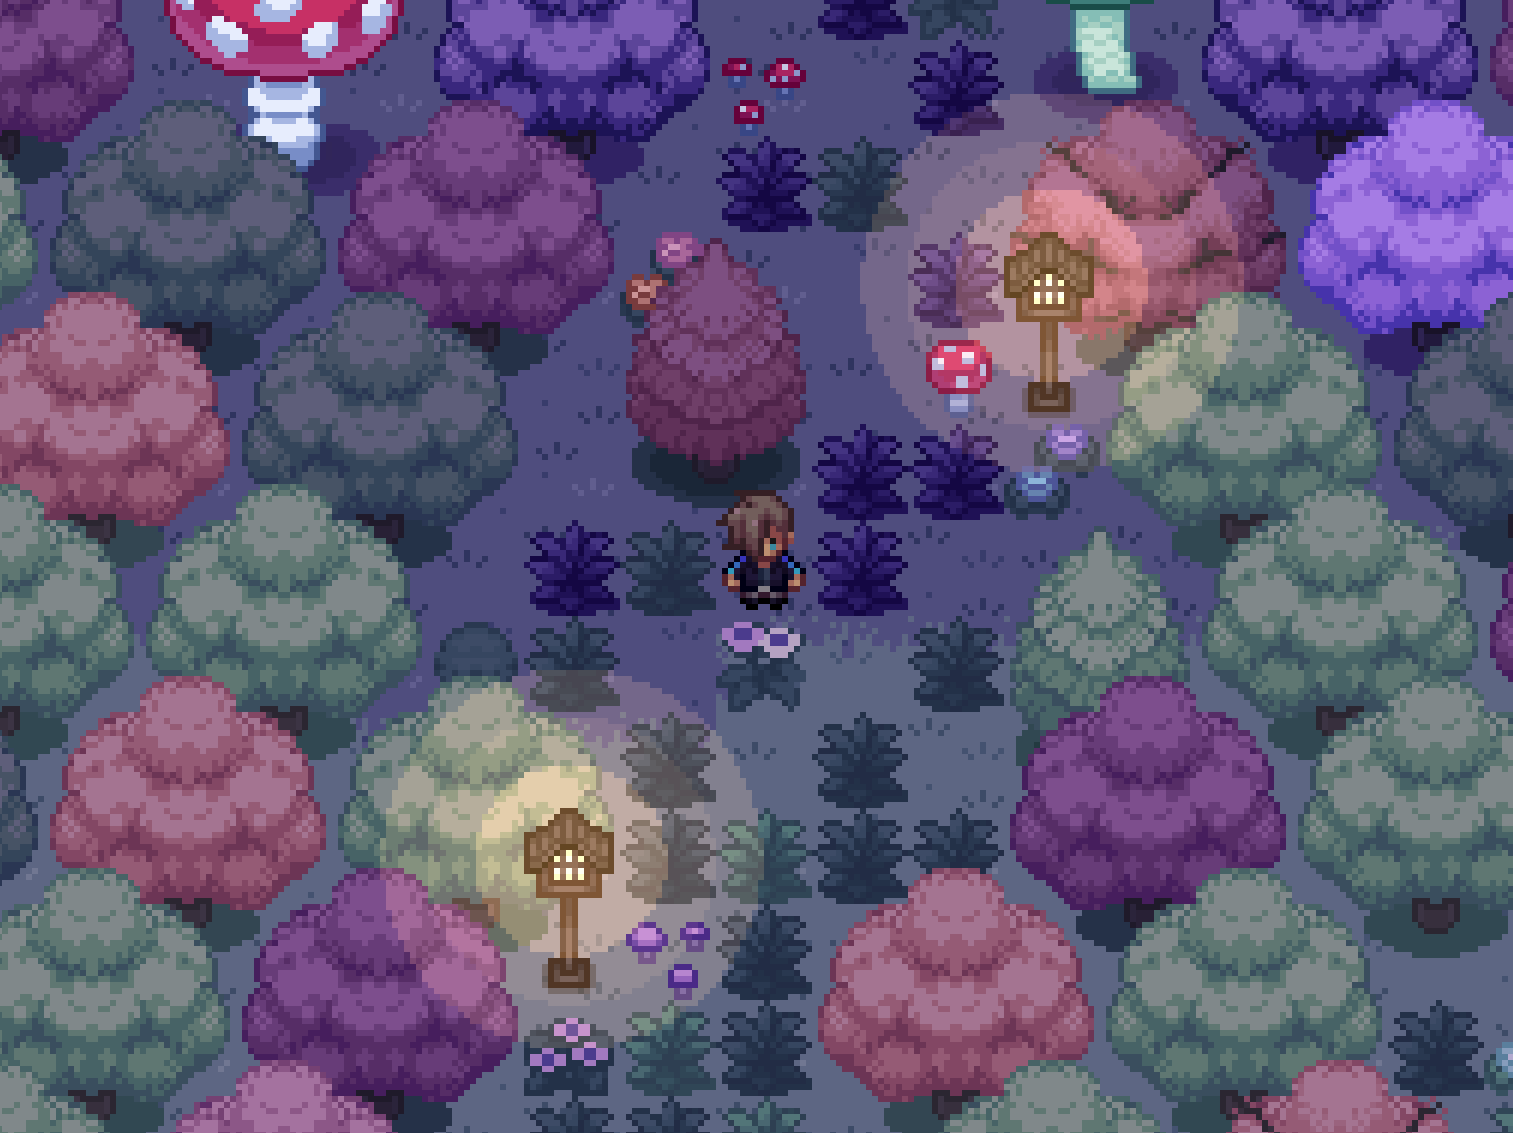
I’m really happy with how this map turned out. I worked on this map across two Development Streams which were exclusive to members of our Patreon. EP7, despite the bumps along the way, has been one of my favourites in terms of our map designs, really embracing the different landscapes Arcanius has to offer and letting our creativity spill out through our locations.
But how do I decide upon the design and what we need for the Game? My initial thought process follows a simple structure:
- Where is this area located?
- What is the purpose of this area?
- What sort of landscape will this area be?
- What is roughly the size of this area?
Let’s take Astraciel Wildwood as an example to explain my process and go through these one at a time.
Where is this area located?
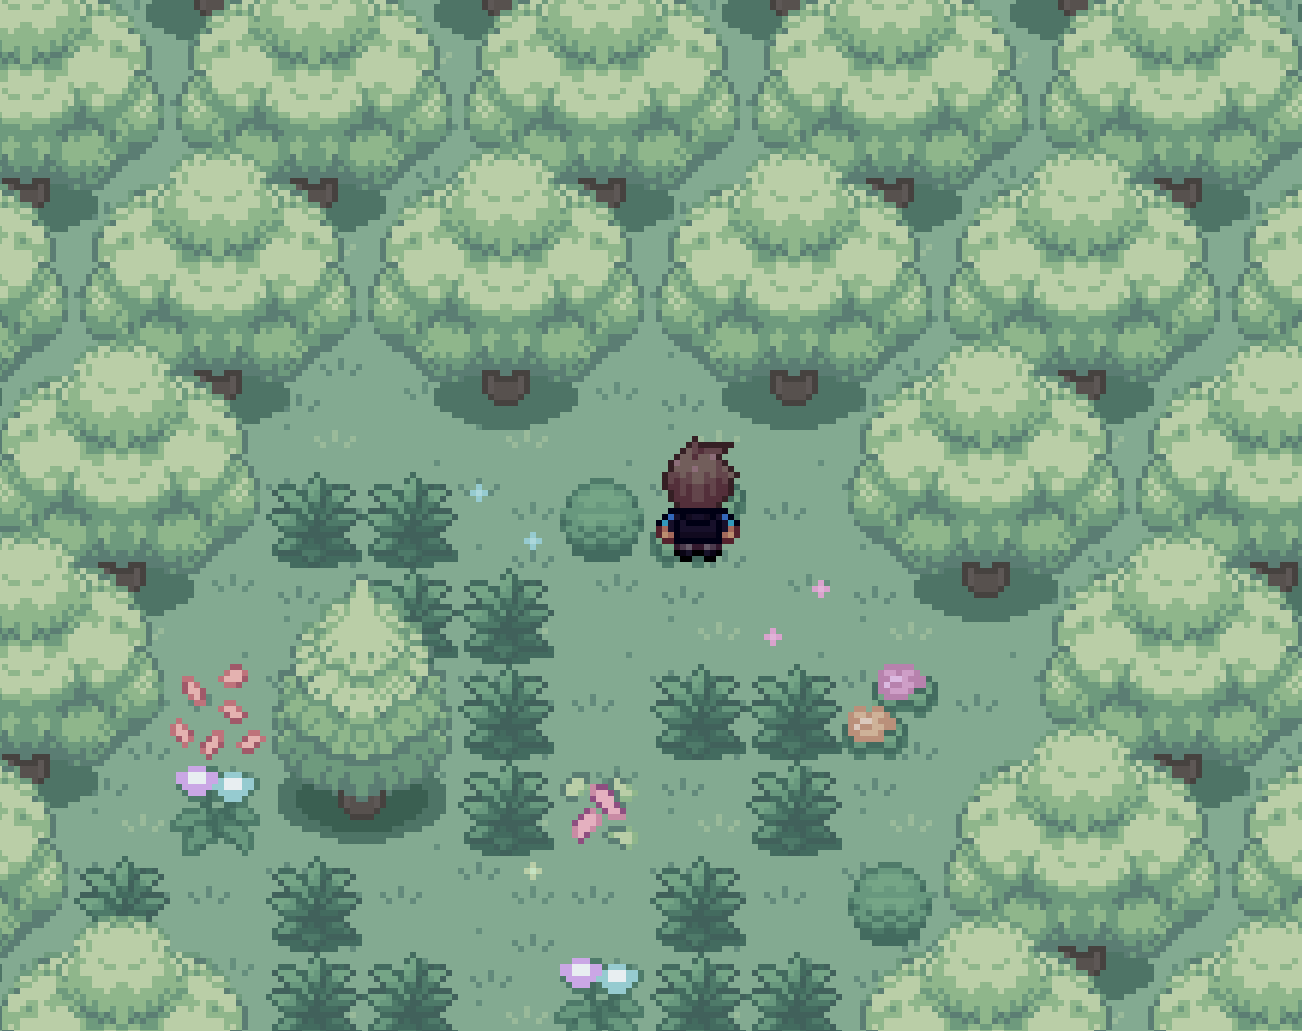
So as an extension of the existing Astraciel Wildwood map, it will sit around the top left side of Arcanius near Astraciel Town. This is an area I want players to step into after they leave Chryseum Canyon from the north exit, and then leaving the area will take them to Astraciel Town, so after looking at the map, there is only really one place it can fit which fulfills this criteria, as shown in the map below.

What is the purpose of this area?
With the vast difference of colours and natural landscape between Chryseum Canyon and Astraciel Town, realistically it doesn’t make much sense to leave the Canyon and end up in a town full of mushrooms. The solution to this? Create a map in between the two locations that acts as a natural “transition”, an area where the player walking through can really feel the change in environment as they progress from Point A to Point B.
What sort of landscape will this area be?
The area in question is outdoors, and the surrounding environment includes a ton of vegetation and trees. As a transition map between the two areas, I would need to ensure that we utilise trees from both tilesets, and include Astraciel’s unique vegetation which involves mushrooms near the exit to really represent that the player has entered a new portion of Arcanius. A forest map with a variety of tree colours, plants and mushrooms.
What is roughly the size of this area?
A key thing to remember is that size is crucial in level design, where do you want the player to go and how far should they realistically be in this area? You see this in the difference between large cityscapes to smaller villages, a city is an area where players have a ton of places to explore and even sometimes get lost in, while a small village has a few houses with clear indications where they are to go next. You don’t want a town to be too large or a city to be too small, it becomes difficult to really capture the finer details. Let’s apply this to Astraciel Wildwood, as a transition map I don’t want this to be extremely large as its purpose is to create a natural shift in the environment. But I also don’t want it to be too tiny as it’s meant to be a forest walkway. This is something that you will pick up the more you do level design, and definitely took me a bit to get it knuckled down to the level of knowledge I have now.
Okay! With these questions answered and a vision in mind, I turn to creating a rough sketch to envision the sort of shape I want the map to take, how I want the player to progress from Point A to Point B, and how I want the player to get there. It is really important that you put yourself in the player’s shoes, picture yourself traversing through this map, is it tedious? Do the puzzles make sense? Is it too long winded?
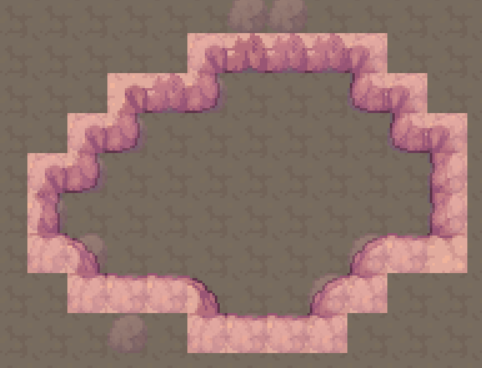
Let’s take this rough sketch for an underground map I’ve created for EP7 and break it down.
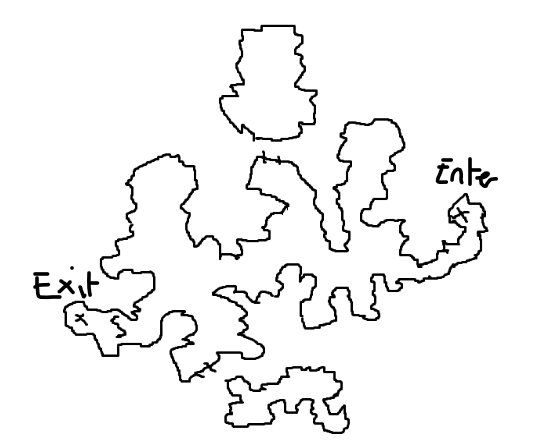
Coming up with a map design can be tricky, but I would just say do something rough and adjust as you go. My rough sketches do not always correlate to the final design, it's rough after all. Anyways, as you can see, I clearly mark where I want the player to enter from and where I want the player to leave from, I also indicate on the map if there are any additional entrances the player can go into and explore, these I tend to mark with a little =. I normally have in mind at this point whether or not there will be a puzzle involved to open up the exit to the player, other maps may have additional sidequest content which I factor in, for example the Old Woodland with the Rufflet Egg sidequest.
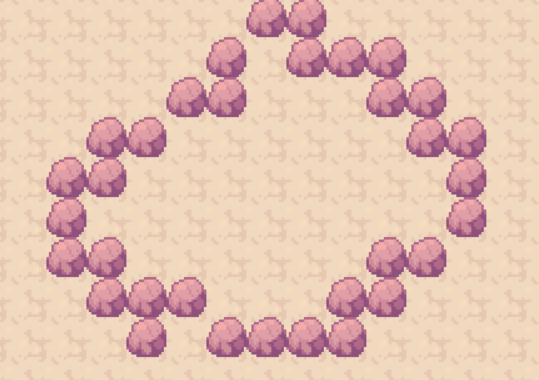
After the sketch is finalised and I’m happy with all its nooks and crankies, I head into my trusted friend, RPGMaker, and begin to map out this rough sketch onto the map. I have a different process if I’m doing an indoor map or outdoor map, for outdoor maps that feature trees, I mockup the rough layout with the bottom halves of the trees next to the borders of the map, while for indoor maps that utilise cliffs, I use layer three and mockup the quick sketch with a random tile, as shown in the brief examples below, these don’t follow the sketch above as I would be here all day lmao.
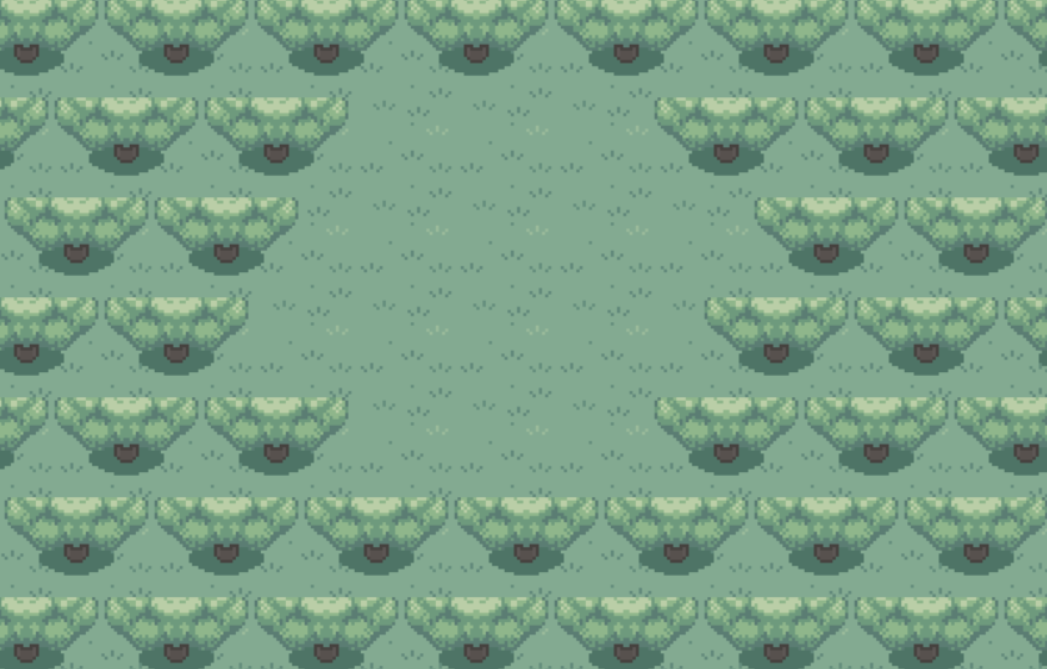
Yes, very small examples, but you get the gist. One thing to note with trees is that unlike the original Gen 3 games how they just perfectly line up, I really am not a fan of it. I personally feel like it’s a bit tacky which is why I always opt for the approach shown above, it adds more of a pattern to the map, and I personally think it looks and feels a lot nicer in game.
After I get my basic layouts finalised, I then get to work adding the tops to the trees and the initial first layer of cliffs, the end result looks a little like this.
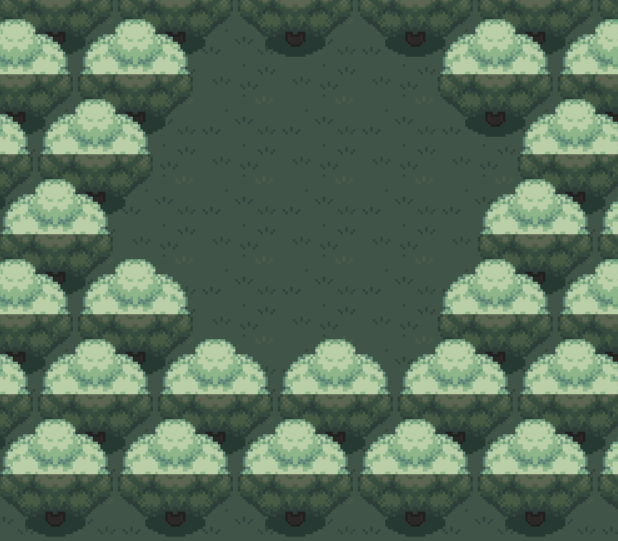
Really starting to take shape! Once I am happy with the design layout, I will then look to develop these further. With forest maps I will start to populate with your flowers, bushes, grass, and maybe chuck an item here and there. With cave maps, I will begin to build up the rest of the cliffs to give the area more depth, and then populate with some rocks, oh and also delete the sketch layer I set up.
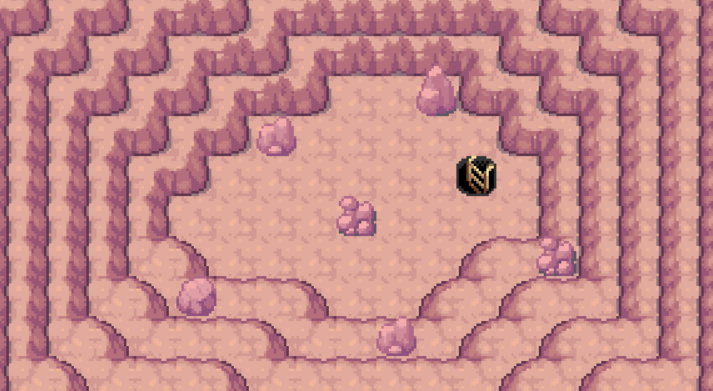
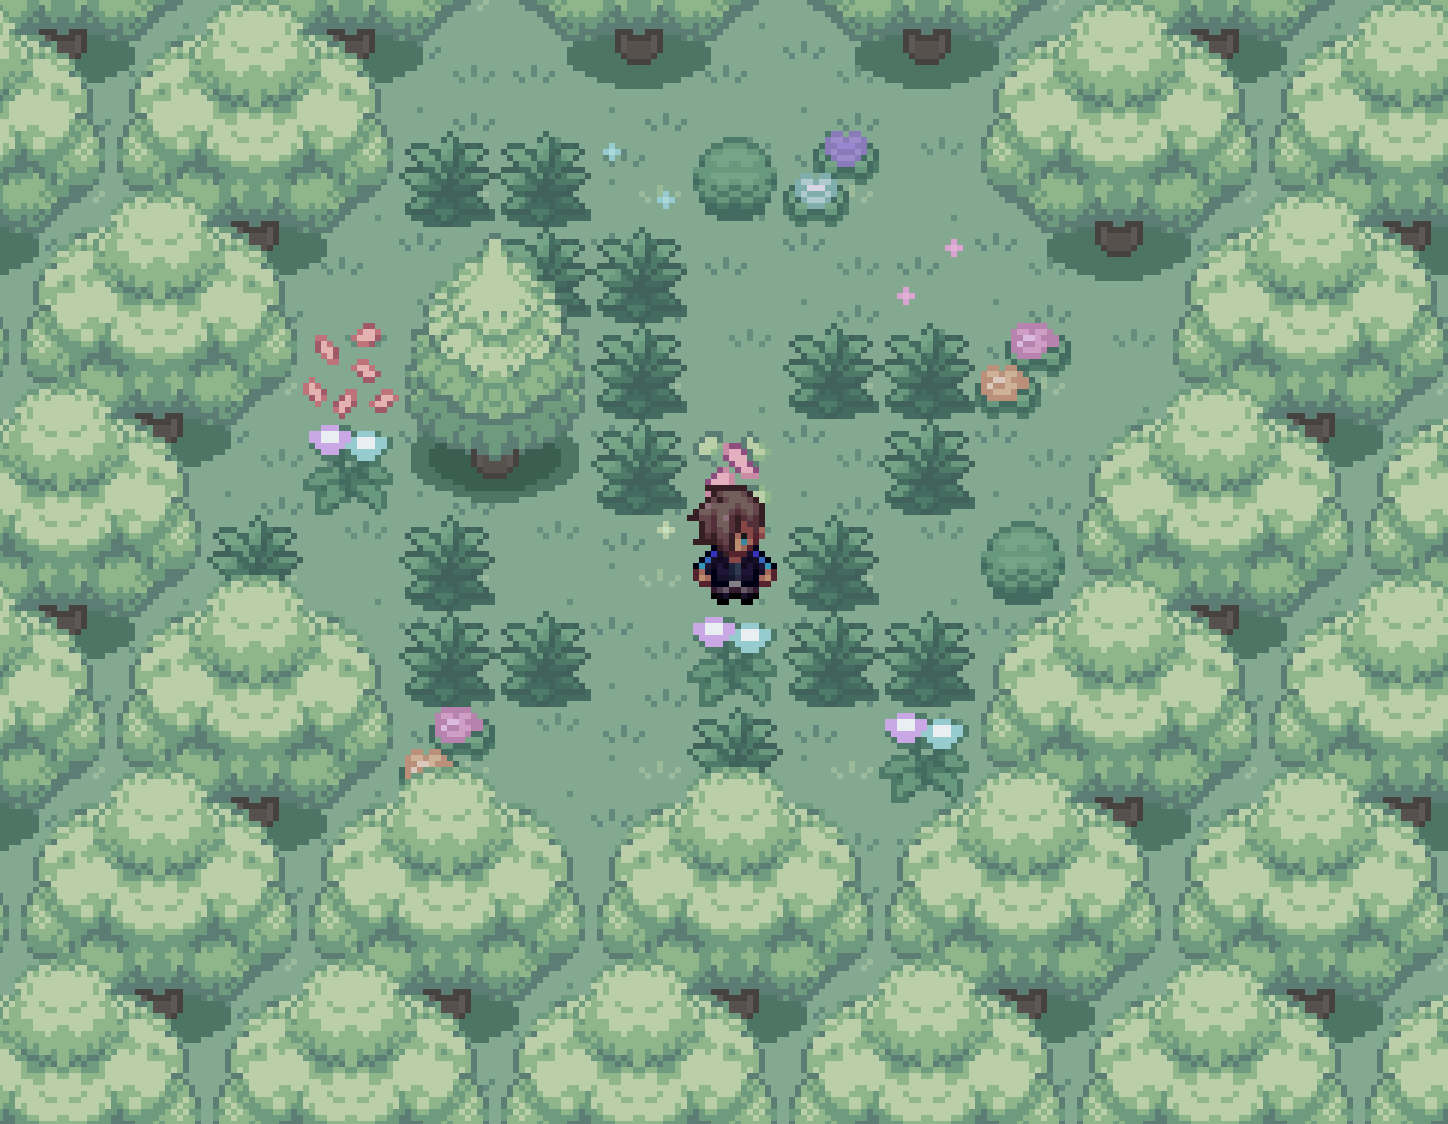
Yes I changed the floor colour for the cliff map, I used the wrong cliffs! Now these maps have some character to them, a small meadow area which is a bit secluded, and an upper level of a cave that could include an item or even a random event for a sidequest. With the mapping done, let’s see how it looks in game? You want to see how the player will fit into the world you’re creating after all. For this, let’s take a look at our little secluded meadow!
Looking good! But before we can fully sign off this map, I always do an “out of bounds check”. What this means is I hug the edge of the map and see if you can see the abyss… aka the black void, for maps like these and cave maps, it’s very important that through the player’s eyes, these are not shown otherwise immersion can be lost. So let’s see… Oh dear.
Now that’s not good, what would you think if you were in this nice forest map and saw the dark void which looks like it has cut off some of the trees? This is a key detail you need to fix with mapping, countless times it has happened to me in the past, luckily now I’ve memorised how many tiles it takes from each direction for the player to see the edge of the map, it's always good to keep it in mind! When it comes to interior maps, seeing the black void is completely fine as it indicates you’re inside a smaller space. Just make sure that if you have multiple interiors to different houses on the same map, they are spaced out nicely so you don’t get a sneak peek into another house!
Much better.
And that is my mapping process! After a map is finalised, I will then look to populate with more items, trainers and then events for main story/sidequest content where I see fit. Let me know what you think about this style of post, I haven’t really gone through my processes like this before so I hope that this was at least a bit interesting!
With that, go give our new team members a nice welcome to the team, I can’t wait to showcase more of what they and the rest of us have been working on throughout the year!
Til next time.
Posty
-
 21
21
-
 1
1


Recommended Comments
Join the conversation
You can post now and register later. If you have an account, sign in now to post with your account.