

Pippolazzo
-
Posts
41 -
Joined
-
Last visited
Content Type
Profiles
Forums
Events
Reborn Development Blog
Rejuvenation Development Blog
Starlight Divide Devblog
Desolation Dev Blog
Posts posted by Pippolazzo
-
-
Most events are one-time only (I believe the Blitzle one is), so you'll have to wait. Aside from legendaries and a few other exceptions, though, you will be able to catch multiples of almost any species in the wild later on, so don't worry if you screw up one of them.
Still, it's best to save before static ones so you can retry, or soft-reset for better IVs, natures and abilities if you care about them.
-
All berries should be available in the Department Store (if you can't get them yet, check on the above floors once you unlock them).
You can buy a lot of them and they are pretty cheap, so farming isn't needed as you can simply restock, but if you still want to grow your own you can plant them in the spots inside the Woods on route 1 (pretty inconvenient though) or better yet later on in the ones inside the alleyways, after the City restoration.
-
Yeah, those webs aren't related to Joltik, though you can catch Dewpider/Araquanid by fishing in the nearby pools. If you didn't get it in the blackout event, Joltik will be available post restoration (after 13th badge) in the grass in Peridot along with Galvantula.
Adding to the above answer, for the lady to show up in 7th street you will need to have cleared Iolia Valley and gained the 9th badge already.
As for Nyu, I am pretty sure he doesn't give away the megastones anymore, as they have both been moved in different places and can be found in the overworld.
-
Hoothoot can be found in multiple places at night, like the grass right outside Grand Hall, inside Rhodochrine Jungle or even on the cliffs above Beryl Ward left of the gym.
If you didn't get Espurr from the event, though, I am afraid it won't be available before North Obsidia Alleyway / Lapis Alleyway, both of which become accessible after beating the 3rd gym. If you are looking for a psychic type, I suggest you snag a Woobat (either in the Underground Railnet or in the Underroot) with the Simple ability. It's super good early game and can help a lot up to the 7th gym or so.
-
Does anyone know if there's a way to get a second Type:Null in the postgame?
Got the one from 7th street and evolved it already, but I'd like to grab a second one since I am going for a full living dex. Just OCD things, ya know.
-
No problem! Fyi in my current run I also tried to get as many points as possible with everyone, but still gave priority to role-playing and staying in character... and that ended up fucking up my relationships with half the cast - including these two jerks - lmao. Still worth it if you ask me, though.
-
 1
1
-
-
Like Cobra mentioned in the spoiler, you have them mixed up: Zekrom route is triggered by battling him, Reshiram by choosing not to.
I have yet to try out the Zekrom path in E19, but in previous ones you used to get a bit more lore about him, his family and Team Meteor in Reshiram's by talking to him in the desert if you let him come with you. He also gives additional lore about the places you visit with him in that section. Reshiram's route is also one of the many requirements for achieving the "secret" ending (which isn't inherently meant to be better or worse than the default one, it's just different).
Also, while Reshiram route allowed you to just skip that battle in the past, now if you decline you will still have to fight someone else.
-
You now get a +2 and an additional dialogue with Blake when rescuing the Smoochum in Citrine Mountain (think you have to do this before effectively meeting him in the main story). Then there's the one in Agate Circus mentioned by Jk, just speak to him after getting Surf. Don't know about the Obsidian Slums one though, I might have just missed it.
For Elias, there's a possible point in one of Ace's dialogues (when asked in the Sanctum about family, pick "blood" for +1 with Elias and -1 with Ace, "loyalty" for the opposite result), and another one in the postgame (the first time you rematch him in a 2v1 battle, pick "I'm honored" for +1, "It's just a prank" for neutral and "Bow before me" for -1).
Everything else should have stayed the same as in previous episodes.
-
 1
1
-
-
If you don't want to deal with the pickup RNG, I think you also get an additional one as a reward for the spirit hunting quest in Victory Road (along with a bunch of other good stuff), or you can straight up buy them from the Department Store Penthouse (40k a piece).
-
1
-
-
They don't jump out of trees anymore apparently, now they are just regular encounters in the wasteland's grass.
-
Go back to the Underroot in Rhodochrine Jungle once you have the Crystal Key from Luna's gym, there's a puzzle involving crystals, rock smash and cut in the upper right corner with the Axew egg as final prize.
-
The north one if I recall right. It's definitely not in the Pyukumuku one, so you should look for the southern cave, which is accessed from a different area of the lake. It's smaller, you don't need blizzard to navigate it and it's basically a single room with 3/4 items lying around, including the readout.
-
Still in Azurine Cave, maybe you are just checking the wrong one? There's one in the north and another in the south.
-
They are available in the Nightclub in the postgame, you can trade BP for them. Not sure if there are other repeatable methods before the Elite 4, maybe the Obsidia Dept. Store sells them as well on higher floors? Haven't checked.
-
1
-
-
It should have turned on another computer in the upper part of the dungeon (bottom right corner of one of the rooms). By interacting with that, you unlock a gate in the middle section that lets you explore further to the right and leads to a shortcut to Calcenon with some pretty cool items.
-
No problem, couldn't really help out that much.
I think you can also snipe up a Lapras in that big and dark underwater area, if you haven't caught one yet. Or it's in a similar zone you can access through a series of underwater passages.
Be sure to pick up Sneasel and fish for a Feebas in the secret lake on 4F as well, and come back once you have rock climb to fish for Dratini in the one on B4F.
Good hunting!
-
Leftmost part of the jungle (check the IMG below):
Spoiler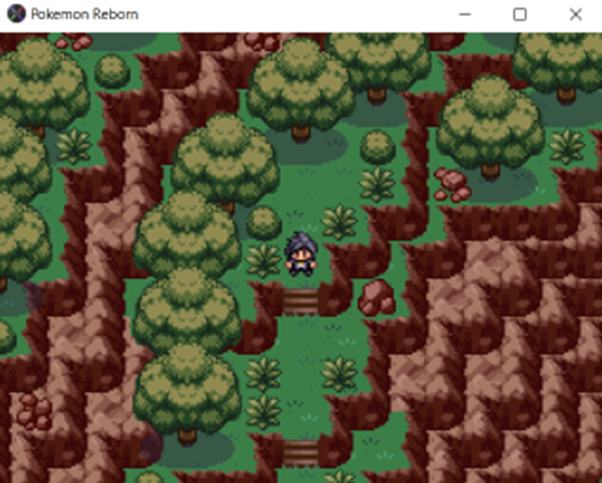
You don't actually need to go through Beryl Cave anymore like in previous episodes. Start from the bottom left entrance from Beryl Wardand go left, up and right, then go down from the house where the guy heals your team and loop around to the left again. Keep going, cross two bridges and you should eventually get there.
If you don't see it spawning in that spot, move to a different ward, save, restart and go back again with sunny weather and it should be there.
-
Can't remember the exact location but being available after Terra means it's 100% one of those that require using waterfall to get to it. Try to check all the paths inside the mountains that require you to go up or down a waterfall, follow them to each possible end and eventually you should come across it. Bring dive, strength, rock smash and obviously surf as well - if you are not playing with the HM password. Try starting from the different entrances (Ametrine, route 3, route 2 - upper left through Citrine, cascade, crustle shortcut in upper right, upper left in North Aventurine Woods) as each of them may lead to unique paths.
One trick I usually use to know if I have already explored a certain path is to keep the itemfinder on registered and spam it wherever I travel, if there are hidden items it means I have yet to go through that specific area.
Sorry if I can't be more specific but it's been a while and that whole area is pretty intricate to navigate.
-
There's just something wholesome about Radomus, 100% my fave. Maybe 'cause I am starting to get old like him, but he actually got me misty-eyed a couple of times throughout the story.
Noel is a close second, but I really like the majority of the cast.
-
You can also get an earlier one in Obsidia Slums if you haven't been to the Orphanage yet.
As soon as you beat the 3rd PULSE-Tangrowth, go back to the Slums and you should find a familiar face inside, near the left entrance. This event becomes unavailable once you meet him through the story in Lapis Ward, though.
-
1
-
-
Don't know if you are still stuck but I'll leave some suggestions in case anyone else needs help with this part, since it's one of my favorites in the whole game and after a bunch of trial and error I feel like I got it down to a T.
General tips:
Spoiler- Sticky web is usually the main issue in the 1st fight, but as long as you lead something that OHKOs A-Marowak (like your Swampert, which I'd definitely keep), you have a free turn in your other slot. Use it to set up a tailwind to override it (Talonflame with Gale Wings does this in priority and can OHKO Ribombee on turn 2 with acrobatics/BB to prevent light screen), or even use it to your advantage by going for trick room, since Cain's and Shelly's whole teams are fast with the exceptions of A-Muk and Primarina.
- You get fully healed after the first fight (which is the hardest of the three in my opinion), so don't worry about trading/sacking once you manage to put yourself ahead. The second fight is by far the easiest, but only heals your mons if they don't faint, so make sure to keep everyone alive in it to start the third one with a fully recovered team.
- For all 1v2 battles, unless you have a double kill, always focus down one side of the opponent until they run out of pokémon, so you can turn it into a 2v1. The sooner you do this, usually the better, but if you manage to gimp an opponent (paralyze it, put it to sleep, encore it, severely drop its stats, etc) you might want to keep it alive on purpose and focus on the other side.
The team I used:
SpoilerBlaziken w speed boost (@wide lens - 'cause I didn't want to rage out of HJK missing) - flare blitz, protect, high jump kick, brick break
Gardevoir w trace (@amplifield rock - to extend trick room) - moonblast, psyshock, calm mind, trick room
Magnezone w sturdy (@magnetic lure - 'cause I forgot to change it before the fight LMAO, zap plate or wise glasses are good options here) - discharge, flash cannon, thunder wave, mirror coat
Swampert w damp (@assault vest - switch to splash plate or even Waterium-Z if you don't have the kill on A-Marowak) - waterfall, brick break, rock slide, ice punch
Hydreigon w levitate (@Dragonium-Z, doesn't really matter though) - dragon pulse, dark pulse, flash cannon, tailwind
Gogoat w sap sipper (@leftovers, see above) - horn leech, bulldoze, bulk up, milk drink
Gogoat can definitely be swapped out, I just like to run it to switch it on grass moves targeting Swampert or incoming sleep powder/spores. I don't recall it doing shit in this fight though, so yeah. Any good fire, rock, bug or fighting type will perform well in its place. I haven't tried Mega Scizor or Escavalier but on paper they dominate here, just watch out for Volcarona and Nidoking's flamethrower in the 1st fight and Clefable's fire blast in the 3rd one. Hydreigon was pretty clutch in the 3rd fight, but I guess any fast dark type can play its role.
Nothing fancy for spreads, just the good ol' 252/252/4 (Atk/Spe/HP or Spatk/Spe/HP for sweepers, HP/Atk/Spe or HP/Spatk/Spe for tanks).
Detailed game plan:
SpoilerLead with Gardevoir in the first slot and Swampert in the second one, this will be important on the 2nd and 3rd fights as you can't switch the leads between them.
- Turn 1: trick room and waterfall on A-Marowak (31 IV adamant 252 atk should be a mid roll without boosting items). Ribombee will set up sticky web, AI should send in A-Muk for the Marowak to threaten Garde and take advantage of TR.
- Turn 2: A-Muk always poison jabs the Gardevoir slot, switch in Magnezone for free, which will be the fastest thing on the field in TR thanks to oppo sticky web. Either waterfall on Ribombee or rock slide with Swampert (again, 31 IV unboosted adamant 252 should be a roll with both). As long as you kill it or get the flinch and light screen doesn't go up, you are golden. If you get the kill, Leavanny should come in.
- Turn 3: discharge+ice punch on Leavanny always kills, plus you have the chance to paralyze A-Muk which you can just ignore for now (he'll knock off your items, but whatever).
- Turn 4 onwards: thanks to amplifield rock you should still have 6 turns of TR. Just discharge + rock slide anything that comes in, waterfall the Nidoking and you should be set. By the time TR ends, you should either have won or be able to clean up the rest with your other mons.
Cain and Shelly, get rek't. Onto the second one.
- Turn 1: Weavile will always poison jab, switch in Magnezone for free.
- Turn 2 onwards: no advice needed, from this point on it's literally a cakewalk. Either kill it with Magnezone or switch into Blaziken, protect to get a speed boost and start sweeping (AI usually switches here). High jump kick OHKOs everything weak to it, flare blitz should melt the Mismagius, Magnezone or Gardevoir OHKO Honchkrow with one electric/fairy stab and your dark type can handle Gothitelle.
And finally, onto the last one!
- Turn 1: A-Ninetales goes for aurora veil, Clefable should thunder wave your Gardevoir. Switch in Magnezone to absorb it and brick break the Ninetales with Swampert to break the screens (that's the whole reason to tech it).
- Turn 2 onwards: just power through the rest of the fight by manuevering carefully and using type advantage. Clefable can be annoying but shouldn't be too much of a threat, just give it a taste of its own medicine with t-wave to get some free turns and leave it there. Focus down the left slot until you take down all 6 mons (Blaziken should OHKO everything barring Bronzong, which you can still double onto since it' slow AF). At this point you should have a clean 6v6 with a constant 2v1 advantage. As mentioned above, something like Mega-Scizor or Escavalier in trick room should be able to sweep anything that remains, otherwise your dark type + blaziken/magnezone should be able to clean up. Bonus points if you end by stylin' on 'em with a meme mon like Gogoat.
Well, that was an essay. Hope it helps.
-
Unless her movesets have been updated in E19, Amaria autoloses from Shedinja as soon as you take out her Swampert in singles and her Vaporeon in doubles, as they are the only ones that can touch it. You can get a Nincada by smashing rocks in the Byxbysion Wasteland.
Edit: as for the team and general suggestions, considering Hydreigon as a starter instead of Togekiss, I think Rotom-mow in place of Heracross would give you the most utility: grass+electric coverage to fix water match-ups, will o wisp support against physical attackers, screens for defense, thunder wave/electroweb for speed control. Also, if you switch to the sand team you mentioned or pair it with any ground type, you can spam the classic discharge+earthquake in doubles since it has levitate.
You can get it right after Luna from the room in the back of Shade's Gym and change its form once you get to Ametrine City, in one of the houses.
-
As mentioned above, Blaziken is straight up busted. Absolutely give it protect to get a free speed boost, that's actually its most important move, along with hi-jump kick and flare blitz for stabs. For the 4th slot, I actually think that swords dance is much better than bulk up, since a +1 in defense won't make any difference against most if not all SE hits, and it's unlikely you'll last long enough to set up multiples in a row, unless you plan to spam potions. Power up punch does the same thing with the added benefit of breaking sturdies/focus sashes. Brick break is another cool tech for fights where the opponent spams aurora veil/screens. Since all of these are TMs, you can just swap them around as you need. For items anything works: stab plates/charcoal/black belt, muscle band, expert belt, wide lens to avoid missing HJK, shell bell to recover a bit after flare blitz, Firium-Z... Just don't waste the mega stone on it, it already has speed boost, so save it for something else.
For A-Muk those moves are good, if it has gluttony you can also try recycle + a 50% health berry as its held item for continuous recovery. Otherwise the most obvious choice is probably black sludge/leftovers.
I also agree that Ludicolo is pretty average outside of rain (and rain conflicts with Blaziken), but if you are dead set on using it consider keeping fake out (amazing for doubles, free chip in singles) and nature power - unironically the most unique and versatile move in Reborn, it can turn around multiple gym battles on its own. As for items, either Waterium-Z, damp rock if you plan to set up rain dance on your own, or assault vest if you are only running attacking moves (which would mean no rain dance or nature power though).
As for complimentary members, since Ludicolo+Blaziken is basically a FWG core on its own, you could add a fantasy one (fairy/dragon/steel). Gardevoir+Magnezone+Hydreigon is one of the best ones and has crazy good sinergy with Blaziken as well, although most people dislike it because it's too mainstream. Unfortunately all of these - especially Deino - are available pretty late.
For early game, one of my favorites is simple Swoobat with calm mind. In your case, free switch in on Blaziken and Muk against ground attacks. Sturdy Aggron carries hard in the mid game and you can get it before the 6th badge, 4x resist on flying and resist on psychic also works well for pivoting from Blaziken. If you drop Ludicolo, or don't mind having two water types on the squad, storm drain Gastrodon is another amazing pick for the mid game. These three basically cover all of your chicken problems, and he can just destroy anything else.
-
- AV Swampert (either starter or from the Azurine Lake event before Adrienn) walls any special threat barring grass-types and hits back like a brick.
- Before that, you can get a Gastrodon as soon as Kiki - same typing, more utility with storm drain, gets recover too.
- Another amazing mon for the midgame is Aggron (now available in the Railnet before Serra, which I think is earlier than before). Bonus points for cheesing lots of fights with sturdy + metal burst.
- Ampharos is pretty good as well in early to mid game, and gets power gem naturally via level up which is required to solve some optional environmental puzzles.
- Gogoat is very fun to use and underrated as hell. Crazy switch in sinergy with the two water/grounds metioned above thanks to sap sipper, it can set up with bulk up, recover with milk drink and horn leech, slow down opponents with bulldoze... And it's a friggin' goat.
All of these are slower and tankier options that can usually take one or two hits and retaliate, I've tried them all at different points on my current run and they all delivered. If you run trick room, they can also act as sweepers against fast hyper offense AI.
Having said that, if you are looking for a pure wall or something more stally, just go for the classics like Blissey, Clefable, Cradily.
Can you buy fossils anywhere?
in On the Hunt
Posted
The shop inside Spinel museum sells some fossils but I don't remember Claw being one of them, or being available through puzzle games like many others.
So you have 2 options:
- save in front of a mining rock and soft reset till you get it, which can be tedious but is a sure-fire solution at any point in the game.
- catch an Armaldo in Victory Road and breed it.