Arkadius
-
Posts
65 -
Joined
-
Last visited
-
Days Won
1
Content Type
Profiles
Forums
Events
Reborn Development Blog
Rejuvenation Development Blog
Starlight Divide Devblog
Desolation Dev Blog
Everything posted by Arkadius
-
Be sure to check out this run too, he improved a lot on my segmented 5:15 And his notes: https://pastebin.com/RMbcu2m5 https://controlc.com/bed8ad2a
-

Windows security detecting Win32/Uwamson.A!ml after running Episode19 ?
Arkadius replied to Chris247's topic in Reborn City
I noticed this too. The updater.exe in the game files is being flagged by several engines. Here's a recent virustotal scan, 21/69 engines detect the file. Normally I would stay far away from files with a result like this. For now though I've assumed it a false positive... Continue at own risk I suppose. https://www.virustotal.com/gui/file/48a887e35eeebed353800a5223f63b6061da65cdbf5addcfc500b4c7ef7497b6 -
You need to pick up the items, you'll find them in the top left of the Grand Hall
-
Can you add passwords to a newly started game in progress?
Arkadius replied to Sirrobert's topic in Reborn City
-
Thanks!
-
Hey everyone, So like everyone here I've been enjoying and exploring the E19 release. The readme of E19 states the following: So, it made me wonder what else could be here. I tried the following and it worked: I wonder what else we can discover. Let's share in this post. @Mods, I wasn't quite sure where to post this topic. I felt this was appropriate.
-
Thank you for all the hard work!
-
Pokemon Reborn E18-2 Speedrun in 5 hours, 15 minutes and 57 seconds!
Arkadius replied to Arkadius's topic in Reborn City
Youtube Playlist: https://www.youtube.com/playlist?list=PLV1soDJJkbF_BmqtoxAI_jLuK3LHryZ9r -
Pokemon Reborn E18-2 Speedrun in 5 hours, 15 minutes and 57 seconds!
Arkadius replied to Arkadius's topic in Reborn City
Here are the Splits and Segment Times: Split Time Segment Time Julia: split time: 0:18:30 0:18:30 Florinia: split time: 0:36:21 0:17:51 Corey split time: 0:50:31 0:14:10 Shelly split time: 1:10:25 0:19:54 Team Complete split time: 1:20:45 0:10:20 Shade split time: 1:33:52 0:13:07 Kiki split time: 1:50:22 0:16:30 Aya split time: 2:05:45 0:15:23 Sirius Split time: 2:21:13 0:15:28 Serra Split time: 2:29:50 0:08:37 Noel Split time: 2:45:50 0:16:00 Radomus Split time: 2:58:13 0:12:23 Luna Split time: 3:12:43 0:14:30 Samson Split time: 3:21:11 0:08:28 Charlotte Split time: 3:35:49 0:14:38 Blake Split time: 3:46:32 0:10:43 Terra Split time: 3:50:43 0:04:11 Taka Split time: 4:02:13 0:11:30 Ciel Split time: 4:13:26 0:11:13 Adrienn Split time: 4:32:09 0:18:43 Titania Split time: 4:41:03 0:08:54 Amaria Split time: 4:44:36 0:03:33 Calcenon City Split time: 5:05:36 0:21:00 Hardy and E18 Complete Split time: 5:15:57 0:10:21 The logic behind the Segments is in principle from gym leader to gym leader, but there were certain parts of the run that were heavily RNG based or simply had very difficult fights in them that I decided to split those segments up into 2. The 'Team Complete' segment is a new segment in which we collect Sharpedo, Nidorina and Natu. Since Sharpedo and Nidorina both need good stats it's a split that's quite RNG heavy. -
Hello everyone, I have once again finally completed a new segmented speedrun of Pokemon Reborn . My final time was 5 hours, 15 minutes and 57 seconds, saving 1 hour, 10 minutes and 48 seconds of my previous run. Youtube Playlist: https://www.youtube.com/playlist?list=PLV1soDJJkbF_BmqtoxAI_jLuK3LHryZ9r A lot of this timesave was possible because of the better routing, strats, gameplay, decision making, movement and execution. A huge shoutout to Bloo123 and Dondon151 for coming up with a lot of the improvements and ideas/inspiration. Bloo and I have worked together a LOT (thanks Discord). A very important aspect of this run is that it is done on E18 version/patch 2. This update had a bunch of changes but the update to the AI is the most important one for the Speedrun. The AI seems to prefer status moves when on full HP. In ways, the AI is more predictable. There are less random switches. Another big part of the update is the HP bars going down quicker. This adds up significantly over the course of the run. There is also the option to forfeit trainer battles. This allows for some very interesting strats, like forfeiting against a Team Meteor grunt after the Radomus fight. This allows us to warp all the way back to the Grand Hall (where we last healed our Pokemon) and skips the maze section after El kidnaps Luna. There is another, very minor but very funny, use. After defeating Hardy you can forfeit against the final trainer in his gym, fly back to Agate and bike back to the gym and then exit the gym immediately. This ends episode 18 and saves about 3 seconds over fighting the trainer (yes, I did this in my run lol). Some of the most significant timesave and changes are: - We use rare candy Meowstic to level 50 before Serra, teaching Misty terrain and allowing us to change many fights in our favour with Prankster Misty Terrain. Serra, Samson, Charlotte, Titania and Hardy come to mind in this regard. - We capture a Natu in the Rhodochrine Jungle after we collect Corey’s Nidorina in the Beryl Cave. We conveniently use the great ball hidden on a rock in Beryl cave and fake out with Meowstic to capture Natu which has teleport. We use teleport throughout the run. It’s most notable timesave is Route 2 for sure. We pass route 2 a bunch of times. My favourite is going all the way up Ametrime Mountain and then teleporting all the way back to Fiore Mansion. - Collecting the WIDE LENS for Blaziken (99% accurate High Jump Kick is godlike) - A guaranteed EXP route all the way to Shelly. - No longer capturing Poochyena/Mightyena but instead collecting the Kricketot in the Peridot Ward and then using Kricketune and Torchic/Combusken during the Julia split. Kricketune solo’s Julia and is helpful later run. - Collecting Onix with Sturdy and Stealth Rock. This helps with a bunch of annoying early game fight and makes Corey a whole lot easier. - Previously we used to make it so that Saphira would be kidnapped during the Tanzan mountain section. Saphira would break out of Team Meteor’s prison on her own and defeating 2 Team Meteor guards on her way out. We now realise that this path causes several other fights later on in the game (in particular during Route 3, Ametrine Mountain and Agate City). We now let Charlotte and Shelly be kidnapped and deal with the double battle in Tanzan mountain. Improvements? Obviously better RNG saves time. In these segments of mine there is a bunch of timesave in the early game. I was not yet used to all the changes we made to the route and made some mistakes because of it. From Julia to Team Complete, I estimate there is about 10 minutes of timesave possible with good to very good segments. For the later splits I challenged myself and reset segments more to get really good segments. Amaria in particular is a very nice segment with only minor (movement) errors. Blooe123 has already been rerouting a bunch of the game. For example, Kricketune is now obsolete. We go in with Torchic/Combusken and Espurr. Something I need to get used to is playing on set mode. I believe we can play on set mode from after Noel all the way to the end of the game. This saves a significant amount of time (playing on set mode prevents ‘Amaria is about to send out Swampert, will you switch your pokomon?’ textboxes). I’m sure there is a lot more to discover. In conclusion: This run is extremely fun to do. I highly recommend everyone who enjoys Reborn to give it a shot and see what you can do. The route utilizes a fun team: Blaziken and Sharpedo as physical sweepers, Nidoqueen and Ampharos as special sweepers and Meowstic for support. Sharpedo in addition has Destiny Bond. You can find my notes here: https://mega.nz/file/sQphVJ5L#ZNkfL2hvSTsmQ8ZWjalCf_bARIZ-U5aj_ND_z-ghyIE -Arkadius previous post:

- 6 replies
-
- 12
-

-

-

-

-
Sounds good to me!
-
Also noticed this when rerouting the speedrun. Bloo123 spoke to Ame about it already. I also noticed that the Crustle Positions in route 2 after a reset are now also fixed. Where previously they would load back up after being pushed down a ledge, they now remain down.
-
@Vinnie Thanks for this post! I have a contribution for the list. I was working out the fastest way through the Once upon a Somewhere area for the Speedrun, so I first mapped out the area and analysed the mechanics. The basic idea is that you start somewhere (x) on location or map 1. You can move in any direction. At some point point you will cross over from map 1 to map 2. Map 1 and map 2 are actually identical to each other, except you will notice that when you go back from map 2 to map 1, the entrance point you arrived at has disappeared. From map 2 you can go in any direction again to get to map 3. Map 3 will have no entrance or exit point either. Go from map 3 to map 4 and you will find the exit point. If you are on your bike, you will know when you transfer from a map to another map when the bike music resets to the normal music played in the area. I tried to represent this graphically: Edit: to add on this, I did not draw all possibilities, just enough to get the idea. There are more routes you can take, you can left too. You can advantage of this by simply crossing the nearest line 5 times: (not sure if intended but it works :3) Not sure why you have to cross 5 times here, I assume it's because otherwise the game doesn't have enough time to load the staircase (since you arrive at the location where the stairs should be) E2: here's a video on it as well https://www.youtube.com/watch?v=GagayCZM3Fg&feature=youtu.be
-
Pokemon Reborn E18 speedrun in 9h 17m (in-game timer)
Arkadius replied to dondon151's topic in Reborn City
For sure, find me on discord under Arkadius500#2539. I'm in the Reborn discord. For the 18-2 speedrun, some general observations: the AI prefers to use status moves when on high/full HP. They also prefer priority moves when they're being outsped by you or if there's nothing else they can do. There are also a lot more switches. You can force a switch usually by bringing a pokemon down to -2 in a stat. Certain gym leaders have been buffed, some pokemon have items like focus sash. In other battles, pokemon have been changed or added. This seems mostly to be the case for Team Meteor fights. -
Pokemon Reborn E18 speedrun in 9h 17m (in-game timer)
Arkadius replied to dondon151's topic in Reborn City
Amazing! Really cool to another complete route, especially one that is different in a major way. I will go over it in more detail later. Very interesting to see Diggersby. I can see how having only two main pokemon could be/would be faster than having 4 main pokemon. I think @bloo123 made a list sometime of how much each main pokemon contributed to the route and Blaziken was far at the top followed by I believe Nidoqueen, Sharpedo and Ampharos. Also I see this route was done for episode 18-1 and not episode 18-2. Episode 18-2 has the massive AI update as well as other notable changes to trainers pokemon, hold items etc. One of the changes made is for the fiore gauntlet, Florinia has a tangrowth instead of the Tropius. @bloo123 and I have been working and refining the route used in the 6h 26m version. He came up with a ton of new ideas, some of which I also see in your route, like Misty terrain Meowstic + amplified Rock and teleport Natu. The last week or so we've been trying to deal with the 18-2 update and the new AI, which has proven a bit of a challenge in some areas but made other fights easier or at least more logical and therefor more predictable. The speedup/not speedup will always be a thing I think. I don't really see a solution for it. If you want the fastest RTA time, enable it. If you want more comparable runs, disable it. This should be something the community should decide. You could very simple make 2 categories, with and without speedup. I don't like forcing people to play a certain way. so this works I suppose. -
You can't go back to Reborn City at this time since Agate City is closed due to Team Meteor's efforts. I'm not sure what items you're trying to get, but you can always try the stands in Agate Circus. You can find healing items and such there.
-
Pokemon Reborn E18 Speedrun in 6 hours, 26 minutes and 46 seconds!
Arkadius replied to Arkadius's topic in Reborn City
I thought you meant the candy would spawn after exiting the tower for the first time, but it only seems to spawn after jumping down the hole in the ground. You could get the candy before Titania too, but after that you still need to climb the vines again and go to Titania again. Or is there another way I'm missing? -
Pokemon Reborn E18 Speedrun in 6 hours, 26 minutes and 46 seconds!
Arkadius replied to Arkadius's topic in Reborn City
With reference to this topic: The sticker event where you need to save the boy from a Drifloom on a windy day is free after city restoration. This means we can always pick up this sticker. So we would pickup: 1. Jasper ward girl 2. Apophyl Academy tv girl 3. Lost guy in underground railnet 4. Injured teleported woman from spinel town in Chrysolia Forest 5. Agate city ice cream/pokedoll/air ballon boy 6. Ametrine city MissingNo 7. Lost boy windy weather sticker event after restoration Since we only need 6, we could skip one. I see two possibilities: 1. If it's raining in Spinel Town, skip the injured woman sticker event. Instead, do the other ones like you would normally do and then after Ciel pick up the Lost Boy Drifloom Sticker in the Lapis Ward. 2. If it's not raining in Spinel town, do the injured woman sticker event. Skip the sticker event with the MissingNo Computer in Ametrine City. As a replacement, pick up the free sticker in Lapis Ward after restoration. The second option would work out very well since you don't want to take the center in Ametrine City because of teleport. If the injured women sticker event isn't fixed, you can decide mid run what to do. -
Question/Request Regarding Weather and Sticker Event
Arkadius replied to Arkadius's topic in Reborn City
Damn this is actually amazing lol. I didn't realize this at all, I figured the event was unchanged despite the renovations. I loaded up a savegame and you're right: Despite this, it would still be very helpful if the injured women sticker would be changed so that you can always collect it.
-
Hey everyone, I was discussing the Reborn Speedrun route with @bloo123 Earlier in practice I came across a significant problem in the speedrun route. It has to do with the Stickers we collect during the run and the weather patterns. If someone could explain the weather patterns in more detail that would be great. From my understanding the weather patterns shift every 8 hours. Is this from 00:00 - 7:59, 8:00 - 15:59 and 16:00 - 23:59? I also understand that the weather patterns vary for different regions. If it's clear in Reborn City, it can be raining in Spinel Town, snowing in Ametrine and hailing in Agate City. This is where the problem arises. In the speedrun, we pick up 6 stickers in order to gain access to the 8th floor and buy X-items. The time investment to get the stickers is definitely worth it as the x items make later fights much much better. The stickers we pick up are: 1. Jasper ward girl 2. Apophyl Academy tv girl 3. Lost guy in underground railnet 4. Injured teleported woman from spinel town in Chrysolia Forest 5. Agate city ice cream/pokedoll/air ballon boy 6. Ametrine city MissingNo The issue lies with the 4th sticker: the injured woman Chrysolia Forest. She is in need of medicine, which we give her after beating Serra and collecting the medicine that's meant for Anna. Afterwards she goes back home in Spinel Town and waits outside before the pokecenter. You can talk to her later and collect the sticker. But if it's raining, she will not appear. This is a huge issue as you cannot collect the sticker and you cannot change or manipulate or influence the weather without breaking the speedrun rules. (you'd have to mod the weather using mods, cheat, set your PC time or date differently, all of which is banned) I have had this happen in practise once and now Bloo123 also had it happen. We are wondering if this could be fixed. We were thinking maybe the women can be moved to the pokecenter if it's raining or altogether so you can collect the sticker at anytime. The weather doesn't seem to play any part in this event. It is not like the windy event where the boy from the lapis ward gets lost to the beryl bridge and is attacked by the drifloom, which is an event specifically triggered by the weather so we're not asking to change that. Just the injured girl event. If this were to happen in a speedrun, it would occur like 3 hours in, which would be very sad. You'd have to either do the windy weather event, which is unlikely to be possible, or the route 1 sticker event, which means a 20 minute time loss not to mention money spent on honey and repels, or the final sticker which is only available before Hardy basically so it wouldn't be realistic. I hope a simple fix can be made to make the injured women appear at any time. either in the pokecenter or in a different house in Spinel Town. I realise that it is very likely to be not a priority whatsoever, but we wanted to bring this up anyway. Thanks for reading!
-
Pokemon Reborn E18 Speedrun in 6 hours, 26 minutes and 46 seconds!
Arkadius replied to Arkadius's topic in Reborn City
Yeah that would def. be interesting. I had noticed differences as well but never quite linked them to who gets kidnappend. Figured other choices like giving Blake the Ruby Ring would also impact that. Very interesting and def something to consider! -
Pokemon Reborn E18 Speedrun in 6 hours, 26 minutes and 46 seconds!
Arkadius replied to Arkadius's topic in Reborn City
I was testing to see what would happen if you teleported to Fiore Mansion after beating Taka. I decided to start from after beating Terra so to do the Taka split over with the changes (picking up Life Orb). The strat used in PB is: 1. Taka fight. · Main Blaziken (should be lvl 73/74) with charcoal Pay Attention to Blaziken’s level. The level cap is 75 and there are 3 fights coming up. · X-attack · Heal PAR · Fire punch Klefki, · HJK Minior, · Flate blitz Gliscor · HJK Exeggcutor, · FP Chatot, · HJK Komala Blaziken should be lvl 74 after You suggested having Wide Lens here. Unfortunately this means the Gliscor Flare Blitz isn't guaranteerd to KO. But I think the odds of not getting the range are better than the odds of hitting 3 HJK's at 90% so wide lens > charcoal would still be worth it. This is with the following Blaziken btw: Ok after beating Taka, if you exit the Water Treatment Center and use teleport to Teleport to Fiore Mansion, nothing basically happens. The meteor event isn't triggered yet. You have to move down to start the Florinia and Julia cutscene, which makes sense because you also get fly from Florinia.
-
Pokemon Reborn E18 Speedrun in 6 hours, 26 minutes and 46 seconds!
Arkadius replied to Arkadius's topic in Reborn City
Teleport A big thing is that teleport strats would save a lot of repels and thus money. This could be beneficial to the rare candy situation. Teleporting doesn't take very long: menu + small animation. -after beating cain, getting nidorina, catch natu, teleport to grand hall and go to orphanage a lot faster Like the idea of first beating Cain and then going after Nidorina and Natu. The teleport location would be set to the Grand Hall as you fought Fern there and leveled Ampharos and Meowstic. Catching Natu after Nidorina is perfect. You would have to deposit Mightyena as well after Shelly though. (blaziken, meowstic, ampharos, carvannah and nidorina who you pick up and then natu that you catch). This also means teaching Rock Smash to Blaziken or Flaaffy. I suppose Flaaffy can learn it here? You only need it for the rock before the Beryl Cave. After that it is again needed in Pyrous Mountain and in the Wasteland if you do the tunnel-detour to get the focus sash, but we can skip that. You do however need it to get back to Reborn City because there's a rock smash rock blocking the way back (unless I miss something). I suppose you could simply heal at the Coral Ward center after the Cain fight and then go through the wasteland, fight Fern (Blaziken solo), heal and fight Aya immediatly after and then teleport back. BUT you would be missing the heart scale pickup. EDIT: does not work, the teleport location is set to the wasteland because you enter there in order to fight Fern/Aya Doesn't matter if you use the healing machines or not. Anyway, Blaziken's moveset at the time of teaching Rock Smash is: - flame charge - blake kick - bulk up - double kick. No tm moves here and basically all are needed. Ampharos' moveset here is: - Power Gem - Electro Ball - Thunderwave - Thunderpunch You suggested teaching Cotton Spore instead of Thunderwave, which is a decent idea but does Ampharos outspeed or even survive Dittoarceus to be able to pull cotton spore off? And is Sharpedo guaranteed to outspeed at varying IV's? (you would want 20+ in any case but you do sometimes take less because of speed boost...) Maybe there's a strat in which we can x special D + light screen in order for sharpedo to tank 1 hit from Arceus. Anyway back to Rock Smash. I suppose Electro ball or Tpunch can be replaced with Rock Smash. After you have Nidorina you can always teach rock smash to Nidorina. -after rescuing heather from the orphanage, teleport to grand hall to train sharpedo for crunch not much faster Teleport would be still be GH. I can see how it's faster. -after beating shade, teleport to grand hall and go to coral to meet up with amaria somewhat faster I can also see how this is faster. You would have to back track a little bit to the underground railnet, but def faster than going through the Beryl and Jasper Ward again. After talking to Victoria you could even teleport again back to the Grand Hall to continue your quest to the Coral Ward. After the meetup with Amaria in the Coral Ward, teleport back to the Grand Hall. -after finishing blacksteam factory, teleport to grand hall and go to apophyll not much faster I think it would save a little time. -after beating cal, teleport to apophyll and fight victoria+kiki not much faster I think it would save a little time over escape roping. Here you would need to teach Rock Smash to Nidorina most likely. -after rescuing cain at azurine island, teleport to apophyll somewhat faster I think it would save some time. -after beating aya, enter and leave OTS After Aya (see rock smash discussion above) you'd get the calcium, and heart scale. You then exit the Wasteland and go to the Department Store. You can stop by the Onix Trainer School and set your teleport location there for sure. Then you'd do the Yureyu bit, the railnet puzzle, get the house key, open the door in advance and save the sticker dude and teleport back to the trainer school. Stop by the move tutor, go back to the Obsidia Ward, stop by to collect the sticker and continue on to Tanzan Mountain. Perfect. -after finishing yureyu and underground railnet, teleport to onyx ward for move tutor a lot faster See above -enter and leave belrose manse and go fight serra An important part here is to not enter the pokecenter in Spinel Mart. This can easily be done. You shouldnt take too much damage on this split and can heal anything off. -after getting ana's medicine, teleport to belrose manse somewhat faster Def good, saves 2-3 repels as well -after escape roping from tanzan mountain when you finish meteor base, teleport to belrose manse not much faster Also good, saves 2-3 repels as well -after beating radomus, train ampharos at grand hall for thunder+dragon pulse After Noel we go through Route 1. I'd first go to Vanhanen Castle, do the Cain fight. Teleport location is set to Vanhanen Castle, so teleporting here isn't an option. We would go through route 1 all the way to the Nature Center, pick up the Wide Lens. Then we would go through the Grand Gates and do that whole section. I don't believe you can teleport in there. After that and some shopping, we go with Radomus/Gardevoir/Cain back to Vanhanen Castle where we fight Radomus. Teleport location is again set to Vanhanen Castle so we can't teleport to the Grand hall. You would go with the crazy Taurus to the Grand Gates and from there to the Grand Hall and continue. After saving Luna from the Subseven Sanctum, you cannot teleport from there to the GH. You also cannot teleport from 7th street. So you'd have to exit 7th street. Teleporting from there to the GH or the Lapis Center is almost certainly slower so you would go to the crazy Taurus again to transfer you to Vanhanen Castle this time. -after beating luna, leave the cave and teleport to grand hall and take the route 2 tauros to agate somewhat faster This works but I think we'd have to time this. -after beating blake, teleport to fiore mansion and go to the circus to fight terra a lot faster So here we would center and set our teleport hub to Agate Circus. We would make our first trip to Fiore Mansion through route 2. That sets our teleport hub to Fiore mansion. We would go back to the Circus. After beating Samson, we go back to Fiore Mansion but our teleport hub is again set to the circus so that unfortunately doesn't work. Once again at Fiore mansion, our teleport hub is set to Fiore Mansion. We would go through Ametrine Mountain and through route 3 with Aya and the rest until we reach Calcenon City where we fight Charlotte. I suppose you could go through all this without healing. Not taking the center in Calcenon preserves the teleport hub at Fiore Mansion. After Charlotte, you'd not center. Blaziken should still be alive and kicking. You would revive and heal Sharpedo to use it to destiny bond the Pulse Avalogg. Then pick up the light shard to heal to full. Then go to Ametrine City. You would do the Sticker event here but not take the center. Do all the battle leading up to Blake, your team is auto healed because of the double battles. After Blake you would teleport back to Fiore Mansion. From there, back to the Circus it is. This also means skipping the first puzzles in route 2. This is great! I wonder what happens when you set your Teleport Hub to Fiore Mansion before doing the whole Water Treatment Center gig. so after beating Taka, you would teleport to Fiore Mansion. Does this trigger the Meteor assault event? Do you skip talking to Julia and Florinia and the cutscene? I'll test this. -after beating ciel, swap natu for pidove for fly(natu can't learn fly) For sure, it is very unlikely that natu becomes xatu. -
Pokemon Reborn E18 Speedrun in 6 hours, 26 minutes and 46 seconds!
Arkadius replied to Arkadius's topic in Reborn City
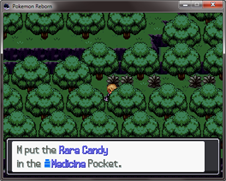
Just a new post for clarity's sake: The rare candy list is very insightful. The reason I didn't pick up the one in the Dr Connal's personal torture (or fetish) establishment is that I actually didn't know about it. - Rare Candy (rock top of the upper left elevated area) - tourmaline desert *** (optional) Do you have an image for this one? - Rare Candy (at the bedroom, after the battle with Titania) - once upon a somewhere I knew about this one, but it takes some time to go back there instead of simply jumping down the holes to exit the gym. I believe there is another rare candy here, but I'm not sure. Maybe we're talking about the same one. E: we're talking about the same one: It just takes a bunch of time to exit the gym now. You can't escape rope or teleport unfortunately. There is another Candy in Malchous Forest after the restoration of Reborn we could consider: But it's quite slow to pick up as you have to go through the forest first, jump some ledges and then exit again. You could do this on the way to Victoria when assembling the team for the Devon Mission. Alternatively, if there are any Adrienn-helpers here, it could be a way to combine it. __________________________________________ Speaking about Dr. Connal. Something maybe worth looking into is the Story split that determines who gets kidnapped and who you fight early. Currently we fight Sirius early. This is mostly because Sirius' team at the Belrose Mansion was incredibly hard to deal with when doing the primative routing/testing. Dr. Connal's team is relatively easy, whether you fight him first at the treatment center or later at the Belrose Mansion. Sirius' team at the treatment center is annoying for sure, but it's manageable. The different outcomes are: 1. Fight Dr. Connal in Yureyu Building & go up in Belrose Mansion -> Laura Kidnapped 2. Fight Dr. Connal in Yureyu Building & stay downstaris in Belrose Mansion -> Noel/Anna kidnapped 3. Fight Sirius in Yureyu Building & stop Sirius in Belrose Mansion -> Shelly/Charlotte kidnapped 4. Fight Sirius in Yureyu Building & stop Dr. Connal in Belrose Mansion -> Saphira kidnapped Currently, we go for option 4. This results in Saphira getting kidnapped and you going with Laura to rescue her. This turns out not to be needed though, as Saphira breaks free on her own, taking down the two meteor guards guarding her cell. In the other scenario's this is a forced double battle. The EXP isn't really needed. Money isn't an issue, so this fight seems redundant. Considering the changes made since originally routing this, maybe an alternative scenario would be faster. It's just very difficult to estimate this. ______________________________________ On more or less the same subject, the story split in which you either win or lose against Solaris on Mt. Pyrous is another thing that can be looked into. Maybe Florinia would be a better partner later in the Fiore Mansion Gauntlet. I don't really think so though. Also considering the time it would take for Garchomp to KO your entire team, it seems like this would be slower overall. _______________________________________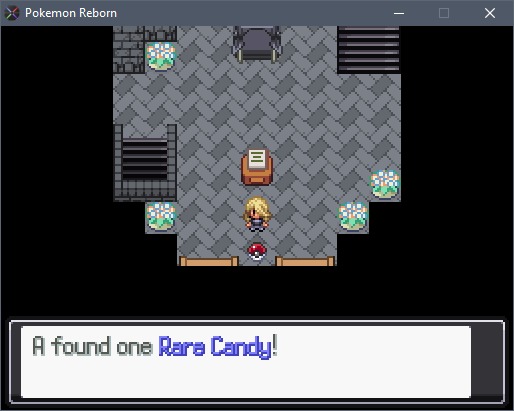
-
Pokemon Reborn E18 Speedrun in 6 hours, 26 minutes and 46 seconds!
Arkadius replied to Arkadius's topic in Reborn City
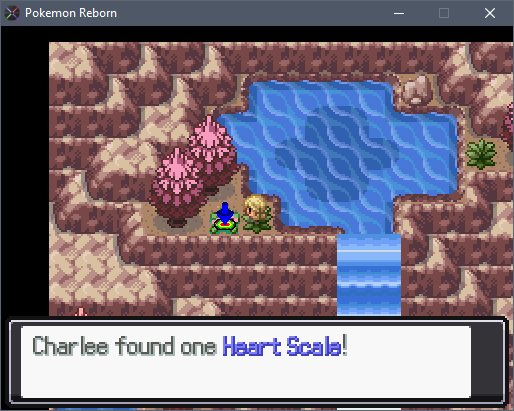
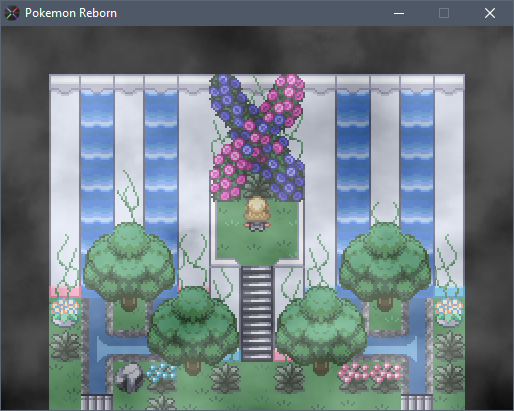
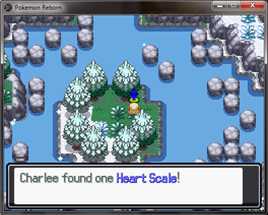
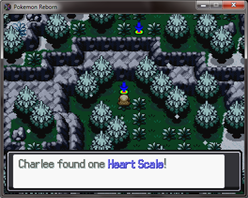
Very nice! The current heart scale route has 7 heart scales when at the move tutor: (using your list) 1. Heart Scale (1st container right-above the Name Rater house at 2nd Street) - lower peridot ward2. Heart Scale (at the end of the alley) - north peridot alley3. Heart Scale (bush at the upper left of the park at the Main Street) - obsidia ward4. Heart Scale (upper left rock left the down-ladder, at the small area coming from B3F Right Area) - grand stairway b2f 5. Heart Scale (space 7 spots left and 2 spots down the 5th rock) - beryl bridge 6. Heart Scale (toxic bush right from the 4th set of tubes) - byxbysion wasteland 7. Heart Scale (from the Move Relearner after giving her Keys back) - onyx ward This allows for the 4 moves being taught at the move tutor: - Fire Punch - Flare Blitz - HJK - Aqua Jet I agree, Aqua Jet is probably not necessary. Things like this are usually because of prior routing when the next sections weren't routed yet so it's always difficult to imagine what you'd need. Same goes for a lot of the item pickups too. Not teaching Aqua Jet is fine. It frees up a heart scale slot so to speak. You could teach Dragon Pulse earlier. I don't think this adds much though. Zap Cannon is also possible (lol). Something that could be interesting is Counter on Nidoqueen. Anyway, assuming we save it: you then have 4 left, which is enough for 1 nature change when in 7th street on the Luna Split. In the time between, we pick up more heart scales: 1. (5 total) Heart Scale (lower left yellow-blue flowers in the 6th flower ring) - tanzan cove 2. (6 total) Heart Scale (rock lower right the train at the bottom hidden path) - chrysolia forest (during Serra split-(I forgot about the lost train heart scale in my latest run) 3. (7 total) Heart Scale (space left the bush right from the 3rd Hiker) - route 1 This allows for 2 specific nature changes. You then have 1 heart scale. left. After this, I didn't look into more heart scales much. There are indeed these two, I included them in an earlier route I think but there was no good option for a third I believe back then. i. (2 total) Heart Scale (space left the mountain wall between the 2 big trees at the lower right corner of the area up the 1st stairs) - route 4 *** ii. (3 total) Heart Scale (grass patch up the bonfire after the 1st stairs on the right path) - route 4 **** (take the right path going up route 4, avoid line of sight) This leaves 4 more: iii. (4 total) Heart Scale (grass at the top end of the gym, after Adrienn battle) - coral gym *** (should be here)iv. (5 total) Heart Scale (pink flowers left the upper left waterfall pool) - fiore gym *** v. (6 total) Heart Scale (space 6 spots down the before last train scrap middle lower left the area) - 1r253 scrapyard *** (do you have screenshots of this one btw? - always good for reference) vi. Heart Scale (space 4 spots right and 7 spots up from the rock up the entrance) - route 4 area 1 *** (needs rock climb, optional) The last heart scale should not be needed. With these additional heart scales you could do an additional two nature changes. This could be useful for sure. They're easy and fast to pick up. Traveling to 7th street however is kinda slow, but not that bad. There's also another heart scale at the Glass Work Station (iirc): ____________________________________________ I'm not sure how Blaze Torchic/Combusken works out. I've noticed in many fights speed boost is just needed. It's difficult for me to estimate how this would work out, also considering you need to be at 1/3 or lower of your HP. I don't usually like being at this low HP. There are always things to consider like priority moves, random switches etc. _____________________________________________